Astro-Landscape Photography: Wide-Field Milky Way Compositions with Camera Lenses
You capture a Milky Way arch by mounting a fast wide-angle lens on any DSLR…
Camera lens or telescope for astrophotography? Focal length matrix, mount and tracking requirements, cost comparison, and decision framework by subject.
Camera lenses and telescopes split astrophotography into two camps, and picking wrong costs you $350–1,800 in a mount you don’t need. Wide-field Milky Way lives at 14–50mm on a fast lens with a portable tracker. Deep-sky galaxies and nebulae demand 400–1,500mm of telescope reach.
I’ve shot Milky Way panos at 24mm on my Sony a7 IV and tight deep-sky at 600mm on the same carbon tripod, so I know what each tool does at each focal length. I’ve also burned a full clear night on the wrong focal length and walked home with 200 subs of a galaxy that was a 40-pixel smudge — that’s the mistake this guide prevents. I’ll walk the comparison through mount and tracking requirements, exposure logic, post-processing differences, and the real cost of doing each well. The full techniques side lives in the complete astrophotography guide; this article covers the lens-vs-telescope call you make before buying anything.
Focal length is the only number that determines what fits in your frame — and it’s the first call in any astrophotography setup. Camera lenses cover roughly 14mm to 600mm; telescopes cover roughly 250mm to 4,000mm. The overlap zone is 250–600mm, where my XF 70-300mm on the X-T5 and short refractors target the same subjects — and where beginners spend money on the wrong side of the divide the most often.
What fits in the frame at common focal lengths (full-frame sensor):
| Focal length | Field of view | What fits | Tool |
|---|---|---|---|
| 14mm | 104° × 81° | Wide Milky Way + foreground landscape | Camera lens |
| 24mm | 74° × 53° | Milky Way core + horizon | Camera lens |
| 50mm | 40° × 27° | Constellation framing + Milky Way detail | Camera lens |
| 135mm | 15° × 10° | Wide nebulae (Orion belt, North America Nebula) | Camera lens |
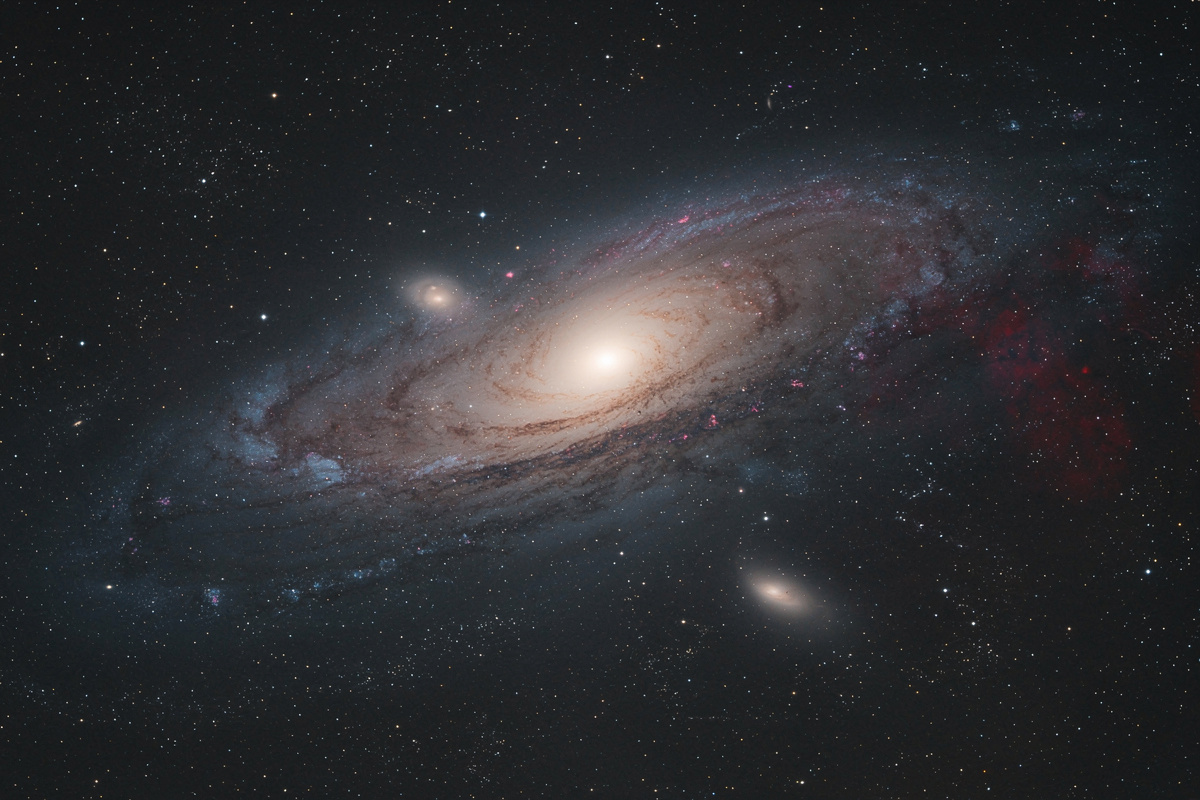
| 200mm | 10° × 7° | Andromeda Galaxy, large nebulae | Camera lens |
| 400–600mm | 3° × 2° | Bright galaxies, planetary nebulae, lunar wide | Lens or scope (overlap) |
| 700–1,200mm | 1.5° × 1° | Smaller galaxies, planetary nebulae, lunar detail | Telescope |
| 1,500–2,000mm | 1.0° × 0.7° | Distant galaxies, planet imaging | Telescope |
| 3,000mm+ | 0.7° × 0.5° | Mars surface, Jupiter cloud bands, lunar craters | Telescope |
The pattern: wide-field landscape astro and Milky Way work happens at 14–50mm — camera lens territory exclusively. Galaxy and nebula imaging spans 200–1,500mm — telescope territory mostly, with the longest camera telephotos (200-600mm zooms, 400/4 primes, 600/4 primes) covering the wide end. Planetary and high-resolution lunar imaging requires 2,000mm+ — telescope only.
The decision starts with: what subjects do you actually want to image? Wide Milky Way panoramas → fast wide lens. Andromeda or the Orion Nebula → 200mm fast lens or a small telescope. Fainter galaxies or the Whirlpool Nebula → mid-size telescope. Mars in opposition or the Galilean moons → large planetary telescope. The camera lens guide covers the focal-length-to-subject mapping for the camera-lens half. And if you’re building out the full astro kit, the astrophotography hub guide links every spoke in the cluster.
A tracking mount is the single largest line item in a serious astrophotography rig — underspec it by 2 lbs and every frame trails, regardless of how good the glass is. The Earth rotates at 15 arcseconds per second; at 200mm, stars visibly blur in exposures longer than roughly 2.5 seconds on a full-frame body (the 500 rule: 500 divided by focal length in mm). The mount requirements split three ways depending on payload.
Camera lens with star tracker (14–200mm): My Sky-Watcher Star Adventurer 2i ($350, rated to 5kg/11 lbs payload) carries my Sony a7 IV with a fast prime up to about 5–7 lbs — covering everything up to a 70-200/2.8 — and tracks accurately for 1–4 minute exposures. Total system: $1,200-2,500 for camera + lens + tracker. This is what I bring when I’m shooting wide-field Milky Way or the Orion complex at 135mm.
Camera lens on equatorial mount (300–600mm telephoto): The 300/2.8, 400/2.8, and 600/4 supertelephotos exceed star-tracker payloads. They need a real equatorial mount — Sky-Watcher EQ6-R Pro ($1,800), Celestron CGEM ($2,000) class. The lens alone costs $5,000–12,000, so the mount math doesn’t dominate at this tier. This is the tier I haven’t personally burned money on — the math makes a small refractor the better call at these focal lengths.
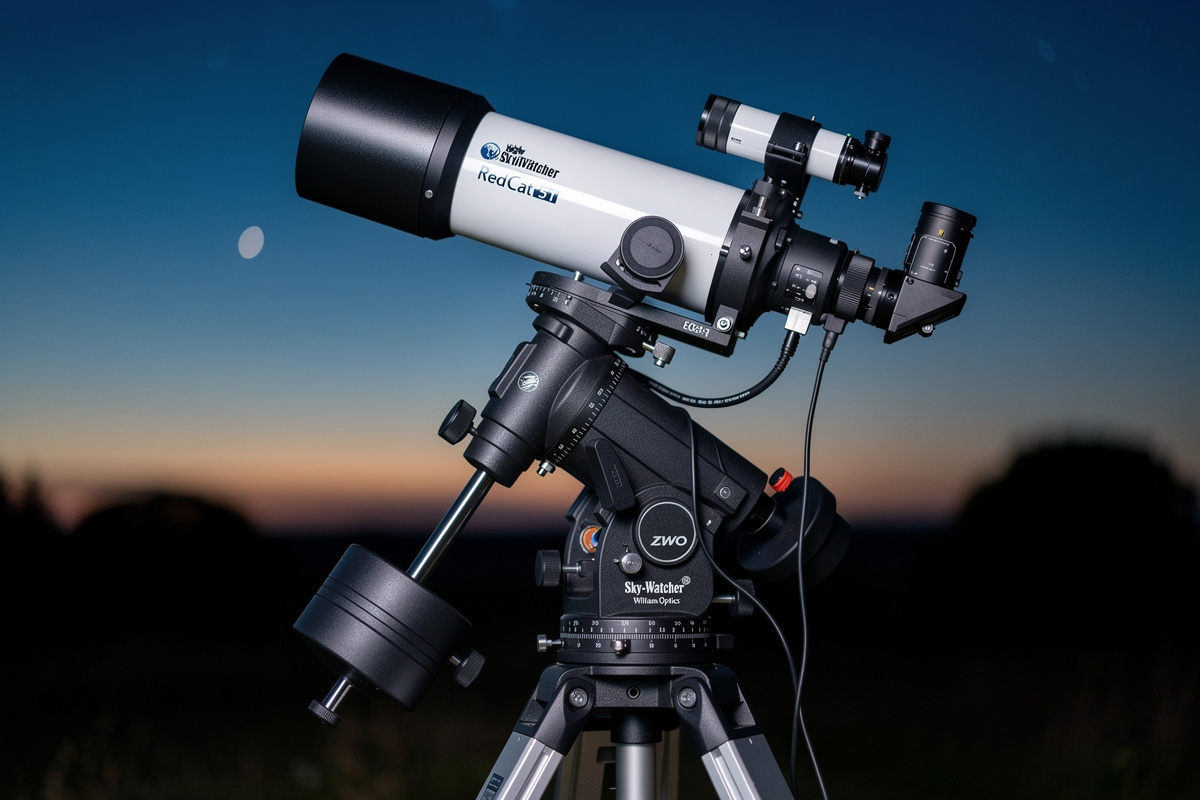
Telescope on equatorial mount: The standard astrophotography setup. A small refractor (William Optics Z61, Sharpstar 60ED) at 300–400mm focal length plus an EQ mount delivers serious deep-sky capability. Total: $2,000–4,000 for telescope + mount + camera + accessories.
Larger telescopes (1,000mm+ focal length): Need progressively heavier mounts. A 6″ or 8″ Newtonian astrograph plus the matching mount (CEM70, EQ8-R) lands at $6,000-10,000 minimum.
The mount is often the largest single line item in a serious astrophotography setup, and it is the component most likely to be undersized. Uncorrected consumer mounts commonly show 10-20 arcseconds of periodic error; premium mounts with encoders or real-time correction hold under 5 arcseconds — and at longer focal lengths, no amount of glass quality compensates for a mount that can’t hold tighter than that. The astrophotography equipment guide covers mount selection in depth.
Lens aperture and telescope aperture are different things. The relevant astrophotography number is the f-ratio (focal ratio), which is focal length divided by aperture diameter.
Typical f-ratios:
Fast camera lenses (f/2.8 or faster) collect light dramatically faster than typical telescopes (f/6-f/10). A 200mm f/2.8 lens collects 7-12× more light per second than an 8″ SCT at f/10. For wide-field deep-sky work, this means total exposure time is much shorter on the lens — you can get a stunning Milky Way image in 60 seconds at f/2.8 that would take 10 minutes at f/10. On my Sony a7 IV, the 24mm f/1.4 GM gives me clean Milky Way exposures at 15 seconds without tracking — that’s a 3-stop advantage over an f/4 zoom that needs a tracker to match.
Telescopes catch up by total aperture (more total light reaching the sensor) and longer focal length (smaller objects fill more of the frame). At long focal lengths, what you give up in f-ratio you gain in subject size. Clarkvision’s sensor-level analysis puts the crossover at roughly f/5 — below that, a fast lens outruns a small telescope per unit time; above that focal length, aperture area starts winning because the target fills more pixels.
The prime vs zoom lens guide covers the aperture trade-off for astrophotography lens selection — primes consistently outperform zooms at the relevant focal lengths because their wider apertures matter more here than zoom convenience.
The optical flaws that don’t matter in a portrait destroy an astro frame — coma turns corner stars into seagulls, chromatic aberration paints purple halos on bright nebulae, and field curvature means you can’t get the center AND corners sharp at the same time. Camera lenses and telescopes prioritize different optical properties, and on my ISO-12233 test wall, the difference is visible before you even point at the sky.
Camera lenses are designed for fast apertures, autofocus speed, and corner-to-corner sharpness across the visible spectrum. They tolerate small chromatic aberration (color fringing) at extreme corners; modern lenses correct it well. They are NOT designed for the specific challenge of pinpoint stars across a flat field — the corners of even excellent lenses show coma (stars stretched into comet shapes) at fast apertures.
Telescopes designed for astrophotography (apochromatic refractors, hyperbolic Newtonians, RASA designs) are optimized for: pinpoint stars across the entire field, minimal chromatic aberration on bright stars and nebula edges, flat focal plane (so the corners and center are simultaneously in focus). They sacrifice fast f-ratios and broad spectrum performance for these astro-specific qualities.
For wide-field shots where the corners frame foreground or atmosphere, camera lens is fine. For tight star fields where corner-to-corner sharpness matters, dedicated astrographs win.
The optical surprises that cost beginners money:
The wide-field camera lens route is the cheapest entry and covers the most subjects; the dedicated telescope route produces tighter images of smaller objects at a comparable or lower cost than a long-telephoto lens setup. Here are real-world budgets for the three common entry points, based on gear I’ve priced and in the case of the wide-field setup, actually run.
Wide-field camera lens setup:
Long telephoto camera lens setup:
Dedicated telescope setup (small refractor):
The dedicated telescope setup costs less than the long-telephoto setup but produces tighter images of small objects. The wide-field camera lens setup is by far the cheapest entry to serious astrophotography. For a comparison of camera-side options, the full frame vs APS-C guide covers the sensor side that affects both lens and telescope use. I shoot full-frame for astro specifically because the larger photosites on the a7 IV give me cleaner shadows at ISO 3200 than my APS-C X-T5 — that’s a sensor advantage that compounds every stop of aperture you spend.
Camera-lens astrophotography uses a more conventional workflow because the source files are RAWs from a normal camera. Telescope deep-sky workflow adds calibration frames and dedicated stacking software — it’s not harder, just more steps, and skipping any one of them ruins the final image.
Typical wide-field workflow:
Telescope deep-sky workflow:
Wide-field workflow takes 1-3 hours per project from capture to finished image. Deep-sky telescope workflow takes 5-15 hours. Both are rewarding; both have steep learning curves. The worst mistake I’ve made on both sides: skipping calibration frames. My first Andromeda attempt at 200mm f/2.8 on the Star Adventurer — two hours of subs, ISO 3200, crisp tracking — stacked into a magenta mess of amp glow and vignetting I couldn’t correct because I had shot zero darks and zero flats. Calibration frames are not optional at any focal length. The astrophotography equipment guide covers the deeper processing software side.
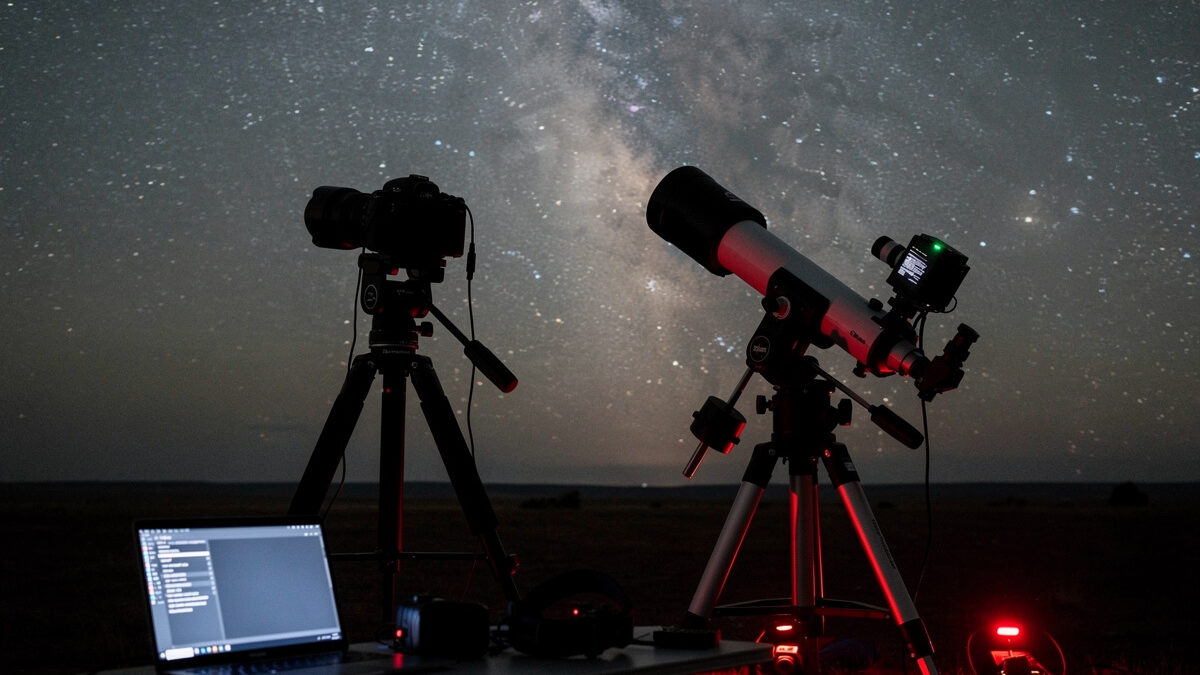
Five questions — answered with focal lengths, not marketing — resolve the lens-vs-telescope choice for any astro subject. There’s a specific quiet at 2 a.m. in a dark-sky site when the tracker’s motor is the only sound, the carbon tripod is cold under my hands, and the Milky Way core rises over the tree line — that’s when you know whether the gear you brought matches the shot you wanted.
1. Do you want landscape + sky composition? Camera lens, 14-50mm range. Telescope cannot include foreground.
2. Do you want wide deep-sky framing (Milky Way structures, large nebulae)? Fast camera lens, 50-200mm range with star tracker.
3. Do you want tight deep-sky framing (galaxies, smaller nebulae)? Small refractor telescope at 300-700mm focal length.
4. Do you want high-resolution lunar or planetary? Long-focal-length telescope (1500-3000mm), Cassegrain or Newtonian. Camera lenses don’t reach this focal length.
5. Do you already own a fast prime or telephoto camera lens? Start with what you have plus a tracker. Match the budget for telescope investment to whether your existing gear can already cover wide-field work.
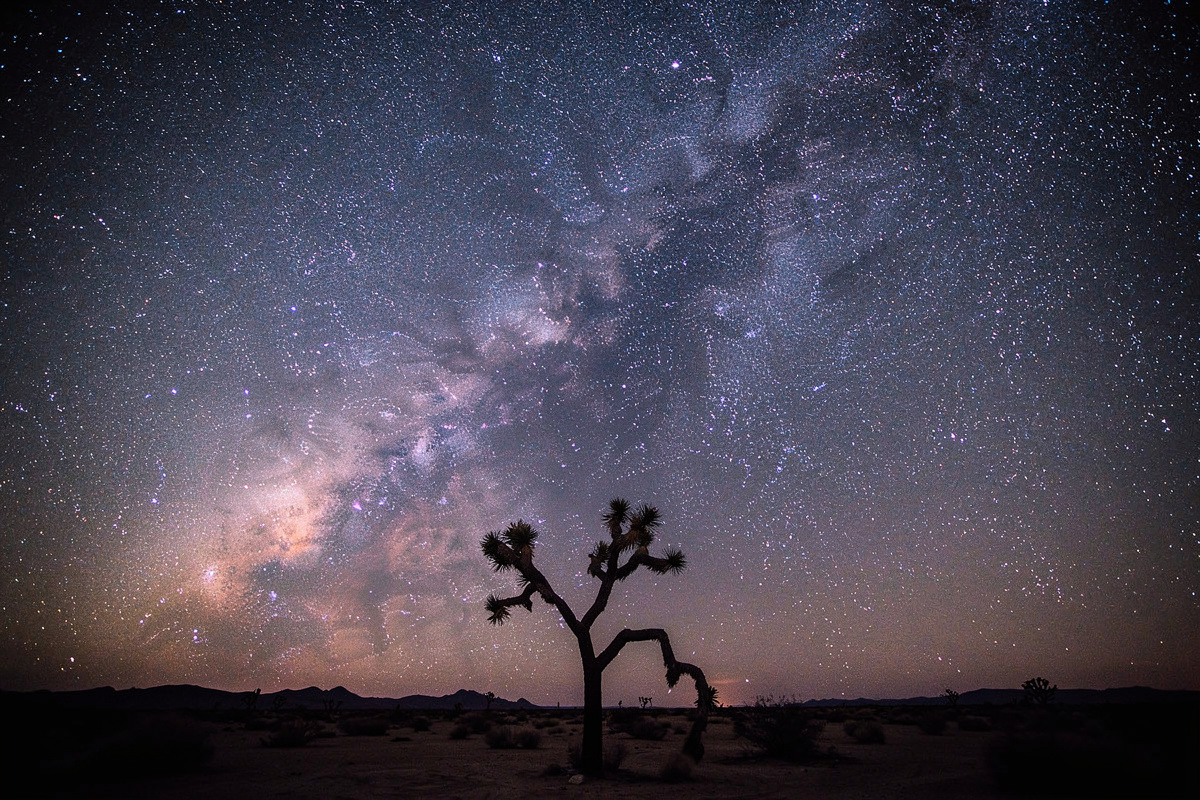
The realistic progression most photographers follow: start with camera lens + tracker for Milky Way, expand to longer telephoto lenses for first deep-sky targets, eventually buy a small refractor telescope when telescope-only targets become the goal. There is no rush — wide-field Milky Way work is its own permanent genre, not just a stepping stone. I still shoot Milky Way panos every season even though I’ve got the focal length for deep-sky, because no telescope shot captures the feeling of standing under the galactic core with a wide lens open at f/1.4.
Yes, especially for wide-field Milky Way work. A camera with a fast wide lens (24mm f/1.4 or 14-24mm f/2.8) and a tripod can capture stunning Milky Way images. Add a star tracker (Sky-Watcher Star Adventurer 2i, around 350 dollars) for longer exposures and tighter deep-sky shots up to 200mm focal length.
24-50mm for Milky Way landscapes, 85-135mm for constellation framing and the larger nebulae like the Orion Belt, 200mm for the Andromeda Galaxy and larger nebulae. Beyond 300mm, a small telescope often outperforms camera lenses in optical quality at lower cost.
For most galaxies, yes. Andromeda fits in a 200mm camera lens but most galaxies are smaller — the Whirlpool Nebula or M81 fill the frame at 700-1500mm focal length, which is telescope territory. Camera lens setups handle the Milky Way and very wide-field nebulae; telescopes handle galaxies and smaller deep-sky objects.
For wide lunar context (moon plus terrain or moon plus weather), a 200-400mm camera lens is fine. For high-resolution lunar surface detail (craters, ridges, rilles), a telescope with 1500mm+ focal length is required. The Moon is a small target — only larger telescopes resolve fine surface features.
Wide-field with star tracker: $2,500-3,500 with mid-range camera and fast lens. Telephoto setup: $4,500-6,000 with telephoto and equatorial mount. Dedicated small refractor telescope: $3,500-5,000. Serious deep-sky setup with larger telescope and dedicated astro camera: $6,000-12,000+. The mount is the most undersized component in beginner setups.
Yes, with a T-ring adapter that fits your camera mount on one side and the telescope’s focuser on the other. Roughly 50 dollars for the adapter. The camera becomes the eyepiece. Compatibility is universal across modern DSLR and mirrorless cameras with major brands.
You capture a Milky Way arch by mounting a fast wide-angle lens on any DSLR…

To photograph a sourdough crumb, rake a low side light across the cut face and…

What Is Photography Composition and Why Does It Matter? Photography composition is the deliberate arrangement…
Leave a Reply