Memory Cards for Photographers: Speed, Capacity, and Reliability Explained
A $30 memory card holds images worth hundreds of dollars in travel and hours of…
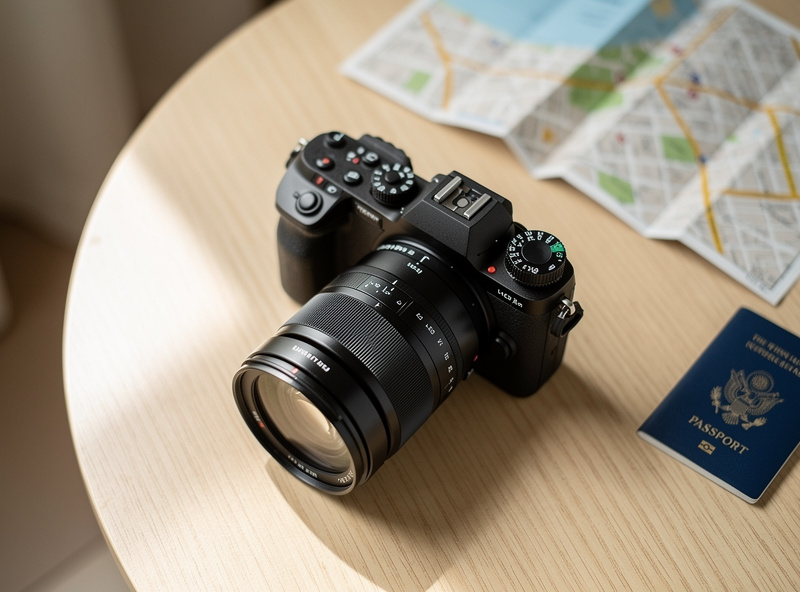
A good travel camera weighs under 1.5 pounds, fits in a sling bag, and produces image quality that rivals larger systems. The Sony A7C II (18 oz), Fujifilm X-T50 (13 oz), and Canon R8 (17 oz) deliver full-frame or APS-C quality in travel-friendly bodies.
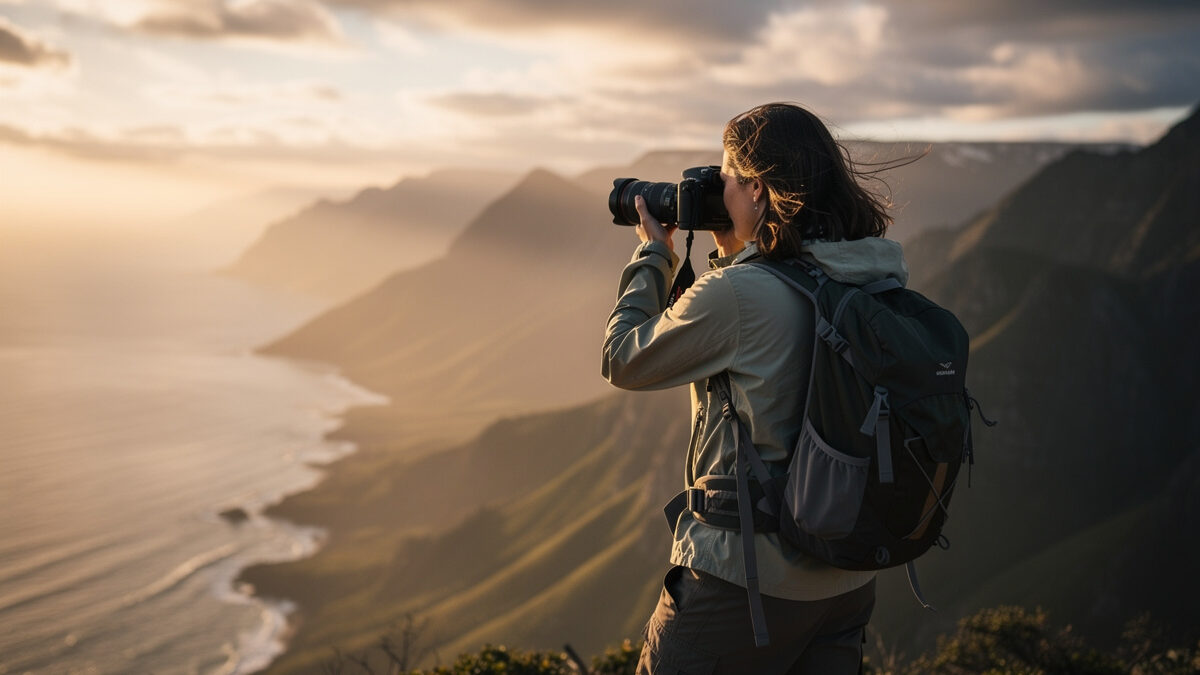
I learned this the hard way. My first big trip as a serious shooter was Copenhagen with a full DSLR kit — by day three the bag stayed in the hotel. The body I shoot now, a Fujifilm X-T5, crosses two borders in a 6L sling bag without slowing me down. The 40-megapixel sensor means I crop instead of carrying a second body, and the XF 16-55mm f/2.8 handles 90% of what I point the camera at. The best travel camera is the one you carry, and the one you carry is the one that doesn’t hurt your shoulder.
Travel cameras must handle diverse conditions — bright sunlight, dim churches, fast street scenes, slow landscapes — without changing lenses in dusty or rainy environments. A weather-sealed body paired with a versatile zoom (24-105mm or 18-135mm) covers 90% of travel scenarios in one lens, eliminating the need to carry or swap multiple optics. Before buying any travel body, check the weather-sealed cameras guide — I’ve shot in enough sudden European downpours to know that a non-sealed body in the wrong storm is a dead body.
Battery life and USB-C charging are critical for travel. My X-T5 and a7 IV both charge via USB-C from a 20,000mAh power bank, which means I leave the dedicated charger at home. Two spare batteries minimum — one day of heavy travel shooting typically drains one full battery — and the power bank recharges both overnight. This setup has kept me shooting through multi-day treks in Swedish Lapland where wall outlets don’t exist.
Compact fixed-lens cameras — Sony RX100 VII, Ricoh GR IIIx, Fujifilm X100VI — offer the best size-to-quality ratio. The Sony RX100 VII fits in a pants pocket while providing a 24-200mm equivalent zoom range, making it the most versatile pocketable camera available. The trade-off is a smaller 1-inch sensor with more noise in low light — the 1-inch sensor’s low-light ceiling hovers around ISO 1600-3200 for clean files before noise reduction becomes mandatory.
Compact mirrorless bodies with interchangeable lenses provide the best balance of quality and versatility for serious travel photographers. Pair a body like the Sony A7C II or Fujifilm X-T50 with a 24-105mm or 18-135mm zoom and you have a setup that handles wide landscapes through tight architectural details without changing lenses. On my own chart, the APS-C X-T5 at 40MP out-resolves most travel zooms wide open — the sensor demands good glass, but the payoff in cropping flexibility is real. For help picking a body, the camera body buying guide walks through every sensor format and mount system.
Smartphone cameras (iPhone 15 Pro, Samsung Galaxy S24 Ultra, Google Pixel 8 Pro) are legitimate travel cameras for social media and web use. Their computational photography — multi-frame HDR, night mode, portrait mode — compensates for tiny sensors in many situations. For print-quality images or professional travel photography, a dedicated camera still provides meaningfully better results in dynamic range and telephoto reach. I carry both — the phone handles the quick share, the X-T5 handles the image I’ll print.
| Camera | Sensor | Weight | Zoom/FL Range | Pocketable | Weather-Sealed | Best For |
|---|---|---|---|---|---|---|
| Sony RX100 VII | 1-inch 20 MP | 10.7 oz | 24-200mm zoom | Yes | No | All-in-one convenience |
| Ricoh GR IIIx | APS-C 24 MP | 9.2 oz | 40mm f/2.8 fixed | Yes | No | Street / detail work |
| Fujifilm X100VI | APS-C 40 MP | 18.3 oz | 23mm f/2 fixed | Jacket | Yes | Street / everyday carry |
| Fujifilm X-T50 | APS-C 40 MP | 13 oz | Interchangeable | Jacket | Yes | Lens ecosystem flexibility |
| Sony A7C II | Full-Frame 33 MP | 18 oz | Interchangeable | Jacket | Yes | Full-frame travel quality |
| Canon R8 | Full-Frame 24 MP | 16.3 oz | Interchangeable | Jacket | No | Lightest full-frame budget |
I’ve shot the X-T5 — the X-T50’s 40MP sensor sibling — extensively, and the 40-megapixel output gives me the same cropping headroom I described above. The Ricoh GR IIIx is the camera I grab when the day’s agenda has nothing to do with photography; it disappears into a jacket pocket and the 40mm equivalent renders with a sharpness at f/5.6 that rivals my XF 35mm f/1.4 stopped down. The Sony A7C II’s full-frame sensor buys you about one stop of cleaner high-ISO performance over APS-C, per DxOMark sensor measurements — real in dim churches and night markets, marginal everywhere else.
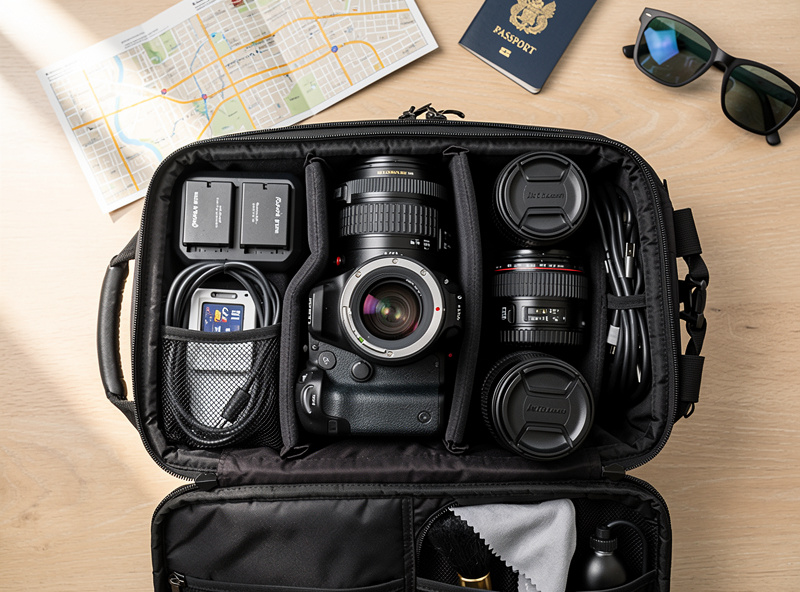
Pack one camera body, one versatile zoom lens, one fast prime for low light (35mm f/1.8 or 50mm f/1.8), two spare batteries, a dual battery charger, a 64-128GB SD card, and a lightweight travel tripod or tabletop tripod. This kit weighs under 4 pounds and handles every travel photography scenario from street scenes to night cityscapes.
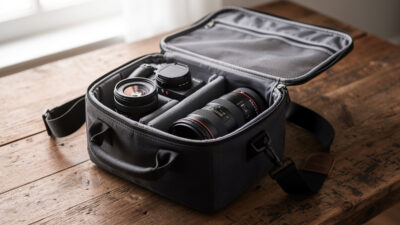
Use a camera sling bag (Peak Design 6L Sling, WANDRD 9L Sling) rather than a backpack for urban travel. Sling bags swing to the front for instant camera access without removing the bag — critical for fast-moving street and travel situations. Backpacks require full removal to access gear, which means missed shots. The first time I tried a backpack on a Barcelona trip, I missed three street scenes in ten minutes while wrestling with straps. Switched to a sling for the afternoon and never went back. For bag selection, the camera bag guide walks through loadouts for every kit size.
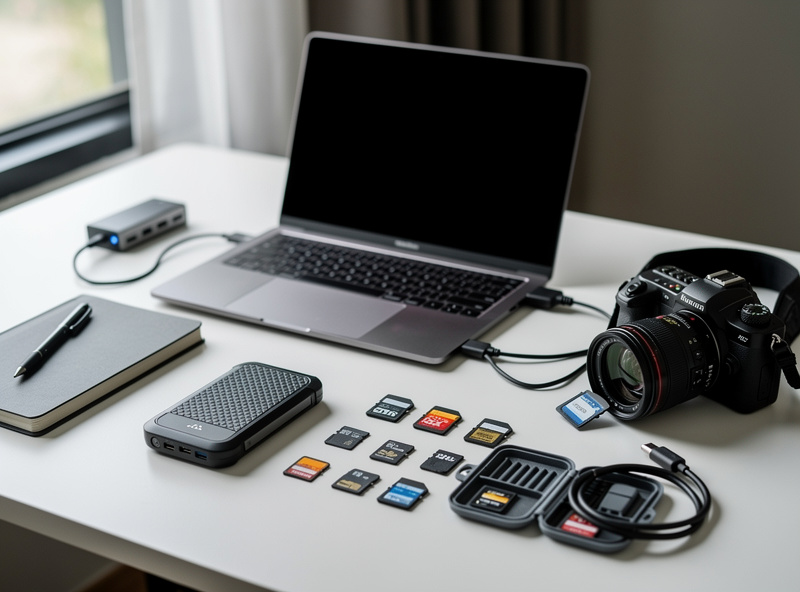
Carry SD cards in a waterproof card wallet and back up photos daily to a portable SSD or cloud storage (Google Photos, iCloud) over hotel WiFi. Losing a day of travel photos to a corrupted or lost SD card is devastating — daily backups prevent this. Format the card only after confirming the backup is complete and accessible. I also carry a 64GB backup card and a portable SSD as my safety net — the first time a card corrupted mid-trip in Iceland, I lost an afternoon of glacier shots I’ll never get back. That afternoon rewired my backup discipline permanently.
Aperture priority mode with Auto ISO (capped at 3200 on APS-C, 6400 on full-frame) and a minimum shutter speed of 1/250s handles most travel situations. Set aperture to f/8 for landscapes and architecture (maximum sharpness) or f/2.8-f/4 for portraits and low-light scenes (background blur and faster shutter). Let the camera handle the rest.
Enable face-detection AF for travel portraits and street scenes. It tracks faces across the frame and prioritizes eye focus automatically, producing sharp portraits without manual focus adjustment. Switch to single-point AF for architecture and still life where you need precise control over the exact focus plane. On my X-T5, the face-detect does a cleaner job than I can manage manually in fast street scenes — I trust it, which took a while to learn.
Shoot RAW+JPEG. Use the JPEGs for instant sharing on social media during the trip. Use the RAW files for serious editing when you return home. The JPEG quality from modern cameras — including Fujifilm’s film simulations and Sony’s Creative Looks — is excellent for immediate use, while RAW files provide the editing latitude needed for professional-quality final images. I shoot JPEG+RAW on two card slots: JPEG to slot 1 for quick grabs, RAW to slot 2 for the Lightroom Classic session back home. The essential camera accessories guide covers the cards, readers, and power gear that actually make a difference in the field.
Research sunrise and sunset directions at your destination using PhotoPills or Google Earth before you arrive. Knowing exactly where the sun rises and sets relative to your planned locations prevents arriving at a stunning viewpoint with the sun directly in your face — silhouetting the landscape instead of illuminating it.
Wake up early. The first hour of daylight at any travel destination produces the best landscape light and the fewest crowds. Popular locations that are packed by 9am are often completely empty at 6am. I shot the Charles Bridge in Prague at 6:15am on a Tuesday in October — the fog rolling off the Vltava, the cobblestones still wet from overnight mist, stone cold under my tripod feet, and exactly three other people on the bridge. By 8am there were 300. That cold-damp predawn smell is the best landscape tripod-setup companion there is. For adding motion to travel scenes, the daytime long exposure guide covers ND filters and shutter techniques that turn crowds into ghosted blurs.
Include a foreground element in every travel landscape — a flower, rock, path, railing, or reflection. Travel landscapes without foreground interest look like postcard snapshots because they lack depth. A foreground anchor draws the viewer into the scene and creates three-dimensional depth that separates your image from the millions of similar travel photos. I learned this the slow way: my first year of travel photography produced a hard drive full of technically sharp, compositionally flat images that nobody lingered on.
Never check camera gear in airline luggage — always carry it on. Checked bags are thrown, crushed, and occasionally lost or stolen. Pack your camera body, lenses, and batteries in a carry-on camera bag that stays with you at all times. Most airlines allow one carry-on plus one personal item; camera sling bags qualify as the personal item. But the size and weight limits vary more than most photographers expect — the camera carry-on airline rules guide covers exactly what each major carrier enforces and what to do when the gate agent pushes back.
In crowded tourist areas, wear your camera bag across your body (not on one shoulder where it can be grabbed). Use a camera wrist strap rather than a neck strap — a wrist strap keeps the camera physically attached to your hand, making snatch-and-run theft nearly impossible. In high-theft areas, carry your camera inside the sling bag rather than around your neck.
Register your gear serial numbers with your insurance company and photograph each piece of equipment (including serial numbers) before departure. Enable “Find My” tracking on cameras that support it. If your gear is stolen, a police report with serial numbers and proof of ownership is required for insurance claims. I photograph every lens and body against a white wall the night before departure — the photography equipment insurance guide explains what most standard policies actually cover and where dangerous coverage gaps hide.
Rate photos in-camera each evening using the star rating system. Tag 1-star for keepers, 2-star for selects worth editing. This 10-minute nightly habit prevents the overwhelming task of culling 2,000 photos when you return home. By the end of a 10-day trip, you have 100-200 rated selects ready for editing. My workflow: hotel WiFi, a cold drink, and the in-camera rating wheel — 10 minutes, every night, no exceptions.
Edit in two passes. The first pass applies global corrections — lens correction, white balance, exposure, and contrast — to all rated images using synchronized settings or presets. The second pass applies individual refinements to your best 20-30 images: local adjustments, selective sharpening, and creative color grading. I build a trip-specific preset from the first 5 keepers in Lightroom Classic and sync it across the whole batch — saves hours of clicking per trip.
Share a curated selection (10-15 images) on social media during the trip using in-camera JPEGs. Save the RAW edits for a final portfolio or blog post assembled after returning home. Sharing during the trip builds engagement while memories are fresh; the polished RAW edits produce your lasting portfolio-quality images.
If I were starting travel photography from scratch with a $1,500 budget, I’d buy a used Fujifilm X-T4 body ($800-900), the XF 18-55mm f/2.8-4 kit zoom ($300 used), and spend the remainder on a Peak Design 6L Sling and two spare batteries. That kit weighs 2.5 pounds, charges via USB-C, and produces images sharp enough for 16×24-inch prints with careful technique. Upgrade to the XF 16-55mm f/2.8 when the 18-55mm starts feeling limiting — you’ll know when.
The single biggest mistake I see new travel photographers make is carrying too much. You do not need three lenses, a full-size tripod, and a laptop on a city break. One body, one zoom, one fast prime, and your phone for backup — that’s it. The shots you miss because you were changing lenses outnumber the shots you gain from having the perfect focal length. Travel light, shoot more, edit later.
Beyond gear, the highest-return investment in travel photography is waking up early. No camera body upgrade improves your images as dramatically as shooting at 6am instead of noon. The light is better, the crowds are thinner, and the city is still waking up — that’s when the photographs that matter get made. Start there, then worry about the rest.
The photographers whose travel work I admire most — the ones whose images make me book a flight — all shoot on surprisingly modest kits. A single body, a mid-range zoom, a fast prime smaller than a soda can. What separates their work isn’t the gear they own but the hours they logged: the 300 pre-dawn alarms, the hundred sunset waits, the willingness to carry the camera when carrying it was inconvenient. Those hours compound. The right compact camera and packing system removes enough friction that showing up becomes the default — and showing up is the only photography skill that matters.
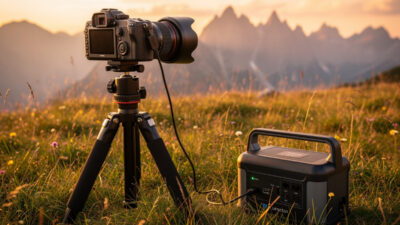
The one purchase I’d make before any camera upgrade is a lightweight travel tripod. A stable platform unlocks long exposures, self-portraits, and low-light cityscapes that hand-holding cannot touch. Pair it with the compact body and one-lens kit above and you have a travel photography system that fits in a personal item, weighs under 5 pounds, and produces images that hold up on a gallery wall. That’s the goal — everything else is just packing peanuts.
A 24-105mm f/4 covers wide landscapes through portrait-length telephoto without changing lenses. On APS-C, an 18-135mm provides a 27-202mm equivalent range. These one-lens solutions handle 90% of travel photography scenarios and weigh significantly less than carrying multiple primes.
Bring a lightweight tabletop tripod (Peak Design Travel Tripod, 2.8 lbs) or a GorillaPod for night cityscapes and long exposures. Full-size tripods are too heavy and bulky for most travel. A tabletop tripod on a wall or railing provides sufficient stability for shutter speeds up to 1-2 seconds.
Two 128GB SD cards are sufficient for most trips. One card in the camera, one as backup. At RAW+JPEG, a 128GB card holds approximately 2,000-3,000 images depending on camera resolution. Back up to a portable SSD or cloud daily rather than carrying more cards.
For social media and web use, modern smartphones produce excellent travel images. For print, large displays, or professional quality, a dedicated camera provides meaningfully better results — especially in low light, telephoto reach, and dynamic range. The best travel camera is the one you always carry.
Use a rain sleeve ($5-10 disposable or $30 reusable) that covers the camera and lens while leaving controls accessible. Weather-sealed bodies and lenses resist light rain without protection. Carry a large zip-lock bag as an emergency rain cover — cut a hole for the lens and secure it with a rubber band.
The first hour after sunrise and the last hour before sunset produce warm, directional light with long shadows. These golden hour windows also coincide with fewer tourists at popular locations. Blue hour (20-40 minutes before sunrise/after sunset) is ideal for cityscape and architectural photography.
Continue building your photography skills with these guides:

A $30 memory card holds images worth hundreds of dollars in travel and hours of…
A camera bag is the one accessory every photographer owns, and most own the wrong…
Stock camera batteries cover one day, a 100Wh USB-PD power bank covers two to three,…
Leave a Reply