Night Photography Settings for Travel: Hand-Held After Dark
The cities you travel to come alive after dark, and most travelers put the camera…
The most nervous I ever get with a camera has nothing to do with photography. It’s the moment at a check-in desk when I’m wondering whether a bag holding more glass than my car is worth is about to be wrestled away and gate-checked into a cargo hold. Camera gear and air travel have a set of rules that are mostly simple, occasionally counter-intuitive, and enforced wildly unevenly — and getting them wrong can cost you money at the gate or, worse, a damaged body. Here is exactly how I get a camera kit through security and onto a plane without losing sleep.
The short version: camera gear flies in the cabin, never in the hold, and the way you pack it is as much about airline size limits as about protection. But the details matter, especially around batteries and budget airlines, so let me walk through the whole thing in the order a trip actually happens.
This is the rule with no flexibility, because it’s a safety regulation rather than an airline preference: spare lithium-ion batteries are not allowed in checked luggage. They must travel in your carry-on, in the cabin, where a problem can be dealt with. This covers your spare camera batteries, power banks, and anything else with a loose lithium cell. A battery installed in the camera is generally fine either way, but loose spares are cabin-only, full stop, on every airline I’ve flown.
The practical upshot is that even if you were tempted to check a camera bag, you can’t check the batteries, so the gear comes with you regardless. I carry spares in a small case in my personal item, terminals protected so nothing can short across them, and I’ve never had an issue. Don’t tape batteries into a heap loose in a pocket; use a case or keep them in their original packaging. This is the one area where the rule is strict and the reason is real.
Beyond the battery rule, there’s the practical truth that you simply never check camera gear. Holds are rough, unpressurized in temperature, and a place where bags get thrown and stolen. Lenses are precision instruments; bodies have delicate sensors and shutters; the whole kit is expensive and often hard to replace on the road. All of it belongs in the cabin with you, where you control it.
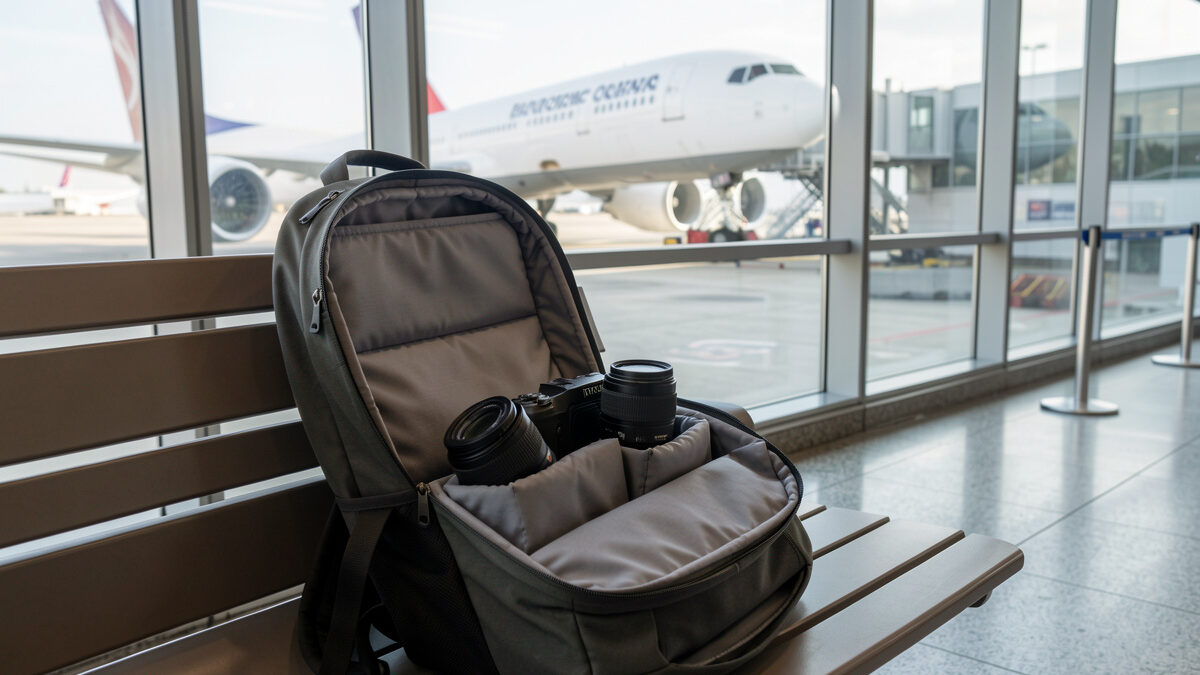
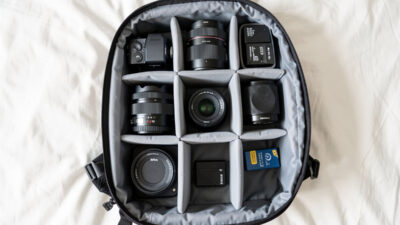
That makes your camera bag a carry-on item, which means it has to play by carry-on rules — and this is where travelers get caught. The bag that’s perfectly comfortable on a domestic flight can be too big or too heavy for a budget European carrier with strict limits. The way around this is to think in terms of two pieces: your main carry-on and your “personal item,” the smaller bag that fits under the seat. Most of the heavy, valuable glass can live in the personal item, which is rarely weighed or measured, while bulkier soft items fill the main carry-on.
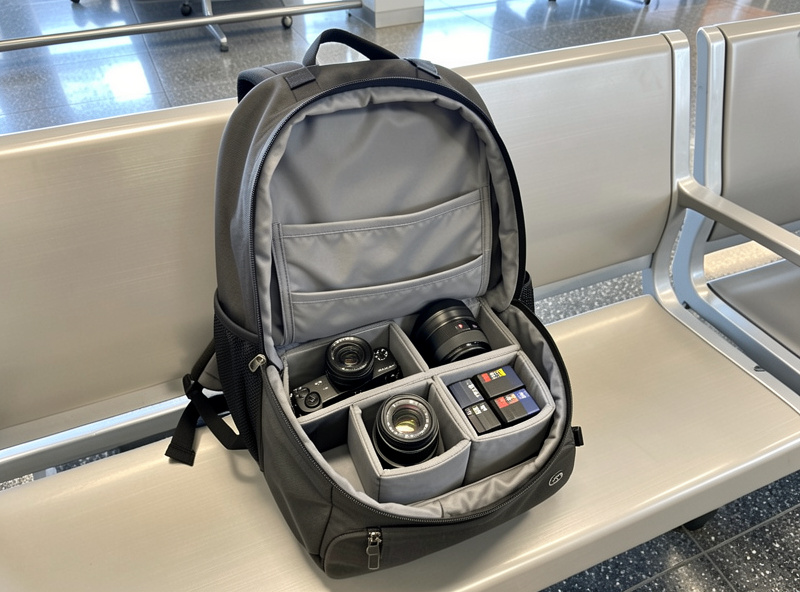
Here’s how I actually distribute a kit across the bags I’m allowed, which is the real skill in flying with cameras. The table is the decision I make every time I pack for a flight.
| Item | Where it goes | Why |
|---|---|---|
| Camera bodies & lenses | Personal item (under seat) | Valuable, fragile, and the personal item is rarely weighed |
| Spare lithium batteries & power banks | Carry-on cabin (never checked) | Regulation: loose lithium cells are cabin-only |
| Memory cards (full & spare) | On your person / personal item | Irreplaceable images; keep them closest to you |
| Tripod | Strapped to carry-on, or checked if large | Replaceable and bulky; the one item I’ll risk checking |
| Chargers, cables, cleaning kit | Main carry-on or checked | Cheap and robust; fills space elsewhere |
The logic is simple: anything irreplaceable or fragile rides in the cabin, ideally in the under-seat bag that security and gate agents scrutinize least. The only item I’ll consider checking is a tripod, because it’s bulky, robust, and replaceable — everything else stays with me. If you internalize one habit, make it this distribution; it’s saved me from gate-check demands more than once.
The size and weight limits that catch people out almost always come from budget carriers, which enforce cabin allowances aggressively and charge real money to gate-check an oversized bag. A camera backpack that sails onto a full-service airline can be flagged on a low-cost one, and the agent measuring bags at the gate doesn’t care that yours is full of fragile gear. The fix is to know the strictest limit you’ll face before you book, and pack to it.
I check the exact cabin dimensions and weight allowance for every budget flight on an itinerary, then make sure my main bag fits the smallest one. When the allowance is brutal, I lean even harder on the personal-item trick: a small sling or shoulder bag with the bodies and lenses goes under the seat, and the main carry-on holds clothes and soft goods that nobody minds. Choosing the bag itself for this is its own decision — the camera bag buying guide covers picking one that fits cabin limits, and the companion packing guide in this cluster covers loading it so it survives the trip.
As an Amazon Associate I earn from qualifying purchases. If your current bag won’t pass a strict cabin limit, a carry-on camera backpack sized to fit under-seat or in the overhead is worth getting before a budget flight — check the airline’s exact dimensions against the bag’s before you buy.

Airport security with camera gear is easier than people fear, with a couple of habits. Cameras and lenses generally stay in the bag through the scanner in most airports, though some will ask you to remove a body if it’s large, the same way laptops come out. I keep the gear in an easy-to-open compartment so I can pull a body out fast if asked, rather than digging through a packed bag while a queue builds behind me.
The two things worth knowing: film, if you still shoot it, should be hand-checked rather than sent through the more powerful checked-baggage scanners, and a tripod occasionally draws a second look but is never a problem. Otherwise, camera gear is routine for security staff who see it all day. Be ready, be polite, keep the batteries accessible if they want to inspect them, and you’ll be through in the normal time. The nerves are about the gate, not the scanner.
Even doing everything right, gear can be lost or stolen in transit, so the final piece is making sure a disaster is merely expensive rather than catastrophic. I keep my serial numbers recorded, I make sure my kit is covered by an appropriate policy that includes travel, and I treat the images as more valuable than the gear — which is why memory cards ride on my person and why I back up nightly once I arrive. A stolen camera is replaceable; a trip’s worth of unbacked-up frames is not. Reliable cards matter here too, which is why the memory cards guide emphasizes reliability over headline speed.
Get the batteries in the cabin, the valuable glass in the under-seat bag, the size sorted before you book a budget carrier, and the images backed up on arrival, and flying with a camera kit stops being stressful. The rules are few and mostly sensible once you know them, and after a couple of trips the whole routine becomes automatic — which is exactly what you want, so the only thing left to think about is the photography waiting at the other end — including the after-dark photography, where my night photography settings for travel guide gives you the hand-held settings for a lit street and a dim interior.
Yes, and you always should. Camera bodies, lenses, and spare batteries belong in the cabin, never in checked luggage. Holds are rough, temperature-extreme, and where bags get lost or stolen. Treat your camera bag as carry-on and, where allowed, put the most valuable glass in your under-seat personal item, which is the bag gate agents scrutinize least.
No. Spare lithium-ion batteries and power banks must travel in your carry-on in the cabin; they are prohibited in checked luggage by international safety rules. A battery installed in the camera is generally fine either way, but loose spares are cabin-only on every airline. Carry them in a case with terminals protected so nothing can short across them.
This is mainly a budget-airline problem, since they enforce cabin limits aggressively and charge to gate-check oversized bags. Check the strictest dimensions and weight on your itinerary before booking, and pack to fit the smallest. Lean on the personal-item trick: put bodies and lenses in a small under-seat bag, which is rarely weighed, and fill the main carry-on with soft goods.
Usually not, though some airports ask you to remove a large body the way laptops come out. Keep gear in an easy-to-open compartment so you can pull a body fast if asked. Film should be hand-checked rather than scanned, and a tripod occasionally draws a second look but is never a problem. Security staff see camera gear constantly, so it’s routine.
Yes. Even with perfect packing, gear can be lost or stolen in transit, so coverage that includes travel turns a disaster into merely an expense. Record your serial numbers, confirm your policy covers you abroad, and remember the images matter more than the gear: keep memory cards on your person and back up nightly so a stolen camera never means a lost trip.

The cities you travel to come alive after dark, and most travelers put the camera…
How you pack a camera bag for travel is a different skill from which bag…

Gear gets you to the moment. Composition decides whether you come home with a photograph…
Leave a Reply