Travel Photography Tips and Gear: The Complete Guide
Travel photography is the discipline that exposed every lazy habit I’d built up shooting at…
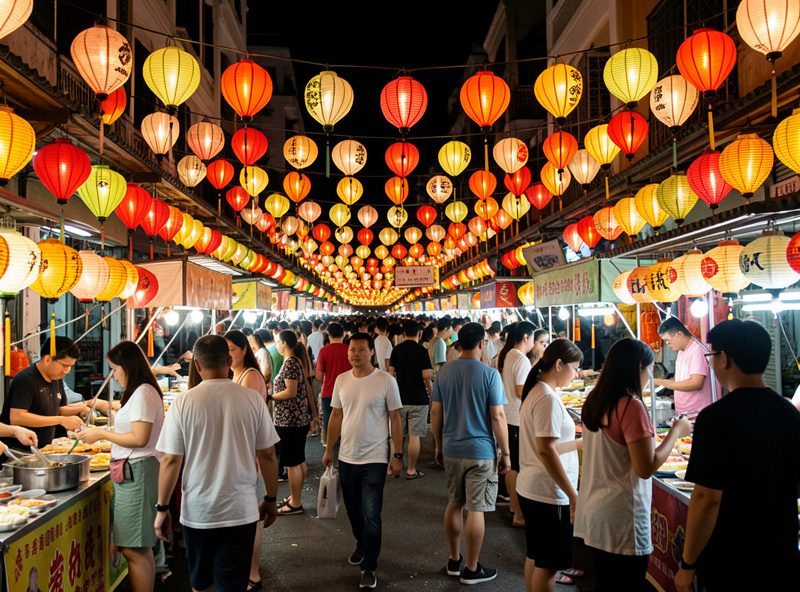
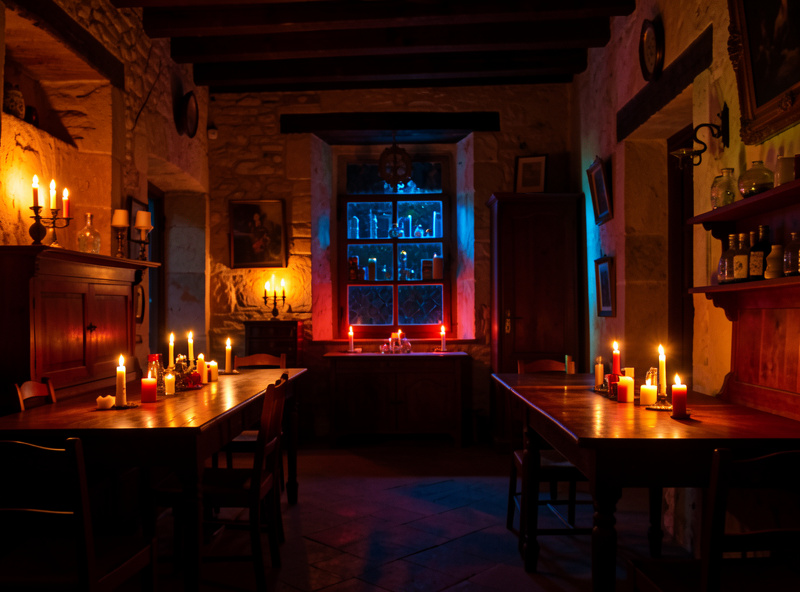
The cities you travel to come alive after dark, and most travelers put the camera away exactly when the best photographs become possible. Blue hour over a lit skyline, a glowing market street, the warm chaos of a night bazaar, a candlelit church interior — these are the frames that separate a travel portfolio from a holiday snapshot, and they’re all shot in low light, usually hand-held, often without a tripod you may not be carrying. This guide is the practical, on-the-road night-settings playbook: how I actually dial in a camera to keep shooting after sunset when I’m travelling light.
A quick scope note, because “night photography” covers two very different things. This is about lit night scenes — streets, interiors, blue hour, hand-held and mobile. It is not about deep-sky astrophotography or stacked star-field work; that’s a tripod-and-patience discipline covered in the long-exposure night guide and the astro-landscape guide. If you’re chasing the Milky Way over a dark landscape, read those. If you want to keep shooting the city after the sun goes down, you’re in the right place.
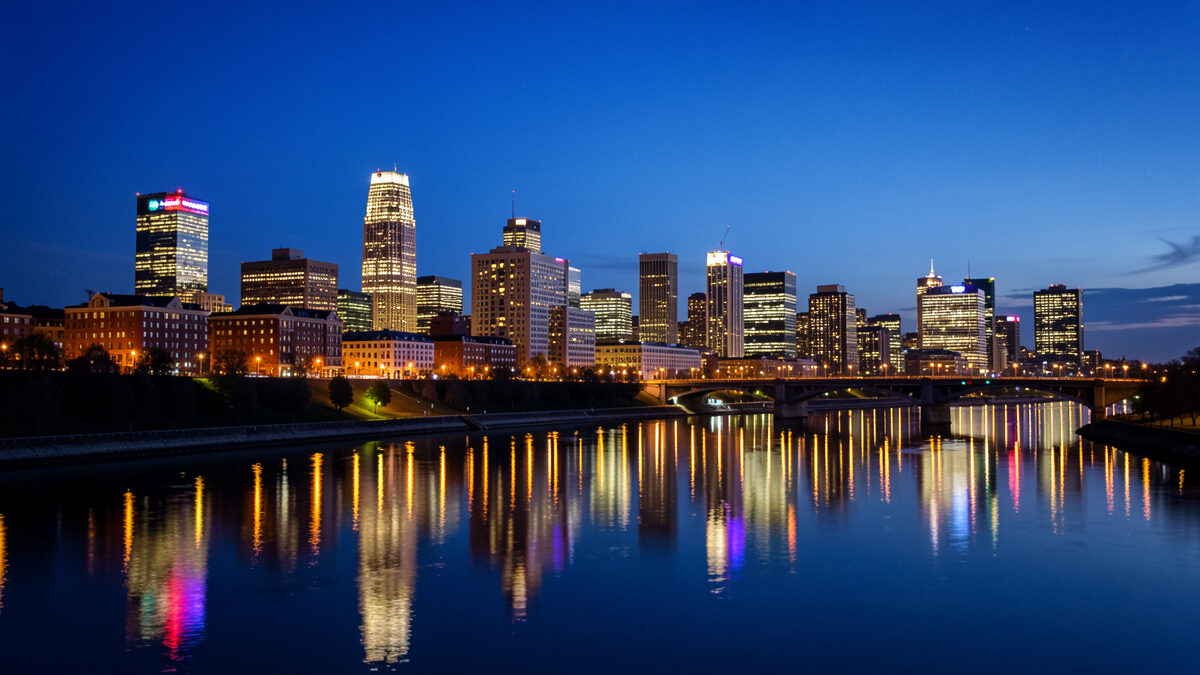
The single most useful thing I can tell a traveler about night shooting is that the best light isn’t at night at all — it’s at blue hour, the twenty to forty minutes after sunset when the sky goes deep blue and the city lights come on. In that window the sky still holds enough light to balance against the artificial lights, so you get detail in both rather than a black sky and blown-out windows. It’s the most flattering light a city ever offers, and it’s brief, so I plan for it: I scout the spot before sunset and I’m in position when it arrives.
Practically, blue hour is also the easiest “night” light to shoot because there’s still enough of it to hand-hold at sensible settings. As it deepens toward full dark the exposures get harder, so I shoot the blue-hour window hard and treat true night as a bonus. If you only learn one piece of travel night timing, make it this: be set up and shooting in the half hour after sunset, every evening, in any city worth photographing.
Without a tripod, every night setting is a negotiation between three things: a shutter speed fast enough to avoid blur, an aperture wide enough to gather light, and an ISO high enough to make the exposure — pushed as high as your sensor tolerates. The order I set them in matters. I open the aperture as wide as the lens goes first, because that’s free light. I set the shutter to the slowest speed I can reliably hand-hold — with in-body stabilization that can be surprisingly slow, but for moving subjects on a street I keep it fast enough to freeze them. Then I let ISO rise to whatever those two demand, and I accept the noise, because a sharp noisy frame beats a clean blurred one every time.
Two camera features make this far easier on the road. In-body stabilization buys several stops of hand-holdability, turning impossible exposures into routine ones — it’s the feature I value most in a travel body for exactly this reason. And a fast prime lens, with its wider maximum aperture, gathers dramatically more light than a travel zoom, which is precisely why I always pack one small bright prime for after dark. The night is when the prime earns its place in the bag.
| Night scene | Aperture | Shutter approach | ISO approach |
|---|---|---|---|
| Blue-hour cityscape | Mid (f/5.6–f/8) | Slow, braced or on a ledge | Keep low while light remains |
| Lit street, moving people | Wide open | Fast enough to freeze motion | Push high as needed |
| Dim interior (static) | Wide open | Slow, leaning on stabilization | Moderate to high |
| Light trails / deliberate blur | Mid to narrow | Long, needs a brace or tripod | Low |
These aren’t rigid rules — they’re starting points I adjust by the histogram. Which brings up the most important night habit: expose by the histogram, not the rear screen, which looks deceptively bright in the dark and will fool you into underexposing. I push the exposure as far right as I can without clipping the highlights of the bright lights, because a brighter capture means cleaner shadows when I lift them later.
Autofocus struggles in low light, and a missed focus ruins a night frame faster than any exposure error. Modern mirrorless bodies are far better at this than older cameras, but they still hunt in genuine darkness. My fixes are simple: I focus on the brightest edge or light source in the scene, where there’s enough contrast for the system to lock, then recompose. When autofocus gives up entirely — a very dark interior, a dim landscape — I switch to manual focus and use focus magnification on the screen to nail it precisely, which is more reliable than fighting a hunting AF system.
For static scenes where I have a surface to brace against, back-button focus helps me lock focus once and not have the camera refocus on every shutter press. It’s a small workflow change that pays off in the dark, where every successful lock is worth keeping. The goal in all of this is the same: get focus confirmed and then stop letting the camera second-guess it.
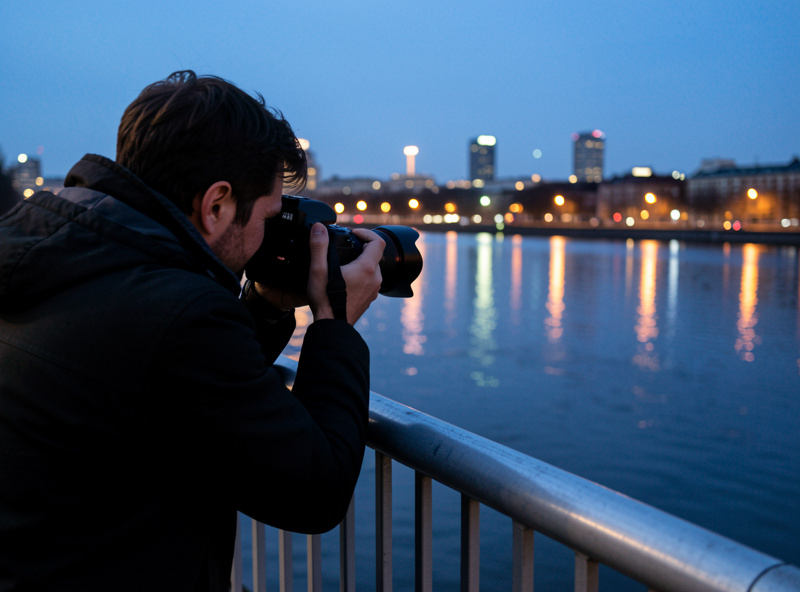
Most of travel night shooting is about borrowing stability from the world around you, since the tripod is often back in the room or never came at all. I brace against anything solid — a railing, a wall, a lamppost, a tabletop — which lets me shoot far slower than I could free-standing. I tuck my elbows in, breathe out, and squeeze the shutter gently rather than stabbing it. I use the self-timer or a two-second delay so my finger isn’t introducing shake at the moment of exposure. And I shoot a quick burst of three or four frames, because in a sequence at least one is usually sharper than the rest.
When the trip genuinely calls for night work that hand-holding can’t manage — long blue-hour exposures, deliberate light trails, reflections that need a multi-second shutter — a small travel tripod changes what’s possible without much weight penalty. I only carry one when the shooting justifies it, but for a night-photography-focused trip it earns its place. As an Amazon Associate I earn from qualifying purchases. A compact travel tripod chosen for short folded length is the one I’d bring; pick it for how small it packs, not how tall it stands.
Night scenes are a mess of mixed light — warm sodium streetlights, cool LED signs, the green cast of fluorescent shop windows, the residual blue of the sky — and that mix is exactly what makes a night photograph feel alive, so I don’t try to neutralize it. Auto white balance often overcorrects at night, draining the warmth that makes a lit street inviting, so I either set a fixed white balance that preserves the warm glow or fix it later in the RAW file. The goal isn’t technically “correct” color; it’s color that conveys how the place felt, which after dark usually means letting the warmth stay warm.
This is another reason RAW matters so much at night: white balance on a RAW file is fully adjustable afterward with no quality loss, so I can shoot freely and decide the mood at the desk. A blue-hour skyline can be pushed cooler for a crisp, modern feel or warmer for a nostalgic one, entirely from the same capture. I expose for the light and decide the color later — the one decision I make in the field is simply not to let auto white balance strip the atmosphere out of the scene before I’ve had a say.
Night photography is where shooting RAW stops being optional. The dynamic range of a night scene — deep shadows against bright point lights — is enormous, and only a RAW file holds enough information to recover the shadows and tame the highlights afterward. A JPEG bakes in the camera’s guesses and throws away the latitude you’ll desperately want when you’re balancing a dark sky against neon. I shoot every night frame RAW without exception.
And I’ve made peace with noise. High ISO grain is the price of hand-held night work, and it’s a price worth paying, because the alternative is no photograph at all. Modern sensors handle high ISO remarkably well, modern noise reduction handles the rest, and a little grain in a night frame reads as atmosphere far more than as a flaw. The travelers who come home with great night work aren’t the ones who avoided high ISO — they’re the ones who stopped being afraid of it, got the shot sharp, and cleaned it up later. Get set up at blue hour, open the aperture, brace against the world, expose to the right, and the city after dark becomes the best part of your trip to photograph.
Travel photography is the discipline that exposed every lazy habit I’d built up shooting at…
The least glamorous article in this whole travel cluster is also the one that’s saved…
The most nervous I ever get with a camera has nothing to do with photography.…
Leave a Reply