Packing a Camera Bag for Travel: Protect and Access
How you pack a camera bag for travel is a different skill from which bag…
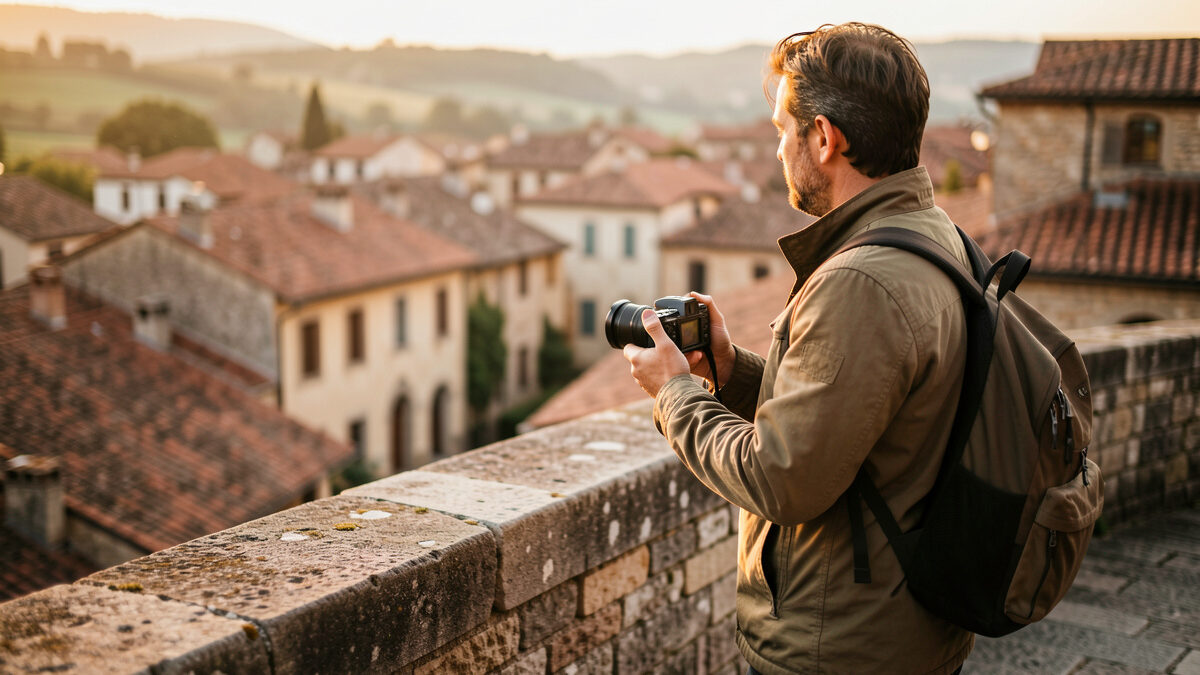
Travel photography is the discipline that exposed every lazy habit I’d built up shooting at home. On my own bench I can take ten frames of a test chart, swap a lens, and start over. On the road you get one pass at the light hitting a wet cobblestone street, you’re carrying everything on your back through an airport, and the dust that would never touch my workshop is suddenly blowing across a sensor I can’t clean for a week. The gear logic changes, the technique tightens, and the failures get expensive. This guide is the whole travel-photography system the way I actually run it across two camera mounts — what to carry, how to get it through security, and how to shoot once you’re standing in front of something worth photographing.
I’m a glass-first shooter who cares more about how a lens draws than which body has the newest sensor, and travel is where that bias pays off. The light, the framing, and the discipline to carry less are what make the picture — not the megapixel count. Everything below is built around that. Where a deeper article exists on this site for a sub-topic, I link straight to it instead of repeating myself, so treat this page as the map and the spokes as the detail.
The single hardest constraint in travel photography is not image quality — it’s that you have to carry the whole system, all day, and still want to pick the camera up at hour eight. Weight and bulk aren’t a comfort preference; they’re the difference between a kit you shoot with and a kit you leave in the hotel. I learned this the hard way carrying a full-frame body plus three fast primes through a hill town in 35-degree heat. By midday the bag stayed shut. The pictures I missed because the camera was too heavy to bother with were worse than any I’d have lost to a slightly slower lens.
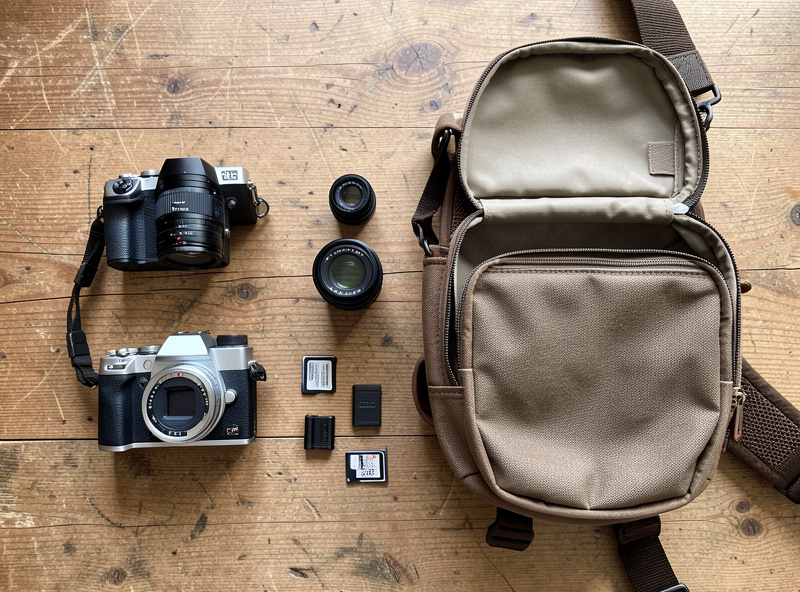
That reframes the whole gear conversation. For travel I optimize for the smallest system that still draws the way I want, not the most capable one. My APS-C body with a single versatile zoom and one fast prime outperforms my full-frame two-lens setup in the field for one boring reason: I always have it out and on. The image-quality gap that looks decisive on a chart on my wall vanishes the moment the heavier kit gets left behind.
The second demand is weather and dust tolerance. Travel means changing lenses in places I’d never expose a sensor at home — a windy overlook, a market street, the spray off a waterfall. Sealing matters more than it does in the studio, and so does a workflow that minimizes how often you open the camera up at all. I cover the field protection routine in detail in its own guide, linked below, but the principle starts here: pick gear you can keep closed.
Body choice for travel is less about the sensor and more about what the whole package weighs once a lens is mounted. A small body wearing a big lens is still a big camera. I think in terms of the mounted combo, not the spec sheet, and I almost always travel with the system that gives me the lightest one-lens-does-most setup rather than the one with the highest ceiling.
The lens is where the real decision lives, because it determines both what you can shoot and how much you carry. A single travel zoom covering wide-to-short-telephoto handles the overwhelming majority of travel frames — streetscapes, architecture, environmental portraits, the detail shots — and frees you from changing glass in dusty places. I’ll trade a stop of aperture for that convenience on the road every time, then add one small fast prime for low light and subject separation when the zoom isn’t enough. Two pieces of glass, one of them tiny. That’s the kit that comes home with the pictures.
I’ve broken both of these decisions out into their own deep dives: a full walkthrough of choosing a travel camera body by system and use case, and a separate guide to the lenses that actually earn their place in a travel bag. If you’re starting from scratch, read those two before you buy anything — the order matters, and lens comes first. The best lenses for travel photography guide ranks the options by the travel-weight-versus-reach tradeoff I actually care about, and both sit alongside this pillar in the travel cluster.
There is no single best travel kit, only the right one for how you travel and what you shoot. The table below is how I actually decide before a trip — not a spec ranking, but a match between trip type and the smallest system that covers it. Weight figures are deliberately left out because they swing wildly by exact model; the point is the relative load and what you give up.
| Trip type | Body approach | Lens approach | Main trade-off | Carry load |
|---|---|---|---|---|
| City / street / documentary | Compact APS-C or small full-frame | One travel zoom + one fast prime | Reach at the long end | Light |
| Landscape / scenic | Higher-resolution body | Wide zoom + tripod | Bulk and weight of support | Medium |
| Wildlife / safari add-on | APS-C for crop reach | Long telephoto zoom | Size and conspicuousness | Heavy |
| Ultralight / hiking | Smallest body you own | Single fixed or pancake-ish zoom | Versatility, low-light speed | Minimal |
| Mixed / one-bag everything | One versatile body | One superzoom, no swaps | Optical compromise at extremes | Light-medium |
Notice none of these rows say “bring everything.” The discipline of travel photography is subtraction. Every lens you leave behind is a lens you don’t carry, don’t worry about, and don’t change in a sandstorm. I’d rather miss the occasional frame that needed a focal length I didn’t bring than carry a bag I stop using by lunch.
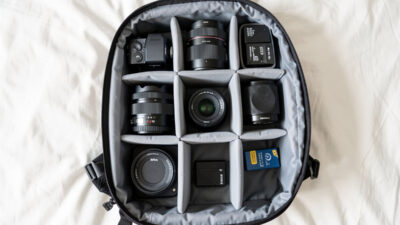
The most stressful part of travel photography has nothing to do with photography. It’s standing at a check-in desk wondering whether your bag of irreplaceable glass is about to be gate-checked into a cargo hold. Camera gear is carry-on, full stop — bodies, lenses, and especially lithium batteries, which are not allowed in checked luggage by international rules. But carry-on size and weight limits vary by airline and they are enforced unevenly, which means the way you pack is also a risk-management decision. The camera carry-on airline rules guide documents exactly what IATA and common carriers allow, what gets challenged at the gate, and how to protect your kit through check-in.
I treat the camera bag itself as a system that has to pass two tests: fit the strictest cabin allowance I’m likely to face, and protect the gear if it gets handled roughly anyway. There’s a full guide in this cluster to getting camera gear through airport security and onto the plane, including the battery rules and the carry-on-versus-personal-item trick, and a companion piece on how I actually pack a camera bag so it survives the trip and stays accessible — the full system is in my camera bag packing guide. Read the airline one before you book a budget carrier; the bag dimensions can cost you real money at the gate. For choosing the bag itself, the camera bag buying guide covers the selection side.
Gear gets you to the moment; technique decides whether you come home with the picture. The shift from home shooting to travel shooting is mostly about working faster and reading unfamiliar light. At home I can wait for the light. Travelling, I’m often standing somewhere once, at whatever time the itinerary allows, and the skill is making strong frames out of the conditions I’m handed rather than the ones I’d choose.
Composition is the highest-leverage thing you can improve, because it costs nothing and travels in your head. Travel composition has its own challenges — the temptation to shoot the postcard everyone else shoots, the chaos of a busy street, the problem of conveying a sense of place rather than just a landmark. There’s a dedicated guide in this cluster to composition for travel photography that goes well beyond the rule of thirds into how to actually make a place feel like itself in a frame, building on the broader photography composition guide. If you read one technique article before a trip, make it the travel photography composition guide — it is the one that directly translates to frame decisions you will face the moment you land.
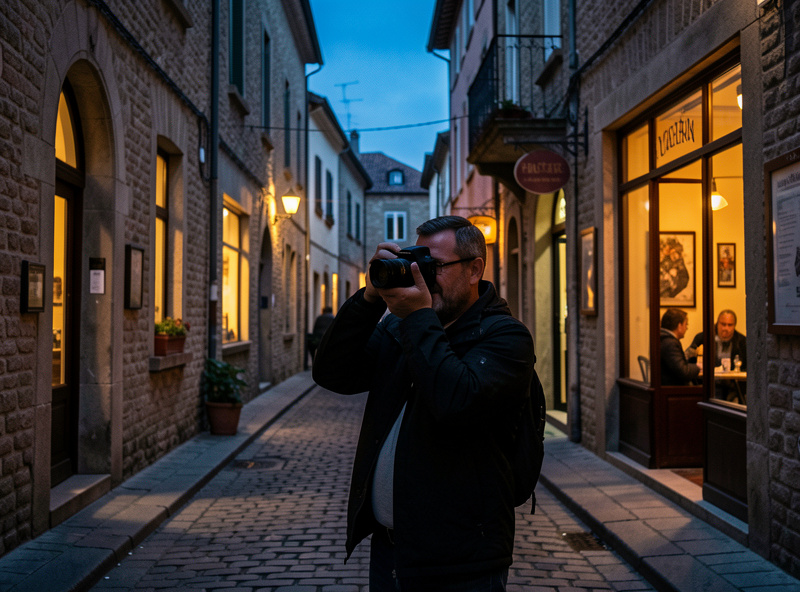
The other technique that separates travel snapshots from travel photographs is comfort with low light. Cities come alive after dark, blue hour is the best light of the day in most places, and the interiors you’ll want — markets, cafes, churches — are dim. Knowing your camera’s behavior in the dark, hand-held, without a tripod you may not be carrying, is what lets you keep shooting when everyone else has put the camera away. The travel night photography settings guide here is the hand-held, on-the-road version — not the deep astro work covered in the night photography guide and astro-landscape guide, but the practical settings for a lit street and a dim interior.
The threat model on the road is different from home. At home, dust is a slow nuisance. Travelling, the failures are sudden: a downpour you didn’t see coming, sea spray on a coastal walk, fine grit blowing across a desert overlook, condensation when you carry a cold camera into a warm humid room. Each of these can take a camera out of service for the rest of a trip, and unlike at home, there’s no spare body in a drawer.
The fixes are mostly cheap and mostly about habit. A simple rain cover, a couple of microfiber cloths, a way to keep the bag itself dry, and a strict rule about not changing lenses in wind. I keep the camera weather-tolerant by keeping it closed, and I’ve stopped more sensor-dust problems by simply not opening the body outdoors than by any amount of cleaning afterward. The full routine — rain, dust, sand, condensation, and the specific gear I carry for each — is in my protect camera gear from rain and dust guide. It’s the least glamorous article here and the one that most often saves a trip. When dust does get past you, the sensor cleaning guide covers safely dealing with it back at base.
Beyond the body and glass, a handful of supporting items decide whether a travel kit is a pleasure or a punishment. The first is the strap, because whatever carries the camera carries it for twelve hours a day. A thin factory strap that’s fine for an afternoon at home turns into a sore neck by day three of a trip; I switched to a wider, load-spreading sling years ago and never looked back. The camera strap guide covers the carrying systems that don’t hurt, which on a long trip is not a luxury.
Support is the next decision, and it’s genuinely a trade-off rather than a clear win. A tripod unlocks blue hour, long exposures, and sharp low-light frames, but it’s also the single bulkiest thing most travelers consider carrying. My rule is that the tripod earns its place only if the trip is built around the kind of shooting that needs it — deliberate landscape or night work — and otherwise I leave it and lean on stabilization and good hand-holding technique. When I do bring one it’s a carbon travel model chosen for pack length, not maximum height; the travel tripod guide walks through that compromise. The broader question of what supporting gear actually improves your photography, versus what just fills a bag, is in the essential accessories guide.
Power is the quiet trip-killer. Mirrorless bodies are hungry, and a dead battery at the wrong moment is a missed frame you can’t get back. I carry more spares than feel reasonable, charge nightly, and for longer remote trips I think about field power seriously — the field power guide compares running off camera batteries, a USB power bank, or a LiFePO4 pack for multi-day shooting away from outlets. The same logic applies to the choice between systems in the first place: handling, ergonomics, and battery life matter as much on the road as raw image quality, which is part of why the mirrorless versus DSLR question usually lands on mirrorless for travel.
If you take one piece of gear philosophy from this whole cluster, make it this: the lens decides the picture far more than the body does, and for travel the lens also decides what you carry. I’m a glass-first shooter precisely because, across two mounts and years of charting copies on a test wall, the difference a good lens makes to how an image draws dwarfs the difference between a current-generation sensor and the one before it. On the road that bias becomes practical, not just aesthetic — a lighter, better-suited lens means a kit you actually use.
This is also why I push back on the full-frame-or-nothing instinct so many travelers arrive with. The full-frame versus APS-C comparison lays out the real differences rather than the spec-war ones, and for travel the calculus almost always favors the smaller format: you give up a stop of low-light headroom and a little background blur, and you gain a system that’s a third lighter and far easier to carry all day. The choice between a single travel zoom and a couple of primes is the same trade in miniature — the prime versus zoom breakdown covers why I lean zoom for travel convenience but always pack one prime for the frames the zoom can’t draw. And if you’re still choosing a system from scratch, start with the camera buying guide before you read a single spoke here.
The skill that most separates travel photographs from travel snapshots is light, and travel forces you to read it fast in unfamiliar conditions. At home I know exactly where the sun lands at golden hour on my own street. Abroad I’m working it out in real time — which side of the square is lit, when the alley fills with reflected warmth, how long the good light will last before it’s gone behind a building. The fundamentals don’t change, but the speed does, and the cheapest professional-grade light there is remains the one you don’t pay for. The natural light guide covers reading and shaping daylight, which on a trip is most of the game; the broader lighting guide rounds out when you’d reach for anything beyond it. Most travelers never need flash, and the discipline of working only with available light makes you a sharper shooter when you get home.
Nothing in travel photography hurts like losing the files. A stolen bag or a corrupted card can erase a trip, and you can’t reshoot a place you’ve already left. My discipline here is simple and non-negotiable: I never reformat a card on the road, I carry enough cards to never have to, and I back up to a second device every night when I can. At home my RAW files go to a NAS and offsite; travelling, the night-time copy to a second drive or a phone is the offsite equivalent, and it lives in a different bag from the camera so one theft can’t take both.
This is also why I shoot to two cards when the body supports it, and why memory-card reliability matters more on the road than the headline read speed everyone obsesses over. The fastest card in the world is worthless if it drops a trip’s worth of frames. Cards are cheap relative to a holiday; treat them as consumables, carry spares, and rotate the full ones into a protected case rather than back into the camera.
The photographers who consistently come home with strong travel work aren’t the ones with the most gear — they’re the ones with a routine. Mine is boring on purpose: charge everything and format cards the night before departure, pack the bag the same way every time so I know where each thing lives by feel, scout the light for the next day, and back up every night. The creativity goes into the frames; the logistics are on autopilot so they never eat into the shooting.
That routine is what this whole cluster is really about. The gear choices reduce what you carry, the airline and packing knowledge gets it there intact, the protection habits keep it working, and the technique — composition and low light especially — turns the access into pictures. Travel photography rewards the shooter who has thought all of this through before the trip, so the only decision left in the field is where to point the camera. Read the spokes below in roughly the order a trip happens: choose the kit, get it there, protect it, then shoot it.
The smallest system you’ll actually keep out and shooting all day. For most travelers that’s a compact mirrorless body with one versatile travel zoom and one small fast prime for low light. The body’s sensor matters far less than whether the mounted combo is light enough that you never leave it in the hotel. Optimize for the lightest kit that draws the way you like, not the highest-spec one.
Yes, and you should. Camera bodies, lenses, and especially lithium batteries belong in carry-on; spare lithium batteries are prohibited in checked luggage under international rules. The catch is cabin size and weight limits vary by airline and are enforced unevenly, so pack to fit the strictest allowance you’re likely to face. See the dedicated airline-rules guide before booking a budget carrier.
No. Full-frame gives a real-world edge in low light and shallow depth of field, but for travel the size and weight penalty usually costs you more pictures than the sensor gains you. A modern APS-C body with good glass produces images indistinguishable from full-frame in normal viewing, in a package you’ll actually carry. Choose by weight and how the lens draws, not sensor size.
Keep the body closed: most field dust problems come from changing lenses outdoors, so don’t, especially in wind. Carry a simple rain cover, microfiber cloths, and a way to keep the bag dry, and let a cold camera acclimate before opening it in a warm humid room to avoid condensation. The cheap habits prevent far more damage than any cleaning afterward.
Back up every night to a second device, never reformat a card on the road, and carry enough cards to avoid having to. Keep the backup in a different bag from the camera so one theft can’t take both. Memory-card reliability matters more than headline speed when a single dropped card can erase a trip, so treat cards as consumables and rotate full ones into a protected case.
Composition, because it costs nothing and travels in your head. Beyond the postcard shot everyone takes, travel composition is about conveying a sense of place rather than just documenting a landmark. After that, get comfortable with low-light and blue-hour shooting hand-held, since the best light most trips hand you arrives after sunset and the interiors you’ll want are dim.
How you pack a camera bag for travel is a different skill from which bag…
The least glamorous article in this whole travel cluster is also the one that’s saved…
The question I get most about travel photography is which camera to buy, and it’s…
Leave a Reply