Memory Cards for Photographers: Speed, Capacity, and Reliability Explained
A $30 memory card holds images worth hundreds of dollars in travel and hours of…
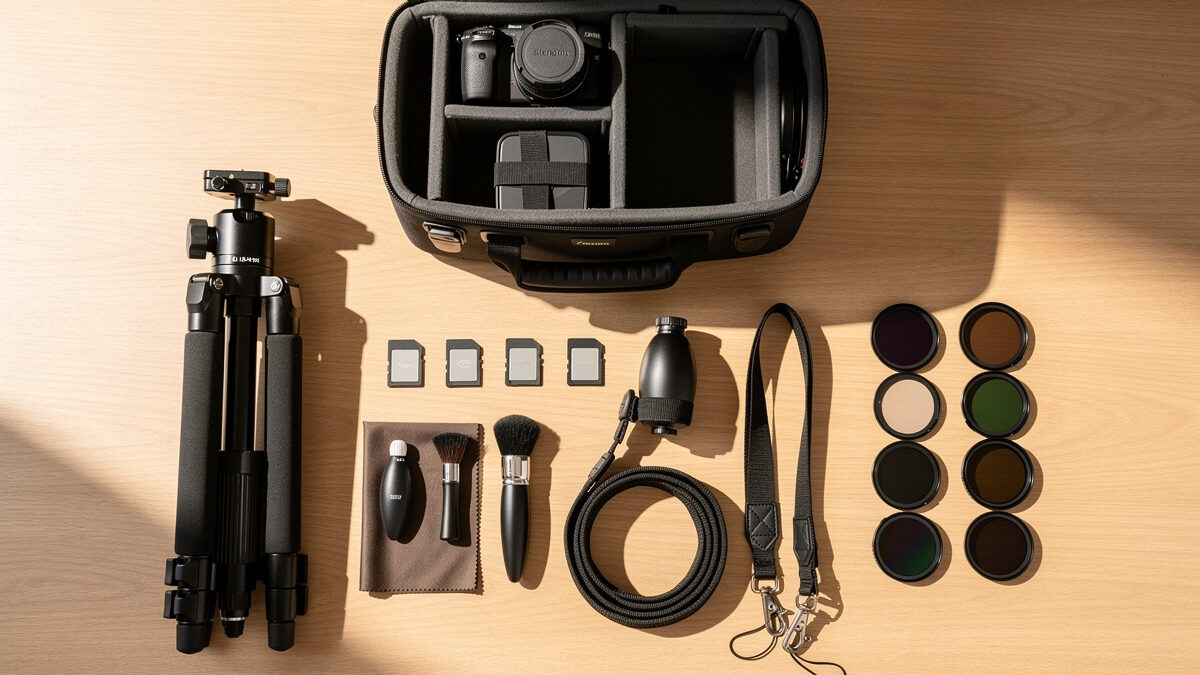
The camera body you shoot matters less than the accessories you use with it. A $2,000 camera on a wobbly tripod produces worse images than a $600 camera on a solid one. A fast lens without a proper bag lives one impact away from becoming a paperweight. I have spent years building a lens kit and documenting everything from welded sim rigs to sourdough crumb shots — the accessories I reach for every shoot are not the expensive ones. They are the ones that solve actual problems.
Most photographers spend their money in the wrong order. I did. The $80 tripod you skip for another lens is the same tripod that would have made every image from that lens sharper. The accessory hierarchy below is ranked by how much image quality you get per dollar — and the first item on the list costs less than a UV filter.
A good tripod adds more sharpness to your images than a lens upgrade, costing a fraction of the price. Camera shake at 1/30s can rob 30% of the resolution your sensor is capable of capturing. That is not a guess — it is what I measured shooting a test chart with and without support. A solid tripod, a remote release, and good technique recover sharpness that no amount of post-processing can restore.

For mirrorless shooters like me, the tripod equation changes because the bodies are lighter — a tripod that was stable enough for a heavy DSLR with a long zoom may be overkill for a Fuji X-T5 or Sony A7 body with a prime lens.
What I personally use is a mid-range carbon fiber tripod with an Arca-Swiss compatible ball head. I mounted a quick-release plate on every camera body and every lens foot I own. When I need to switch from handheld to tripod, it takes under five seconds. That speed means I actually use the tripod — which is the whole point. A tripod you leave in the car because it is a hassle to set up is not an accessory, it is a regret. The carbon fiber vs aluminum decision comes down to one variable: do you hike with your gear? If yes, the weight savings of carbon fiber pay for themselves across ten miles of trail. If you shoot near the car, aluminum is equally stable at half the price. Both materials deliver the same function — stability — and that function is the difference between a sharp image and a soft one when the light is low and the shutter stays open.
For landscape work specifically, a tripod is non-negotiable. The golden hour and blue hour light I chase in Sweden lasts about 45 minutes per session, and every frame during that window needs to be sharp. A tripod is not a convenience for landscape — it is the tool that lets you shoot at f/11 with ISO 100 while the sun is below the horizon. Without it, you are either raising ISO into noisy territory or opening the aperture and losing the depth of field that landscapes demand. The same principle applies to night photography — long exposures are impossible handheld, and the tripod is the difference between a sharp starfield and a blurry mess. I have written more about exposure decisions for specific scenes in the landscape photography guide — the short version is that the tripod is what lets you shoot at base ISO in any light — when we get to filters, I will show you how an ND filter extends your tripod’s usefulness by letting you shoot multi-second exposures in broad daylight.
I have watched a camera bag save a body from a three-foot drop onto concrete. The bag was scuffed. The camera was fine. The insurance that a proper bag provides — against drops, rain, dust, and airport baggage handlers — is not expensive compared to replacing a body or lens. The bag you choose also shapes what gear you bring, and what gear you bring shapes what photos you can take. A backpack that holds two bodies and four lenses encourages you to bring two bodies and four lenses. A shoulder bag that holds one body and two primes forces editing decisions before you leave the house. I have found the forced-edit approach produces better photography because I think about what I plan to shoot and bring only what serves that intention.
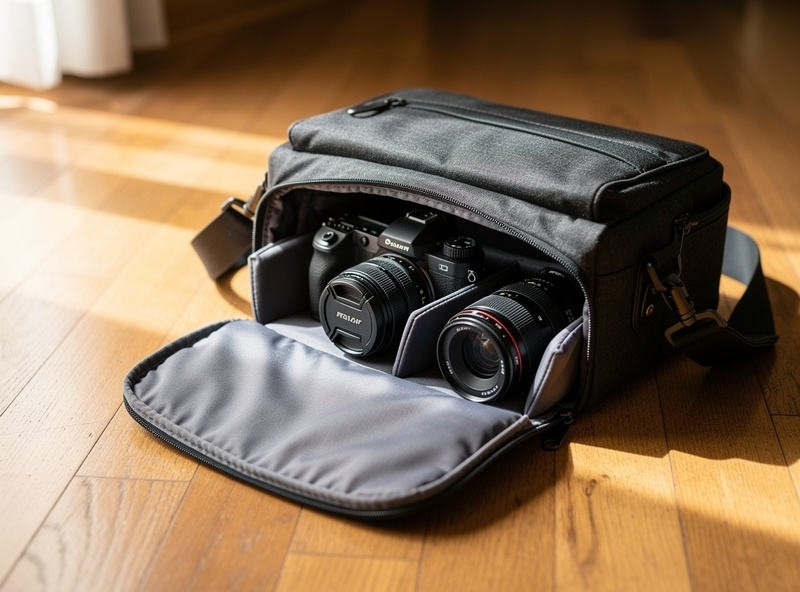
My current setup uses two bags. A mid-sized shoulder bag rated for weather resistance holds one mirrorless body, two primes, a speedlight, spare batteries, and memory cards. For landscape shoots requiring a tripod or product documentation of workshop builds, I use a backpack that carries the tripod externally and has space for an extra lens or a small flash kit. Two bags, two purposes. The shoulder bag is my daily carry — it is small enough that I actually bring it everywhere, which means the camera comes everywhere, which means I have photos of things I would have missed with a bigger bag sitting at home. That is the real metric for a camera bag: does it make you bring the camera? If it does not, the bag has failed regardless of its padding, weather sealing, or brand reputation.
When choosing a bag, the features that matter are weather resistance, a rigid bottom panel that protects lenses from impact, and a layout that lets you grab the camera without removing the bag. Everything else — the accessory pockets, the laptop sleeve, the tripod straps — is secondary. The bag’s first job is getting the camera from safe to shooting in under five seconds. If a bag cannot do that, it is not a camera bag, it is a storage container. The same principle applies to the travel photography approach — mobility determines whether the camera gets used at all.
The most expensive memory card you can buy costs less than the value of a single shoot you would lose if a cheap card failed. Card failure is not theoretical — I had one UHS-I card from a bargain brand corrupt during a landscape shoot three years ago, and I lost 40 minutes of golden-hour exposures. The card cost $18. The lost images were irreplaceable. I replaced every card in my kit within the week, all from reputable brands, and I have not had a failure since.
For most mirrorless shooters, a UHS-II V60 card is the price-to-performance sweet spot — the SD Association’s Video Speed Class specification guarantees V60 sustains a minimum 60 MB/s write speed, which is fast enough to clear the burst buffer between shots and record 4K video at standard bitrates. V90 cards are faster but unnecessary unless you are shooting burst-mode wildlife or 4K video at high bitrates. A 64GB V60 card from SanDisk or Lexar costs about $30 and holds roughly 1,800 RAW files from a 26-megapixel sensor. For a full day of shooting, two 64GB cards provide enough capacity and redundancy — if one card fails, you still have the other. What matters more than the card speed is what happens after the card comes out of the camera. My workflow is simple and has survived four years without a loss: import to Lightroom, backup to the NAS, and once a month, pull an offsite backup. I covered the backup strategy when I wrote about field photography power solutions — redundancy is not a luxury, it is a hedge against the one drive failure that will happen eventually.
Dual-slot cameras have an edge here, and it is one of the reasons I recommend looking at dual-slot bodies when you are ready to upgrade — the camera buying guide covers body selection in depth. A single-slot body with a reliable card is still trustworthy, but dual slots let you write RAW to both cards simultaneously, and that instant backup is worth the body premium if you shoot anything you cannot reshoot.
A bad camera strap hurts — not metaphorically, physically. After a full day of shooting with the thin strap that came in the box, your neck aches, your posture collapses, and you stop shooting earlier than you would if the camera were comfortable to carry. A good strap lets you carry the camera with one hand and forget it is there. The difference between a basic included strap and a purpose-built carrying system is the difference between shooting for 45 minutes and shooting for six hours.
I switched from the included neck strap to a sling-style strap two years ago and the change was immediate — the camera now hangs at my hip, accessible in one motion, and my neck is no longer part of the support system. For longer hikes with two bodies or a body and a tripod, a dual-camera harness distributes weight across both shoulders. The right strap system turns carrying a camera from a chore into something you do not think about, which is exactly what you want — attention belongs on the subject, not on the discomfort of your gear. A sling strap costs between $25 and $70, and it is the cheapest way to extend your shooting day by hours. That is a better return on investment than any lens or body upgrade I can name.
For street photographers who need the camera instantly accessible, a wrist strap paired with a small prime lens is the fastest-draw setup there is. The camera is in your hand, not on your shoulder, and the wrist strap is insurance against a drop — not the primary carry system. Different shooting styles demand different carrying solutions, and the strap you need depends on whether you are walking city streets for four hours or standing at a landscape overlook for two. Both scenarios benefit from a strap upgrade, but the specific solution differs.
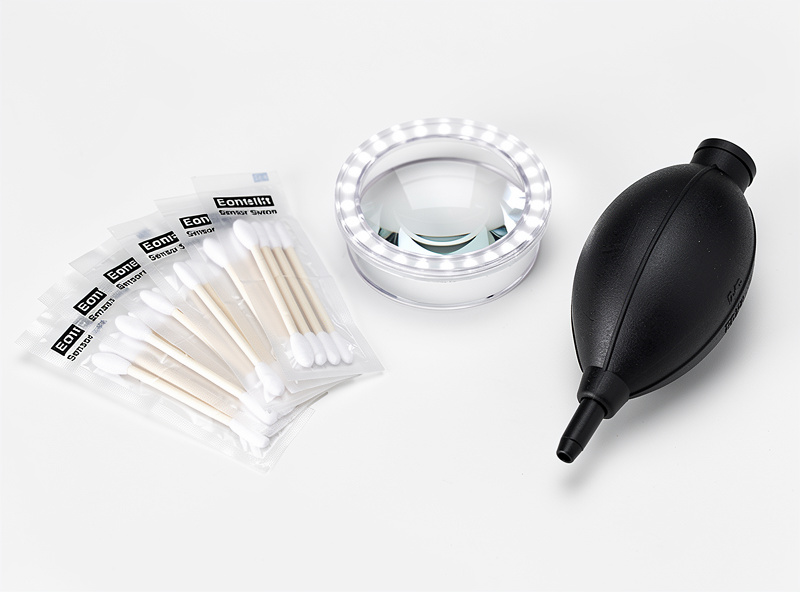
Sensor dust is the silent killer of landscape shots. You will not notice it shooting at f/2.8. Stop down to f/11 for a deep landscape and suddenly the sky is dotted with dark spots that take minutes to clone out per image — or hours across a full shoot. I clean my sensor every two months or before any shoot where I know I will be above f/8. The routine is a rocket blower for loose dust, a sensor loupe to inspect, and a wet cleaning kit with APS-C-sized swabs for stubborn spots. The first time you do it yourself it is terrifying — the sensor is exposed, a wrong move could scratch it, and every instinct says to close the camera and back away. After the third time, it takes under two minutes and costs a fraction of what a shop charges. The cleaning kit pays for itself on the first use.
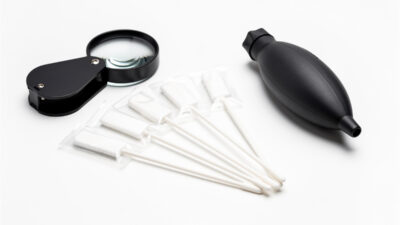
Lens cleaning is more forgiving but equally important. A microfiber cloth, a lens pen, and a small blower handle 95% of field situations. The remaining 5% — oil smudges from a finger touching the front element, dried sea spray, tree sap — need lens cleaning fluid and careful technique. One rule I wish someone had told me earlier: never spray fluid directly on the lens. Always on the cloth. The fluid can seep past the front element seal and reach internal elements, which turns a cleaning job into a repair job.
If you shoot in dusty, wet, or sandy environments — and I do, documenting workshop builds and garden projects with the same camera that shoots landscapes — a protective UV filter on each lens is worth the minor optical trade-off. A scratched front element costs hundreds to replace. A scratched filter costs $30. The filter is a sacrificial layer, and if it saves one front element over the life of a lens, it has paid for itself ten times over. The macro photography guide goes deeper into field cleaning for close-up work where dust and pollen are constant threats.
I carry three batteries for every shoot — one in the camera and two in the bag. Mirrorless bodies drain batteries faster than DSLRs because the EVF and rear screen are always drawing power. A single battery on my Fuji body lasts roughly 350 shots in normal use or about two hours of continuous shooting with the rear screen active — well under the official 580-shot CIPA rating for that exact body, which tells you something about the gap between the CIPA standardized test cycle and how a real shoot actually goes: constant chimping, EVF use in bright sun, and image review all burn more power than CIPA’s test protocol assumes. In cold weather, which is standard for a Swedish winter landscape session, that drops to around 200 shots. Three batteries get me through a full day with margin for error, and the third-party batteries I use from Wasabi cost $20 each compared to $65 for the OEM version. I have used them for three years without failure — the only difference is slightly less accurate charge reporting in the battery indicator, which is a minor inconvenience at a major price discount.
For multi-day trips without access to power, a LiFePO4 power station can charge camera batteries through a USB charger overnight. This setup adds about two pounds to the pack and extends shooting capability indefinitely off-grid. It is overkill for a day trip but essential for the kind of remote landscape work where the nearest outlet is 50 miles away. The power station also charges the phone, the headlamp, and anything else that keeps you functional in the field — it earns its weight in ways that go beyond photography.
A circular polarizer is the one filter every outdoor photographer should own. It cuts reflections from water and foliage, deepens blue skies when shot at 90 degrees to the sun, and acts as a roughly 1.5-stop neutral density filter in a pinch. The effect cannot be replicated in post-processing — you cannot remove a reflection from a RAW file the way a polarizer removes it from the light entering the lens. A good polarizer from B+W or Hoya costs about $60-80 in a 67mm thread and lasts through multiple lens upgrades if you use step-up rings.
Neutral density filters are the second filter worth owning, but only if you shoot moving water, seascapes, or want to blur motion in daylight. A 6-stop ND lets you shoot a one-second exposure at noon, turning a waterfall into silk or removing pedestrians from a city scene. A 10-stop ND extends that to 15 seconds, which is enough to smooth ocean waves and streak clouds. I carry a 6-stop and find it covers 90% of situations where I want motion blur — the 10-stop lives in the bag more often than on the lens. The photography composition guide covers how motion blur and long exposures change the visual structure of an image.
Graduated neutral density filters were essential in the DSLR era when dynamic range was limited. Modern mirrorless sensors at ISO 100 capture enough dynamic range that a two-stop GND effect can often be achieved by exposing for the highlights and lifting the shadows in post. I stopped carrying GND filters two years ago and have not missed them. The camera sensor has replaced the graduated filter for all but the most extreme contrast scenes, and even those are increasingly handled by exposure bracketing and blending. This is one category where the accessory has been rendered unnecessary by sensor technology, and I recommend skipping it.
Every prime and zoom I own ships with a lens hood, and every one of those hoods spends most of its life still in the box instead of on the lens. That is a mistake. A hood does two jobs: it blocks stray light from hitting the front element at an angle, which is what causes contrast-killing veiling flare and the washed-out, milky look that no amount of post-processing recovery fully fixes, and it protects the front element from a bump, a raindrop, or a stray finger far better than a bare filter thread does.
The tradeoff people worry about — that a hood kills the deliberate sunstar or flare look they actually want in a shot — is real but narrow. Shoot toward the sun with the hood on and you lose the controlled flare; shoot with the light behind or to the side, which is most of the time, and the hood is doing nothing but protecting the shot. My habit is simple: hood on by default, hood off only when I am deliberately composing for a sunstar at the frame edge. A petal-shaped hood matched to your specific lens (not a generic round one) costs $10-25 if you lose the original, and it is the cheapest optical-quality accessory on this entire list because it usually already came free in the box.
A tripod removes camera shake from wind, breathing, and an unstable surface. It does not remove the shake from your own finger pressing the shutter button. On a long exposure at f/11 for a landscape, or a macro shot at high magnification where depth of field is measured in millimeters, that single press can undo everything the tripod was there to prevent. A remote shutter release — wired, wireless, or the smartphone-app version most current mirrorless bodies support — closes that last gap.
The cheapest version costs almost nothing: the camera’s own 2-second self-timer, which lets any vibration from the button press settle before the shutter fires. I use it constantly for landscape work where I am not chasing a fast-changing moment. Where the self-timer falls short is anything time-sensitive — a wave breaking at a specific point in its cycle, a bird about to take off, a long-exposure sequence I want to trigger without walking back to the camera each time. For those, a wired remote ($15-25) or a wireless trigger ($25-50) earns its place in the bag.
The accessory that has changed my actual shooting habits more than the remote itself is the intervalometer — a remote release with a built-in timer that fires the shutter at a set interval for a set number of frames. Time-lapse sequences, star-trail stacks, and focus-bracketed macro sequences all depend on one. Most current mirrorless bodies now build this function into the camera menu directly, which is worth checking before buying a separate unit — my X-T5 has it native, so the external intervalometer I bought years ago for an older body now lives in a drawer. Check your specific camera’s menu system before spending $30-50 on hardware the firmware may already provide for free.
An off-camera flash and a couple of reflectors do more for a portrait than the difference between an f/1.8 and an f/1.4 prime ever will. I carry a single off-camera flash, a couple of reflectors, and a 5-in-1 diffuser-reflector combo as my standard light-shaping kit, and it covers the overwhelming majority of portrait and product work I shoot — including the workshop documentation shots that have nothing to do with photography as the primary subject.
The single most useful piece in that kit is the 5-in-1 reflector: silver for punch, white for a softer fill, gold for warmth, black for negative fill (subtracting light instead of adding it), and the diffuser panel itself for softening direct sun into something closer to open shade. On a bright day, bouncing a silver reflector into a subject’s shadow side does more to fix a harsh portrait than any amount of post-processing recovery. It costs $15-40 and folds down to the size of a dinner plate — there is no accessory-per-dollar value in this entire guide that beats it.
The off-camera flash is the step up from there. Moving the flash off the hot shoe and onto a stand or a hand-held bracket changes the entire character of the light — instead of a flat, on-axis blast that flattens the face, you get directional light with real shadow and shape. A basic manual speedlight with a wireless trigger runs $100-250 and is the single biggest lighting upgrade available to a photographer who has only ever shot with on-camera flash or ambient light. It is not a studio strobe system, and I do not pretend it replaces one — for anything beyond a speedlight-and-reflector reality, that is commercial-studio territory I hedge on rather than claim. But for the field work most of this guide covers, a speedlight and a reflector are the entire lighting department, and they fit in the bag you already own.
| Accessory | Landscape | Portrait | Street/Travel | Budget Range |
|---|---|---|---|---|
| Tripod | Essential | Recommended | Optional | $80 to $300 |
| Camera Bag | Essential | Essential | Essential | $60 to $200 |
| Memory Cards (2x64GB) | Essential | Essential | Essential | $30 to $80 |
| Camera Strap Upgrade | Recommended | Recommended | Essential | $25 to $100 |
| Sensor Cleaning Kit | Essential | Recommended | Recommended | $25 to $60 |
| Extra Batteries (2) | Essential | Essential | Essential | $40 to $80 |
| Remote Shutter Release | Essential | Optional | Optional | $15 to $50 |
| ND Filters | Recommended | Optional | Optional | $40 to $150 |
| Circular Polarizer | Essential | Optional | Recommended | $60 to $100 |
| Speedlight / Flash | Optional | Essential | Optional | $100 to $400 |
| Reflector | Optional | Recommended | Optional | $15 to $40 |
The table above is my honest assessment after years of shooting different subjects. Landscape photographers need stability and light control — a tripod, polarizer, and remote release earn their weight. Portrait photographers need light shaping — a speedlight and reflector make more difference than any lens upgrade, which is why the portrait lens recommendations start from the assumption that lighting is already handled. Street and travel photographers need mobility — a good strap and bag determine whether the camera leaves the hotel room at all.
The mistake beginners make is buying everything at once before understanding what they actually shoot. My advice after watching that mistake play out too many times: buy the bag and memory cards first. Shoot for a month. Identify the specific problem that is actually limiting your images — and buy the accessory that solves that specific problem. That is the accessory that earns its place in your kit. Everything else is weight you carry for someone else’s photography style, not your own.
The right accessories do not make you a better photographer — they remove the obstacles between you and the image you already know how to make. A tripod removes shake, a bag removes the friction of carrying gear, a strap removes the fatigue that makes you stop shooting early. The camera body gets the glory, the lenses get the discussion, but the accessories are what keep you shooting when the light is right and the moment is happening. That is what matters.
A proper camera bag and reliable memory cards. A bag protects your gear from drops and weather. Cards determine whether your images survive the journey from camera to computer. Everything else — tripod, strap, filters — comes after you understand what you actually shoot.
Between $80 and $300 for a good aluminum or entry-level carbon fiber tripod. Mirrorless bodies are lighter than DSLRs, so you do not need the heaviest support. Avoid tripods under $50 — the head will creep, the legs will flex, and the sharpness you gain from using a tripod will be lost to platform instability.
Yes for reliability, not necessarily for speed. A UHS-II V60 card from a reputable brand like SanDisk or Lexar costs around $30 for 64GB and delivers sufficient speed for most shooters. The premium you pay for a known brand is insurance against card failure and irreversible data loss.
Every two months for active shooters, or whenever you notice consistent dark spots in images shot above f/8. Dust becomes visible at smaller apertures. A rocket blower handles most loose dust. Wet cleaning with swabs addresses stubborn spots and should be done carefully with the right tools.
Yes, if you shoot for more than an hour at a time. An upgraded sling strap or cross-body system distributes weight across your shoulder instead of hanging from your neck. The difference in comfort determines how long you keep shooting during a full day in the field.
Landscape shooters need a tripod, a circular polarizer, and a remote release. Portrait shooters need a speedlight, a reflector, and a light stand. Both need a good bag, reliable memory cards, and extra batteries. The specialized accessories diverge based on whether you are chasing natural light or shaping artificial light.
Third-party batteries from reputable manufacturers like Wasabi or Neewer work well and cost about 60% less than OEM. I have used third-party batteries for three years without failure. The trade-off is slightly less accurate charge reporting in some camera bodies, which is a minor inconvenience at a major price discount.

A $30 memory card holds images worth hundreds of dollars in travel and hours of…
Sensor dust is the silent killer of landscape shots. You will not notice it at…
What Makes a Camera Good for Travel Photography? A good travel camera weighs under 1.5…
Leave a Reply