Camera Lens vs Telescope for Astrophotography: How to Choose
Camera lens or telescope for astrophotography? Focal length matrix, mount and tracking requirements, cost comparison,…
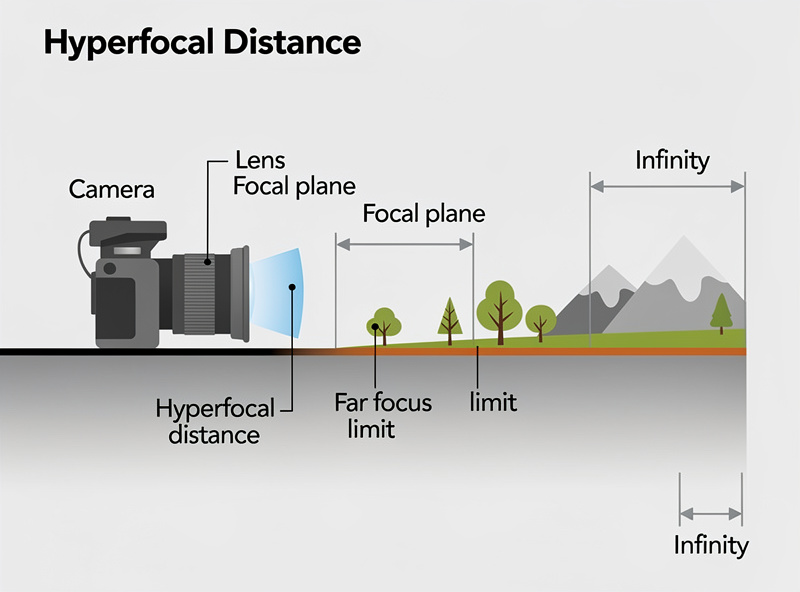
For landscape photography, use aperture priority mode at f/8 to f/11, ISO 100-400, and focus one-third into the scene. These settings maximize sharpness across the entire frame while keeping noise minimal. A shutter speed of 1/125s or faster handles most daylight conditions without a tripod.
I shoot landscapes on my Fujifilm X-T5 with the XF 16-55mm f/2.8 mounted 80% of the time — and here is what surprised me after two seasons of charting aperture sweeps on a test wall: most lenses hit peak sharpness at f/8, not f/11. The difference is subtle on a 24-inch print but unmistakable when you crop. If your camera body resolves at 40MP like mine does, that f/8 sweet spot matters more than any spec sheet suggests. Photography is the meta-hobby that records every other project — the same X-T5 that charts a 56mm portrait lens documents my hydroponic builds, welded sim rigs, and leather projects. But landscape is where the glass earns its keep, and after burning through bad light more times than I want to admit, here is the guide I wish someone handed me on day one.
Landscape photography prioritizes depth of field and sharpness over speed. That means small apertures, low ISO, and careful focus placement. Shoot in RAW format to preserve maximum dynamic range for post-processing, especially when dealing with high-contrast scenes like sunrises where the sky is bright and foreground is shadowed.
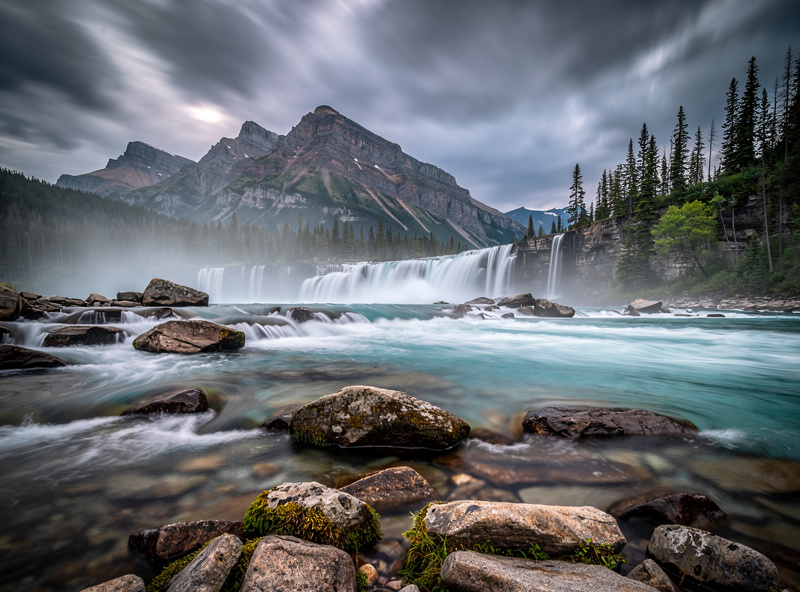
On my X-T5 I default to aperture priority at f/8, Auto ISO capped at 800, and a minimum shutter speed of 1/125s. When the light drops and my shutter dips below 1/60s, I lock the camera onto my carbon travel tripod with a geared head — that combination weighs under 3.5 lbs and fits in a daypack alongside a water bottle and a sandwich. A good tripod is the single most important landscape accessory, and I say that as someone who owns too many lenses. For daytime long exposures involving waterfalls or cloud movement — anything below 1/15s — a tripod is non-negotiable. Without one, every frame on a high-resolution sensor will show motion blur from hand shake, and no amount of Lightroom sharpening recovers detail that was never captured.
I use a 2-second self-timer for every tripod shot. On my first season of landscape work I skipped the timer because I was impatient — and lost maybe one in four frames to shutter-press vibration at 1/8s. The fix costs zero dollars and two seconds. Use it.
Wide-angle lenses from 14mm to 35mm are the standard landscape focal range because they capture expansive scenes and exaggerate depth. My XF 16-55mm f/2.8 lives on the body and covers roughly 90% of my landscape frames — the constant f/2.8 is overkill for f/8 landscapes, but the zoom range means I rarely fumble through lens changes in wind or rain. A 16-35mm f/4 zoom on full-frame accomplishes the same thing at half the weight.
A 24-70mm standard zoom is the versatile second lens. It handles tighter compositions, compresses distant elements, and works well for landscape details — a single tree, a weathered fence, patterns in rock formations. On my Sony a7 IV body I keep an 85mm fast prime in the bag specifically for compressing distant ridges and isolating backlit foliage against dark forest walls.
A 70-200mm telephoto is underrated for landscapes. It isolates distant mountain layers, compresses depth in valley shots, and captures intimate landscape details that wide angles miss — frost on a single pine needle, a backlit waterfall thread half a mile away. The trio of 16-35mm, 24-70mm, and 70-200mm at f/4 covers every scenario from sweeping vistas to compressed telephoto abstracts. Keep your glass clean between outings — lens care is not glamorous but it prevents the micro-contrast loss that ruins a print.
| Focal Range | Best Use | Typical Weight (f/4) | Common Trade-Off | I Use This For |
|---|---|---|---|---|
| 14-35mm wide | Expansive vistas, foreground emphasis, astro-landscapes | 1.1-1.4 lbs | Distant subjects feel tiny; hard to isolate details | Alpine panoramas, coastal sunsets, Milky Way |
| 24-70mm standard | Natural-perspective landscapes, detail shots, environmental portraits in context | 1.1-1.5 lbs | Jack of all trades, master of none — no ultra-wide drama or telephoto compression | Forest interiors, mountain lakes with reflections |
| 70-200mm telephoto | Compressed mountain layers, isolated details, wildlife in the landscape | 1.7-2.3 lbs | Heavy; requires solid tripod head; atmospheric haze reduces contrast at distance | Ridge silhouettes at dawn, compressed valley fog |
| 24mm f/1.4 prime | Astro-landscapes, blue-hour handheld, maximum corner sharpness | 0.9-1.4 lbs | No zoom flexibility; you compose with your feet | Night skies with foreground anchor, deep blue-hour cityscapes |
| 100-400mm super-telephoto | Distant peak isolation, moonrise over terrain, compressed sunrise layers | 3.0-3.5 lbs | Heavy, expensive, requires gimbal head or sturdy ball head | Moon behind a mountain silhouette, wildlife in the scene |
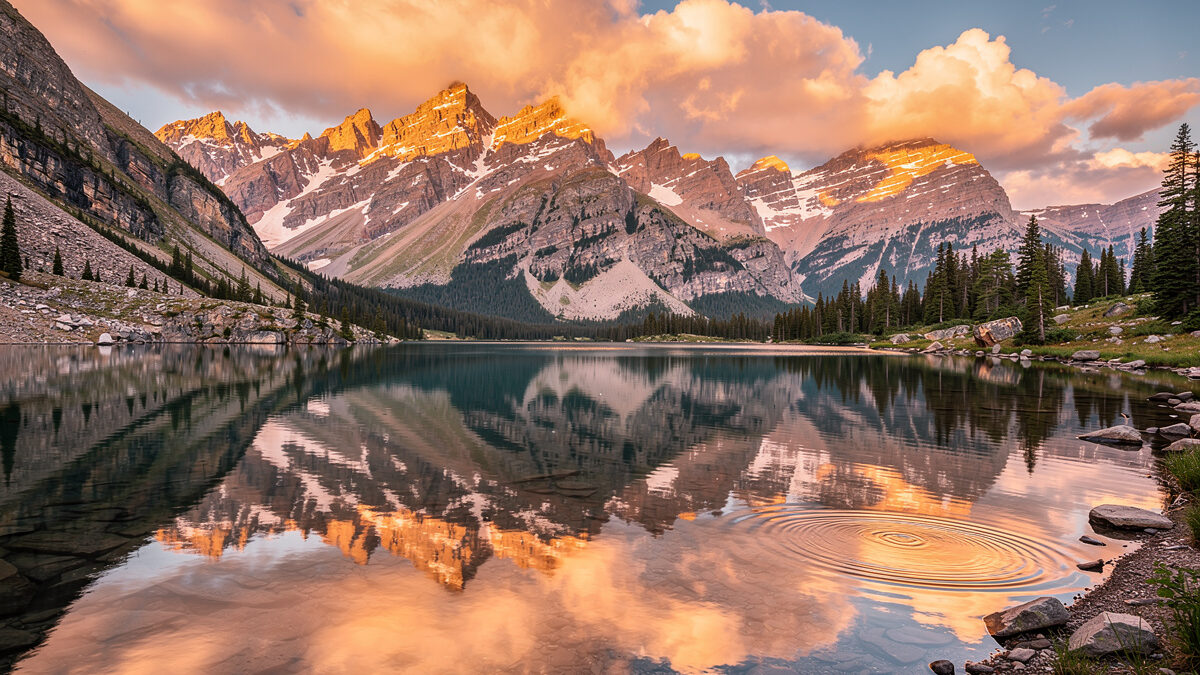
Strong landscape composition starts with a clear foreground element — a rock, flower, reflection, or leading line — that anchors the bottom third of the frame and draws the eye into the scene. Without foreground interest, landscapes look flat regardless of how dramatic the background is. I learned this the hard way in Yosemite: I set up for a sweeping valley shot and forgot the foreground entirely, producing 40 frames of beautiful sky over a mushy brown smear at the bottom of the frame. Now I walk the scene for five minutes before I even open the tripod, hunting for a rock, a patch of wildflowers, or a shoreline curve that anchors the composition.
Apply the rule of thirds by placing the horizon on the upper or lower grid line, never dead center. If the sky is dramatic — colorful sunset, storm clouds — give it two-thirds of the frame. If the foreground is the star — reflection lake, textured terrain — give the land two-thirds. This binary decision alone transforms most landscape compositions. For a complete breakdown of visual structure beyond the rule of thirds, see the landscape composition guide.
Look for natural leading lines — rivers, shorelines, fence rows, ridgelines — that guide the eye from the foreground through the middle ground to the background. The strongest landscapes have three distinct layers (foreground, middle ground, background) connected by visual pathways. On my last trip to the Swedish archipelago I spent 20 minutes repositioning my tripod two feet at a time until the shoreline curve led from a foreground granite boulder through a band of reflected dawn light straight to the island on the horizon. That is the difference between a snapshot and a photograph — the foreground, middle ground, and background have to talk to each other.
The golden hour — the first hour after sunrise and the last hour before sunset — produces warm, directional light with long shadows that reveal terrain texture. During these windows, the sun sits between 0 and 15 degrees above the horizon, creating the soft, dimensional light that defines professional landscape photography.
The blue hour — 20 to 40 minutes before sunrise and after sunset — provides cool, even illumination with no harsh shadows. It is ideal for water reflections, cityscape landscapes, and moody coastal scenes. The sky takes on deep blue and purple tones that complement warm artificial lights in the frame. I shoot more frames during blue hour than golden hour now because the light is more forgiving — there is no sun disk to blow out, no lens flare to manage, and the gradient from deep indigo at the zenith to pale cyan at the horizon creates a natural vignette no filter can replicate.
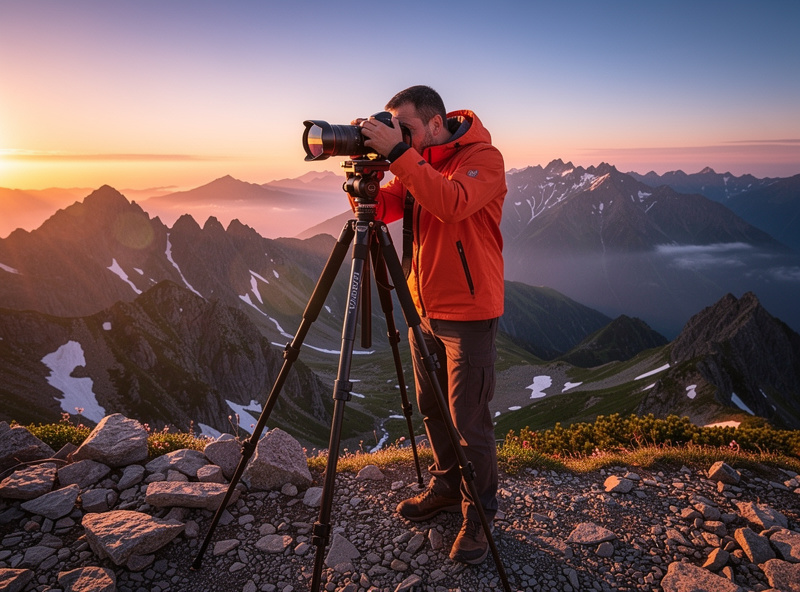
Midday sun (10am to 2pm) is the hardest light for landscapes because it creates harsh, top-down shadows and blown-out highlights. If you must shoot midday, look for overcast days — nature’s softbox — forest canopies that filter light, or embrace high-contrast black-and-white conversion. The best landscape photographers plan their shoots around golden and blue hours, arriving 45 minutes before sunrise to set up in the dark while the sky is still a deep velvet blue.
National and state parks offer the most accessible world-class landscape locations. In the United States, locations like the Grand Canyon, Yosemite, Zion, Glacier, and the Great Smoky Mountains provide diverse terrain — desert, alpine, forest, coastline — within relatively short drives. Research specific viewpoints and lesser-known trails to avoid crowds.
Coastlines and lake shores are consistently productive because water adds reflections, leading lines, and foreground interest to any scene. Rocky coastlines with tide pools, sandy beaches with dune formations, and mountain lakes with mirror reflections all provide compositions that change dramatically with weather, season, and time of day.
Scout locations using Google Earth, PhotoPills, and The Photographer’s Ephemeris to plan sun position, shadow direction, and seasonal conditions before you arrive. Arriving at a new location cold — without knowing where the sun rises or which direction the best view faces — wastes golden hour light on mediocre compositions. I keep a running note in my phone of GPS pins with the exact shooting direction, best season, and tide height for every coastal location within a two-hour drive of home. That note is worth more than any piece of glass in my bag.
Harsh light is not always a dealbreaker. Use a circular polarizer filter to cut glare from water and foliage, deepen blue skies, and increase color saturation. A polarizer is the single most useful filter for landscape photography — it works in conditions where no amount of post-processing replicates its effect. On my XF 16-55mm I keep a high-transmission polarizer threaded on by default during midday hikes.
Graduated neutral density (GND) filters balance bright skies against dark foregrounds in-camera. A 3-stop soft-edge GND handles most sunrise/sunset situations. Alternatively, bracket three exposures (normal, +2 stops for shadows, -2 stops for highlights) and blend them in Lightroom or Photoshop HDR merge — this digital approach replaces most GND needs. For a complete rundown of every filter type and when each one actually earns its place in the bag, see the camera lens filters guide.
Stormy, foggy, and overcast conditions produce some of the most compelling landscape images. Fog adds depth separation and mood — I once shot a spruce forest at dawn in thick fog where each tree receded in a different shade of pale gray, the closest ones sharp and textured, the farthest ones ghostly silhouettes. That image hangs on my wall and cost zero dollars in gear. Storm clouds create dramatic skies that flat blue skies cannot match. Rain creates reflections and saturated colors, and the sound of rain on a Gore-Tex shell while you huddle under a trailside overhang waiting for the light to break is the landscape photographer’s version of church. The photographers who get the best landscape shots are the ones who go out when everyone else stays inside. A weather-sealed camera body buys you the confidence to shoot in conditions that send everyone else to the car.
A basic landscape workflow in Lightroom starts with lens correction — enable profile corrections and remove chromatic aberration — then adjust white balance to match the scene mood. Push exposure until the histogram touches the right edge without clipping highlights. This technique, called “expose to the right” (ETTR), maximizes shadow detail in RAW files and is the standard approach recommended in photographic post-processing literature including guidance from the Digital Photography Review testing methodology.
Use the HSL panel to selectively boost blues in the sky and greens in foliage without affecting other elements. Add a slight contrast boost with the tone curve, then apply selective sharpening to the foreground using a radial filter or brush. Avoid global sharpening — it amplifies noise in smooth sky areas. When I am processing a landscape destined for print, I sharpen at 100% view with the Amount between 60-80 and the Masking slider holding at 70+ to keep the sky untouched.
For high-dynamic-range scenes, blend bracketed exposures manually with luminosity masks rather than relying on automatic HDR merge. Luminosity masks give pixel-level control over which exposure contributes to each area of the image, producing natural results without the artificial look of auto-HDR processing. If you plan to print your best work, a proper printing workflow will expose weaknesses that a backlit screen hides — banding in smooth sky gradients, sharpening halos, and shadow noise that looked fine at screen brightness but prints as visible grain.
If I were building a landscape kit from zero with the benefit of hindsight, I would spend my budget in this order: a sturdy tripod before a second lens, a single 24-70mm (or APS-C equivalent 16-55mm) before any primes, and a circular polarizer before any other filter. The gear mountain is a trap — I have seen photographers carry six lenses up a mountain and come back with 600 frames shot at 24mm and 200mm exclusively. My actual landscape bag today holds the X-T5 body, the 16-55mm f/2.8 and 70-300mm for reach, a carbon tripod, a polarizer, and a single ND filter. That is four items, and they have produced every landscape print on my walls.
The body matters less than you think. I shoot APS-C because the 40MP sensor on the X-T5 exposes lens weaknesses that a 24MP full-frame sensor masks — corner softness and chromatic aberration have nowhere to hide at that pixel pitch. But landscape lives at f/8, and at f/8 the gap between a $500 kit zoom and a $2,000 pro zoom shrinks to the point where only a test chart can distinguish them. Spend on glass and a tripod; the camera body is a distant third priority. If you are shooting landscapes at night, the equation shifts — then you want the fastest wide prime you can afford and a body with clean ISO 6400, which is where the astro-landscape crossover lives.
f/8 to f/11 is the sharpest aperture range for most lenses and provides sufficient depth of field for landscapes. Going beyond f/16 introduces diffraction, which softens the image despite increasing depth of field. Test your specific lens to find its peak sharpness point.
Yes, a tripod is essential for landscapes shot at sunrise, sunset, or with long exposures below 1/60s. Without a tripod, you are limited to fast shutter speeds and higher ISOs, which reduce image quality. A sturdy tripod is more important than a second lens.
A wide-angle lens (14-35mm) captures expansive scenes and is the standard landscape choice, but it is not strictly necessary. Many award-winning landscapes are shot at 50mm to 200mm to compress layers and isolate details. A 24-70mm covers most landscape needs.
The golden hour is the first hour after sunrise and the last hour before sunset when the sun sits 0-15 degrees above the horizon. It produces warm, directional light with long shadows that reveal terrain texture and add three-dimensionality to flat scenes.
Use a tripod for shutter speeds below 1/60s. Shoot at f/8 for maximum lens sharpness. Keep ISO at 100-400. Use a 2-second timer or remote shutter to eliminate camera shake from pressing the shutter button. Enable mirror lockup on DSLRs to reduce vibration.
Always shoot RAW for landscapes. RAW files retain 14-bit color data per channel versus JPEG’s 8-bit — 16,384 tonal steps versus 256, roughly 64x more tonal information for recovering blown highlights and lifting shadows in post-processing. The file size difference is irrelevant for the massive quality gain.
Continue building your photography skills with these guides:
Camera lens or telescope for astrophotography? Focal length matrix, mount and tracking requirements, cost comparison,…

To photograph a sourdough crumb, rake a low side light across the cut face and…
Three weekly capture types anchor a garden photography workflow that produces real year-over-year insight: a…
Leave a Reply