Garden Photography Through the Seasons: A Documentation Workflow
Three weekly capture types anchor a garden photography workflow that produces real year-over-year insight: a…
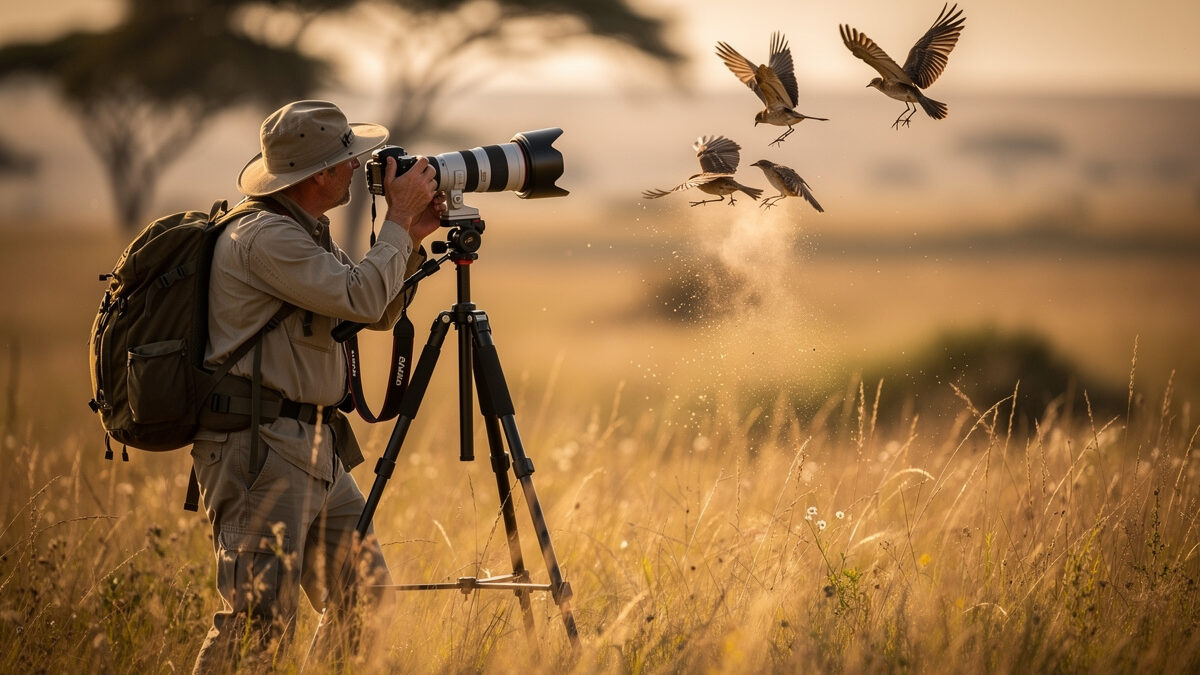
This wildlife photography beginner guide starts with the foundation every new shooter needs: the right shutter speed for sharp subjects, the right autofocus for tracking, and the right glass for reach. I shoot wildlife with the XF 70-300mm on my Fujifilm X-T5 — a mid-range telephoto that proves you do not need a $12,000 600mm f/4 to get publishable frames. What matters more is knowing how the settings and field technique work together. The lens gets you close; the settings get you sharp.
For wildlife photography, use shutter priority mode at 1/1000s minimum for birds in flight and 1/500s for stationary animals. Set continuous autofocus (AF-C or Servo AF) with animal eye detection, and use continuous burst shooting at 10+ frames per second to capture peak action moments.
Wildlife moves unpredictably, so speed is everything. Auto ISO with a ceiling of ISO 6400 (on full-frame) or ISO 3200 (on APS-C) gives the camera flexibility to maintain fast shutter speeds as light changes. A slightly noisy sharp photo always beats a clean blurry one.
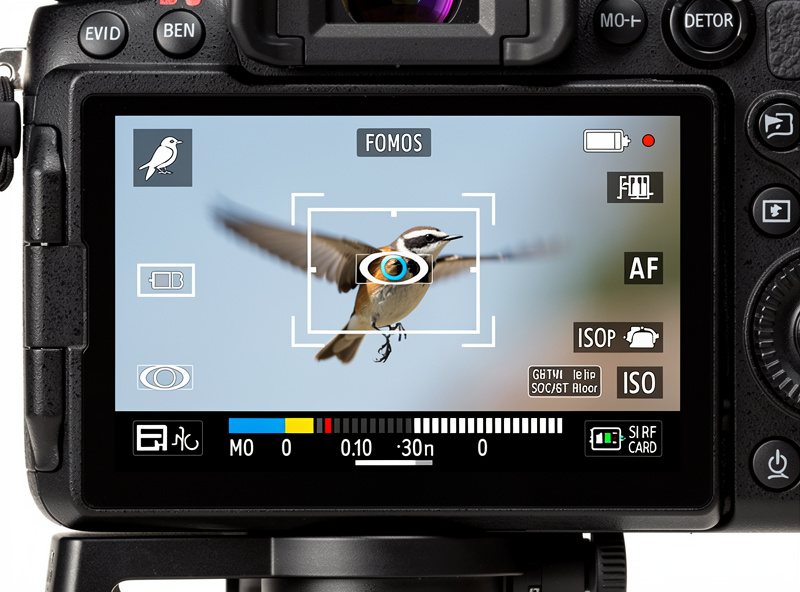
Set your focus area to zone or wide-area AF with animal tracking rather than single-point AF. Single-point AF requires you to keep a tiny focus point on a moving animal — nearly impossible with birds in flight. Zone AF lets the camera’s tracking algorithms do the heavy lifting while you concentrate on composition and timing. There is one setting most beginners leave at the factory default that kills tracking on erratic subjects — AF tracking sensitivity. We will fix that in the birds-in-flight section below once shutter speed and ISO are dialed in. For now, a deeper dive on wildlife camera settings walks you through every AF configuration option.
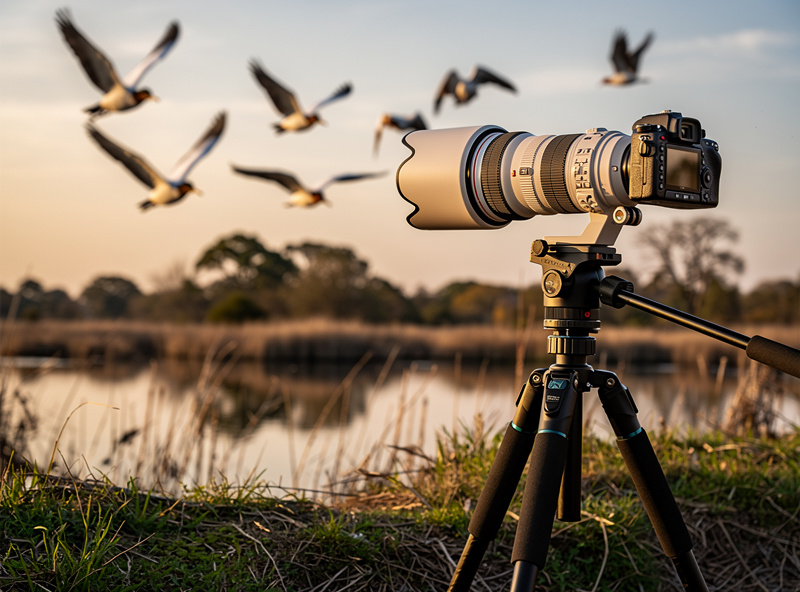
A 100-400mm or 200-600mm telephoto zoom is the workhorse wildlife lens. It reaches distant subjects while remaining handholdable for hiking. The Sony 200-600mm f/5.6-6.3, Canon RF 100-500mm f/4.5-7.1, and Nikon Z 100-400mm f/4.5-5.6 are popular options across their respective systems.
I shoot the XF 70-300mm f/4-5.6 on my X-T5 for most wildlife outings. At the APS-C crop factor, it gives me an effective 105-450mm field of view — enough reach for herons, deer at 50 meters, and even perched raptors if I place myself well. It is not a 600mm f/4, and I do not pretend it is. For small warblers at 30 meters, you want more glass. But for a sub-$800 telephoto that weighs 580 grams and lives in my hiking bag, it is the reason I have any wildlife photos worth printing. See our best telephoto lens guide for wildlife for a full comparison across every mount system.
A teleconverter (1.4x or 2x) extends your reach but costs 1-2 stops of light and slows autofocus speed. A 1.4x teleconverter on a 400mm f/5.6 lens gives you 560mm at f/8 — still usable on most modern mirrorless bodies. A 2x teleconverter pushes most lenses beyond reliable autofocus limits. Use 1.4x converters only.
Research your target species’ behavior patterns, feeding times, and preferred habitats before heading out. Animals are most active during the first two hours after sunrise and the last two hours before sunset — these windows align with the best light and coincide with peak animal movement.
Wear muted, earth-toned clothing that blends with the environment. Move slowly and avoid direct eye contact until you are ready to photograph — many prey animals interpret direct eye contact as a predatory signal. The chik of a startled blackbird cutting through morning stillness is your cue: you moved too fast. Freeze, drop your profile, and wait until the marsh settles into its own rhythm before advancing. Use natural cover (trees, bushes, terrain) to break up your silhouette as you approach.
The first time I tried stalking a great blue heron through shoulder-high cattails I made every mistake in the book: crunched dead reeds with every step, wore a bright gray jacket against dark green vegetation, and approached straight on like I was walking to my mailbox. The heron lifted off at 80 meters. Two weeks later I approached the same marsh in olive drab, moving parallel to the waterline behind a low berm, and the same bird let me set up at 25 meters. Approach angle breaks your silhouette faster than noise does — and it is the thing nobody teaches.
Stay downwind when possible, as many mammals rely heavily on scent. Keep your distance — if an animal changes its behavior because of your presence, you are too close. Use your telephoto reach rather than moving closer. A 600mm lens at 30 meters produces better images than a 200mm lens at 10 meters with a stressed animal.
Fast continuous shooting speed (10+ fps) is the most critical wildlife body feature. Modern mirrorless cameras like the Sony A1 (30 fps), Canon R5 (20 fps), and Nikon Z8 (20 fps) capture frames so fast that peak action moments — a bird’s wing at full extension, a predator mid-leap — become almost guaranteed rather than lucky captures.
Advanced autofocus with animal eye detection is the second priority. This feature tracks a bird’s eye as it flies across the frame, maintaining critical sharpness on the pupil rather than the body. It transformed wildlife photography when introduced and is now available on bodies from $1,000 and up.
Buffer depth — how many consecutive RAW frames the camera can capture before slowing — determines whether you can sustain burst shooting through a 3-5 second action sequence. On my X-T5 I get about 20 RAW frames at 15 fps before the buffer fills — enough for a 1.3-second bird launch sequence, but I have to time the burst carefully rather than hold the shutter down and pray. Bodies like the Nikon Z8 hold dozens more and let you sustain a sequence through an entire flyby. Check buffer specs for RAW+JPEG continuous shooting before you buy.
Birds in flight require the fastest autofocus settings your camera offers: continuous AF (AF-C/Servo), widest AF area mode with tracking enabled, and the highest frame rate available. Pre-focus to infinity and pan with the bird’s flight path — smooth panning technique matters more than any single camera setting.
Start tracking the bird well before it enters your ideal composition zone. Keeping the AF system locked onto a subject for several seconds produces dramatically better hit rates than trying to acquire focus at the exact moment you want to shoot. Pre-tracking also stabilizes your panning motion.
Back-button focus separates the focusing function from the shutter button, allowing you to continuously track focus with your thumb while independently triggering the shutter with your index finger. This technique, used by virtually all professional wildlife photographers, eliminates the half-press focus delay and gives continuous control over when focus tracking starts and stops. Pair it with AF tracking sensitivity set to “erratic” or “unstable” in your camera’s custom AF menu — this tells the AF system not to jump to a branch in the foreground when the bird passes behind one. I lost a whole morning of swallow shots learning that the hard way. For a complete breakdown, see our bird photography gear guide which covers body settings for different species.
The animal’s welfare always comes before the photograph. Never bait, chase, harass, or stress wildlife for a shot. Do not approach nests, dens, or newborns closely enough to cause defensive behavior in the parent. If an animal changes its behavior because of your presence — stops feeding, raises its head alertly, moves away — you have violated ethical distance.
The Audubon Society’s ethical bird photography guide codifies these principles — it is the standard I follow in the field. The core rule is simple: the photograph is never more important than the animal’s safety.
Follow the principle of “leave no trace.” Stay on established trails and paths. Do not break branches to improve your sightline. Do not play recorded animal calls excessively, as it disrupts territorial behavior and wastes the animal’s energy on false alarms. Many wildlife refuges and national parks have specific regulations — know and follow them.
Never share the precise location of sensitive species (nesting sites, den locations, endangered animals) on social media. Other photographers may not exercise the same restraint, and increased foot traffic around a nest can cause abandonment. General location descriptions (“Yellowstone,” “coastal Maine”) are acceptable; GPS coordinates are not.
Start by culling aggressively — a 10-frame-per-second burst of a 3-second flyby produces 30 frames, of which 2-3 will have the best wing position, eye contact, and focus. Select only the peak moment and delete the rest. Keeping hundreds of near-identical frames clogs your catalog and slows your workflow.
Apply noise reduction selectively — use luminance noise reduction on the background (usually sky or foliage) but avoid it on the animal’s feathers or fur, where it destroys fine detail. Modern AI-based noise reduction tools like Topaz DeNoise or Lightroom’s AI Denoise handle high-ISO wildlife images remarkably well up to ISO 12800 on full-frame bodies.
Crop for composition, not rescue. If your subject is tiny in the frame because you could not get close enough, a heavy crop will not produce a usable image — it will produce a noisy, soft image. Get closer (with longer lenses or better positioning) rather than planning to crop later.
Wildlife photography looks intimidating from the outside — the 600mm f/4 lenses, the camouflage hides, the 30 fps flagship bodies. None of that is where you start. Start with the telephoto you can afford, learn to shoot at 1/1000s in shutter priority, and practice stalking without being seen. The glass you own is better than the glass you are saving for. I started chasing herons with a 70-300mm on an APS-C body, and some of those early frames still live in my print portfolio — not because the gear was great, but because I moved slow, got close, and shot at the right settings. For the full expanding ecosystem of wildlife knowledge, start with our complete wildlife photography guide. It connects every technique on this page to the larger kit.
1/1000s for birds in flight and fast-moving animals. 1/500s for stationary wildlife. 1/2000s or faster for hummingbirds and swallows. These minimums ensure sharp images when combined with continuous autofocus and burst shooting modes.
A 600mm lens provides ideal reach for small birds and shy mammals, but it is not required to start. A 100-400mm zoom on an APS-C body (effective 150-600mm) covers most wildlife situations for under $1,500. Upgrade to longer glass only after you have mastered approach technique.
Continuous autofocus (AF-C on Nikon/Sony, Servo AF on Canon) with animal eye detection and zone or wide-area tracking. This combination lets the camera track moving animals across the frame while maintaining sharp focus on the eye — the critical focus point for compelling wildlife images.
Yes, APS-C cameras are popular for wildlife because the 1.5x crop factor extends telephoto reach. A 400mm lens on APS-C frames like a 600mm on full-frame. The trade-off is slightly worse low-light performance and shallower buffer depth, but modern APS-C bodies like the Canon R7 and Sony A6700 are excellent wildlife cameras.
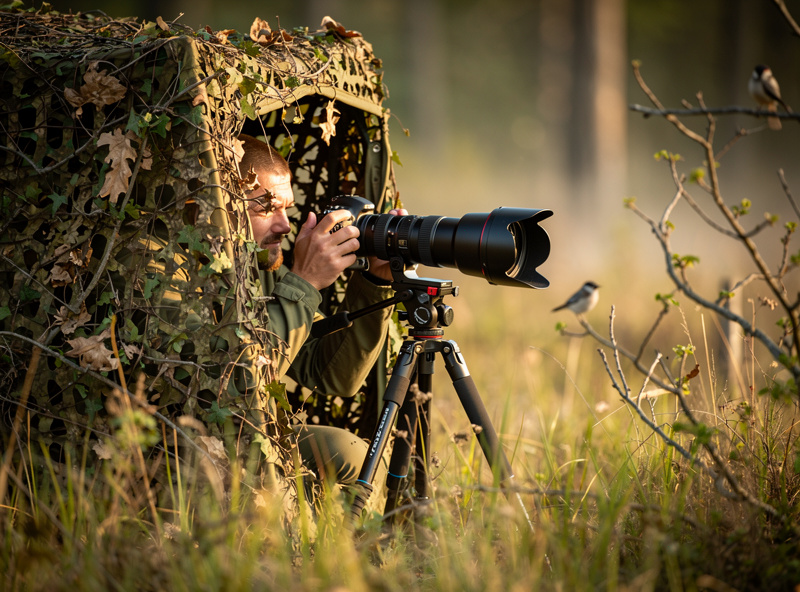
Use long telephoto lenses (400mm+) to maintain safe distance. Wear muted clothing. Move slowly and stay downwind. Never approach closer than the distance at which the animal changes its behavior. Use blinds or hides for extended sessions near predictable animal paths.
The first two hours after sunrise and the last two hours before sunset. These golden hour windows coincide with peak animal activity for feeding and movement. Midday produces harsh light and most animals rest during the warmest hours, making encounters less frequent and images less dynamic.
Deeper dives into every piece of the wildlife photography puzzle:
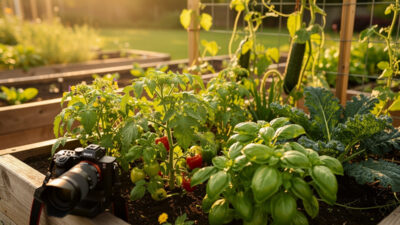
Three weekly capture types anchor a garden photography workflow that produces real year-over-year insight: a…
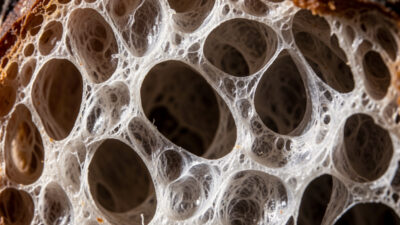
To photograph a sourdough crumb, rake a low side light across the cut face and…

What Is Photography Composition and Why Does It Matter? Photography composition is the deliberate arrangement…
Leave a Reply