Best Telephoto Lens for Wildlife Photography
The best telephoto lens for wildlife is a 150-600mm class zoom: it reaches far enough…
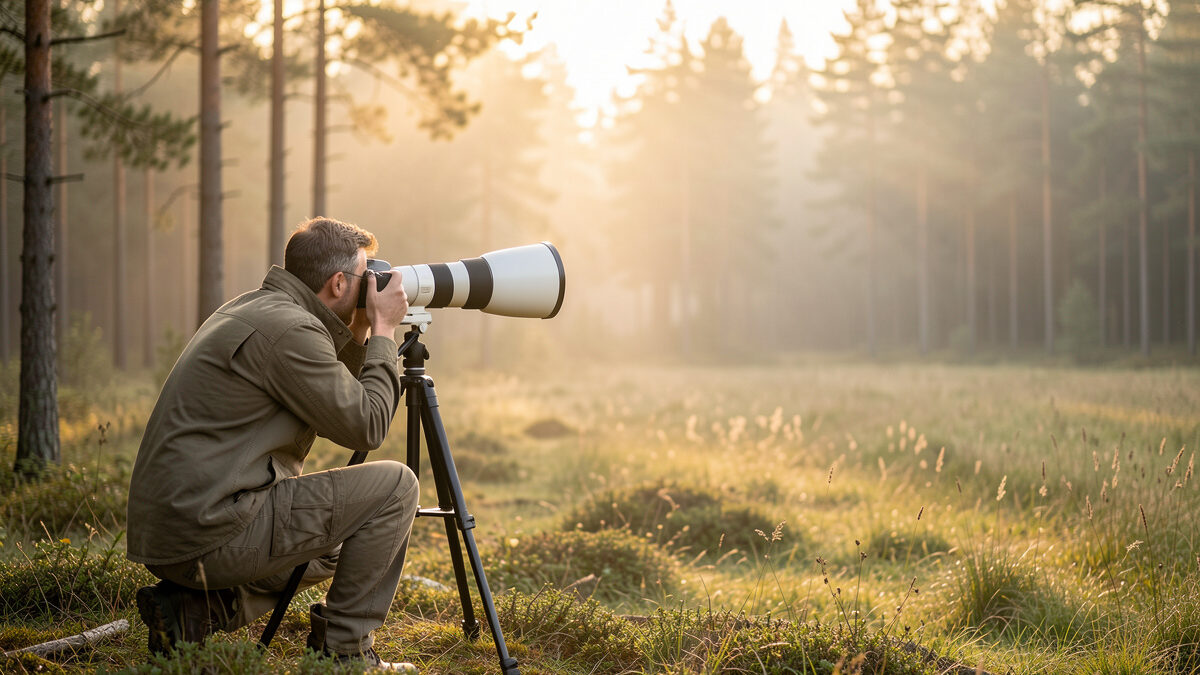
Wildlife photography lives or dies on three things: enough focal length to fill the frame from a respectful distance, an autofocus system that locks onto an eye and holds it, and the patience to let an animal come to you. On my Fujifilm X-T5 the practical wildlife reach starts around 300mm (about 450mm full-frame equivalent), and for serious bird work I want 400mm-plus. Everything else — settings, hides, ethics — orbits those fundamentals.
I shoot wildlife the way I shoot everything else: glass first, body second, light always. This guide is the map to the whole topic, and it pulls together every wildlife-specific piece I’ve charted and field-tested across my X-mount and FE kit. Where a subtopic deserves its own deep dive — the best telephoto lens, the exact camera settings, building a hide — I link out to it. Treat this as the trunk; the spokes are the branches.
You need three pieces of kit before anything else: a lens of at least 300mm (400mm-plus for birds), a body with reliable continuous autofocus and subject tracking, and stable support — a monopod or a bean bag. Everything past that is refinement, not requirement.
I learned this the expensive way. My first season I kept blaming my keeper rate on the body and nearly bought a new one. The real problem was reach: I was cropping a jackdaw down to 800 pixels because my longest lens stopped at 200mm. Swapping to a 70-300 fixed more frames than any sensor upgrade would have. If you’re choosing between spending on a body or on a longer lens, the lens wins almost every time — the same conclusion I reach in my broader take on why most body upgrades are sideways moves. For a structured walk through the entry kit, my wildlife photography for beginners piece covers the starter loadout in plain terms; this hub goes deeper on each decision.
Support is the part beginners skip and pay for. A 600mm-equivalent lens magnifies every twitch of your hands. I run a carbon travel tripod with a fluid-style head for static hide work and a bean bag draped over a car window or fence post for opportunistic shots. Both cost a fraction of a stop of image stabilization and steady the frame in ways IS alone can’t at long reach.
The fourth piece, the one nobody lists, is clothing that lets you sit still in cold for hours. My most productive Scandinavian winter mornings have been spent motionless at minus 10 Celsius waiting for a goshawk that showed up twice in three weeks. Insulated layers, fingerless gloves under shooting mitts, and a thermos are wildlife gear as surely as the lens is. You cannot photograph what you’ve already retreated indoors to avoid, and the animal’s window doesn’t care about your comfort.
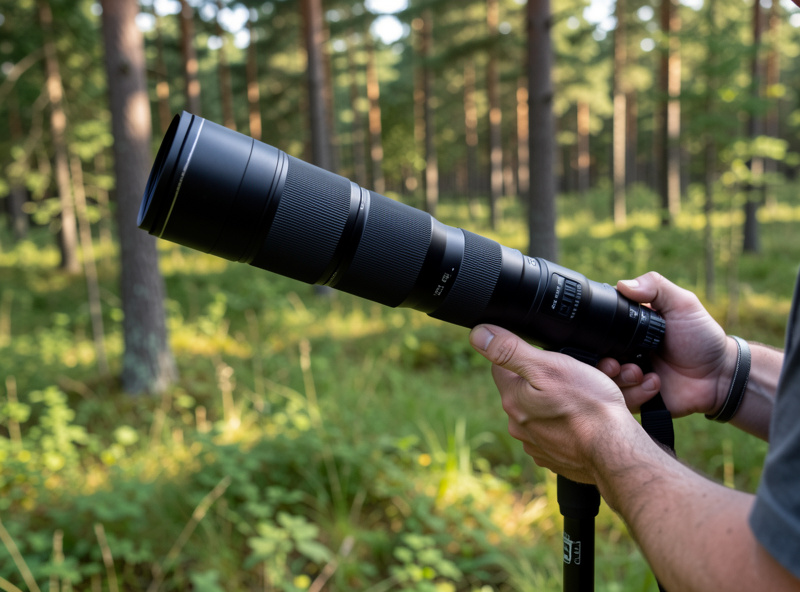
The wildlife sweet spot is a 150-600mm class zoom: it covers the reach you need, costs a fraction of a pro prime, and the variable aperture (typically f/5-6.3) is workable in daylight. The dedicated telephoto decision — superzoom vs prime, third-party vs first-party, the APS-C crop advantage — gets its own full breakdown in my guide to the best telephoto lens for wildlife, and the bird-specific kit (longer reach, faster AF, lighter rigs for handholding) has its own bird photography gear guide — I treat them separately because the trade-offs diverge. For the lens fundamentals underneath all of it, my take on prime vs zoom lenses and the camera lens versus telescope comparison both feed directly into how you pick reach.
On the body side, the crop factor is your friend here. My 40MP X-T5 turns a 100-400 into a 600mm-equivalent frame with room to crop further, which is exactly why I reach for the APS-C body for distant birds and the full-frame Sony a7 IV for larger mammals in low light. That trade-off — pixel density versus high-ISO headroom — is the real full-frame versus APS-C question for wildlife, not the spec-war version. If you’re still assembling a system, my camera buying guide and the guide to camera lens types set the foundation.
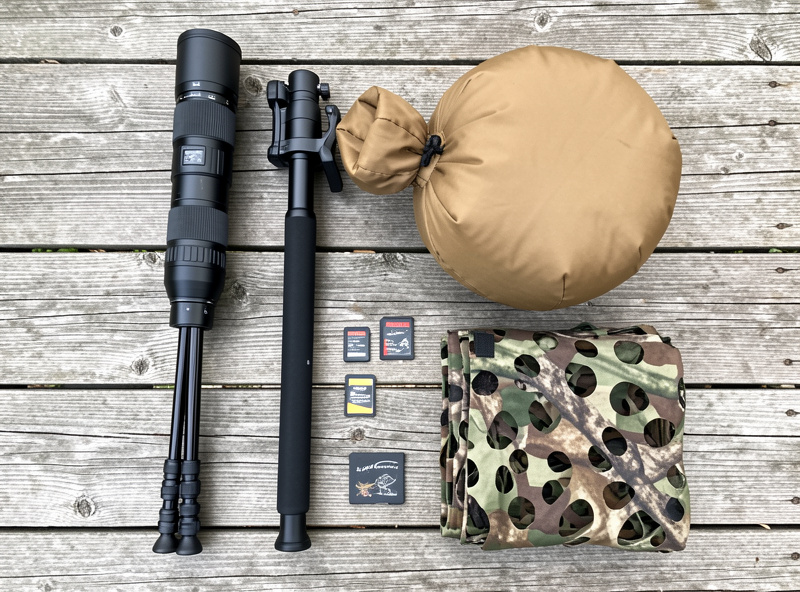
Don’t overlook the supporting cast. Long lenses drain batteries fast in cold weather, and a wildlife session means a lot of buffer-clearing burst frames, so fast, high-capacity memory cards matter — I cover the spec that actually counts in my memory cards for photographers guide. A proper tripod for a mirrorless camera and the right camera bag round out a field kit, and the broader essential camera accessories list is worth a read before your first long day out.
Start in shutter priority or manual with auto-ISO: 1/1000s minimum for perched birds, 1/2000s or faster for birds in flight, continuous autofocus (AF-C) on, and burst mode engaged. Aperture sits near wide open on most superzooms because you need every photon and the depth of field at distance is already generous.
The single biggest mistake I see — and made myself — is shooting too slow. A great horned owl turning its head looks frozen at 1/250s and is a smear at the same exposure if the body moves. I default to 1/1600s for general wildlife and only drop lower for deliberately static, tripod-locked subjects. The full decision tree — metering, ISO ceilings, drive modes, how I expose for white feathers without blowing them — is involved enough to handle on its own, and I lay it out frame by frame in my deep dive on wildlife photography camera settings that work. The principles overlap heavily with fast-action work, so my sports photography settings piece is a useful companion for the panning and shutter-speed math, and night and long-exposure technique covers the low-light end.
Auto-ISO with a ceiling is the setting that changed my hit rate most. I cap it at ISO 6400 on the X-T5 and 12800 on the a7 IV, set my shutter and aperture, and let the camera ride the ISO to hold exposure as light shifts under canopy. It frees me to track the animal instead of chimping the meter. Modern sensors clean up high-ISO files better than most shooters assume — the noise floor is rarely the thing that ruins a wildlife frame. Motion blur and missed focus are.
Drive mode is the other setting people misjudge. I shoot in mechanical or electronic burst at around 8-15 frames per second, but I don’t spray-and-pray. I wait for behavior — a heron’s neck cocking before a strike, a fox shifting weight before a pounce — then fire a short burst through the action. A 40-frame machine-gun blast just fills the card and the buffer with near-identical frames; three frames timed to the moment beat thirty timed to nothing. This is where reading the species pays off more than any spec, and it’s why I’ll happily trade a faster body for a lens that reaches further.
Continuous autofocus (AF-C) keeps refocusing as your subject moves, and modern subject-detection AF can lock onto an animal’s eye and stick to it through the frame. This is the feature that separates a usable wildlife body from a frustrating one — far more than megapixels.
I run back-button focus for everything wildlife: thumb holds AF-C, shutter just fires. It lets me pre-focus on a perch, wait, and shoot the instant a bird lands without the camera hunting. How tracking modes, AF area sizes, and animal-eye detection actually behave in the field deserves its own deep treatment, because the menu settings are where most keeper rates are won or lost — I walk through every one of them in my guide to continuous autofocus for wildlife photography. If you’re still choosing between systems, the autofocus difference is a real part of the system decision for wildlife — it outweighs almost every other spec on the sheet.
One field truth no spec sheet tells you: subject detection is brilliant on a clean background and unreliable against busy reeds or branches. When a bird is buried in clutter I switch from wide-area tracking to a single small AF point and place it on the eye manually. Knowing when to trust the algorithm and when to override it is the actual skill — the camera is a tool, not a substitute for understanding your subject’s behavior.
Birds in flight demand 1/2000s or faster, continuous autofocus with a wide tracking area, and pre-focus on the flight path before the bird enters it. Pan smoothly with the bird, keep both eyes open, and fire short bursts. Expect a low keeper rate even when you do everything right.
This is the discipline that humbled me most. My first serious go at a sea eagle quartering a Swedish fjord produced 400 frames and four sharp ones. The fix was technique, not gear: I stopped jabbing the shutter at the bird and started acquiring focus early on empty sky along its path, letting AF-C settle, then panning into the bird so tracking was already locked when it filled the frame. A monopod under the lens damps the vertical wobble while leaving you free to swing horizontally — the single best tool for flight work after the lens itself.
Shutter speed is non-negotiable here. Wingtips travel fast even when the body looks slow; 1/1600s blurs a gull’s primaries and 1/2500s freezes them. I’ll push ISO hard to keep that speed, because a clean blur is a deleted frame and a slightly noisy sharp one is a keeper. Shoot against open sky when you can — it gives subject-detection AF the clean background it needs — and accept that flight photography is a numbers game even for experienced shooters. The skill is raising your hit rate from one-in-a-hundred to one-in-ten, not to certainty.
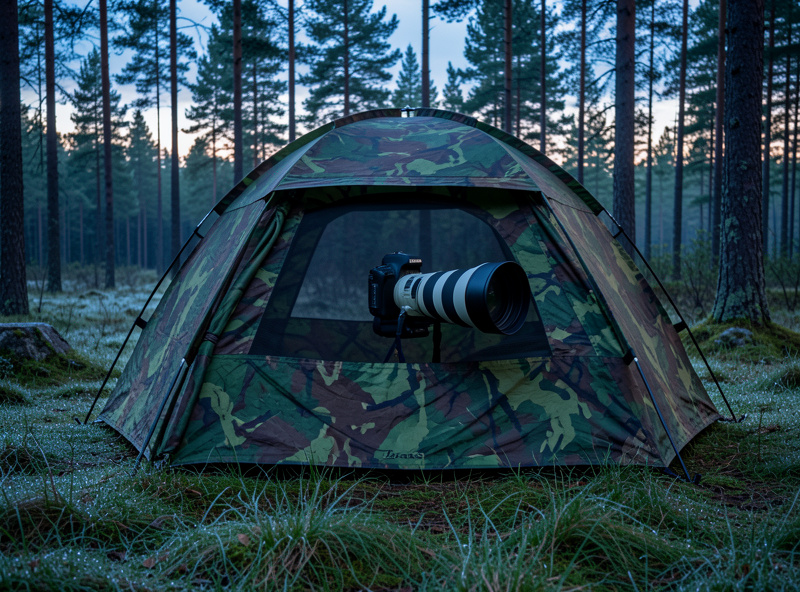
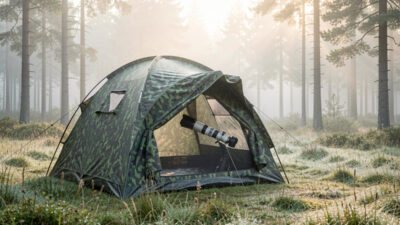
A hide (or blind) is a camouflaged shelter that lets you get close to wary animals without spooking them. A basic pop-up costs about the same as a mid-range memory card and routinely halves the distance you can work at — which on a fixed lens is the same as buying more focal length for a tenth of the price.
Most of my best frames came from sitting still in a hide near a feeding station or a forest edge, not from stalking. Animals habituate to a static, scent-controlled shape far faster than to a moving human. The whole approach — pop-up versus permanent, where to site one, how long to let wildlife settle, what to wear — fills my wildlife photography hide and blind guide, but the headline is simple: concealment buys you proximity, and proximity is free focal length. Quiet handling matters too — a strap that doesn’t creak and a bag that opens without a zip-rasp are part of the same fieldcraft, which is why I’m picky about my camera strap on long, still sits.
Fieldcraft beats gear more often than photographers want to admit. Reading light direction so the sun is behind you, learning a species’ routine so you’re in position before it arrives, moving like prey rather than predator — these are free and they out-produce any lens upgrade. The Nordic summer’s endless blue hour is a gift here: I can sit a Scandinavian forest edge from 3am golden light through a soft, shadowless mid-morning without the harsh midday gap that plagues lower latitudes.
Ethical wildlife photography means the animal’s welfare always outranks your shot: keep your distance, never bait or disturb nesting sites, and accept that some frames aren’t worth taking. A long lens exists precisely so you don’t have to crowd your subject.
This isn’t soft sentiment — it’s craft. A stressed animal gives you stressed body language and flat behavior; a relaxed one, photographed from a distance it tolerates, gives you natural action. The reach of a 600mm lens is what buys that distance. The specific lines — flush distances, nesting season, drone disturbance, the “no photo is worth harm” rule — matter enough that every serious wildlife shooter should settle them before buying gear, not after, which is why I gave them a full ethical wildlife photography field guide of their own. The same patience-and-distance ethic carries into the calmer garden and backyard photography I shoot in the off-season.
In Scandinavia the rules also intersect with allemansrätten (the right to roam) — broad access, but explicitly conditioned on not disturbing wildlife or breeding birds. That cultural baseline shaped how I work: low impact is assumed, not optional. Photograph the animal living its life; don’t manufacture the moment.
There’s a practical test I apply in the field: if the animal has changed its behavior because of me — stopped feeding, raised its head in alarm, abandoned a perch — I’m too close, and I back off regardless of the shot. Alarm calls, repeated head-bobbing, and a frozen posture are the signs to read. A nesting bird that flushes off eggs because a photographer pushed in can lose the whole clutch to cold or predation in minutes; no image justifies that, and it’s the fastest way to ruin a site for every shooter after you. The long lens is the ethical tool precisely because it lets the animal stay ignorant of you, and an unaware subject behaves naturally, which is the only kind of wildlife photograph worth keeping.
Clean backgrounds come from three choices: a long focal length that compresses and blurs the backdrop, a low shooting angle that puts distant scenery behind the subject, and a wide aperture. Get down to the animal’s eye level and the messy ground behind it melts into smooth color.
This is the difference between a snapshot and a photograph, and it’s almost entirely about position, not money. A 500mm lens at f/6.3 already throws a far background into soft wash; what ruins most wildlife shots is a high shooting angle that drops the cluttered forest floor directly behind the subject. I kneel, I lie prone on a foam mat, I shoot through gaps so foreground grass becomes a dreamy blur. On my X-T5 I watch the histogram and protect the highlights on pale fur and white feathers, because clipped feather detail is unrecoverable and far more damaging than a little shadow noise.
Light direction is the free lever. Front light from a low sun lands an even, flattering wash on the subject and a catchlight in the eye — that tiny specular glint is what makes an animal look alive rather than taxidermied. Side light carves texture into fur and feather. I plan sits around the sun’s position, not just the animal’s, and at Nordic latitudes the long low-angle light of a summer morning or a winter midday is the most usable wildlife light I’ve ever worked in.
Start with garden birds, waterfowl at a local pond, and habituated park animals. They’re tolerant of people, predictable in their routines, and forgiving of the mistakes you’ll make learning to track focus and time bursts. Mastery here transfers directly to wary, distant species later.
I tell every beginner the same thing: don’t start with a lynx. Start with a robin on a feeder ten feet away. A garden feeding station turns your back yard into a controlled studio where the same birds return on a schedule, the light is known, and you can run a hundred focus-tracking attempts in an afternoon. By the time I moved to skittish forest species, the muscle memory — thumb on AF-C, eye on behavior, finger ready — was automatic. The reps came cheap and close before they had to count far and fleeting.
Waterfowl are the next rung: ducks, geese, swans, and herons sit at the edge of comfortable working distance, move predictably, and give you flight-takeoff practice without the difficulty of a swift or a swallow. Scandinavian wetlands in particular are dense with photographable waterbirds through the long summer light. Build the skills on the easy subjects, then spend them on the hard ones — and let the gear, especially the reach, scale up only as your fieldcraft demands it.
Here’s how the core kit categories stack up so you can prioritize spending. Reach and autofocus are where the money does the most work; support and concealment are the cheap multipliers most people underbuy.
| Gear Category | Why It Matters | Typical Spend | Priority |
|---|---|---|---|
| Telephoto lens (150-600mm class) | Reach to fill the frame from a safe distance | High | Essential — buy first |
| Body with strong AF-C / animal-eye AF | Locks and holds focus on moving subjects | High | Essential |
| Monopod / bean bag | Steadies long lenses, reduces fatigue | Low | High value, low cost |
| Pop-up hide / blind | Halves working distance to wary animals | Low | High value, low cost |
| Camouflage clothing | Breaks your outline near skittish species | Low | Useful, situational |
| Fast, high-capacity memory cards | Sustains long bursts without buffer stalls | Low-Mid | Recommended |
If I were starting today with a fixed budget, I’d put roughly 60% into the longest, sharpest telephoto I could afford, 30% into a body with proven animal-eye AF, and the last 10% into a bean bag, a pop-up hide, and a fast card. That ratio produces more keepers than any other split I’ve tried.
Resist the body-upgrade reflex. The crop factor of an APS-C sensor like my X-T5’s stretches every millimeter of focal length, which is why I’ll often grab it over the full-frame a7 IV for distant birds even though the Sony is the “better” camera on paper. Match the tool to the subject: APS-C and a long zoom for small, distant, skittish wildlife; full-frame for larger mammals in dim forest light. The camera that records all of this is the same one I use to document every other workshop project — wildlife is just the subject that demands the most reach and the most patience.
You need at least 300mm, and 400mm or more for birds. A 150-600mm class zoom is the practical sweet spot: enough reach to fill the frame from a safe distance at a fraction of the cost of a pro prime.
Use shutter priority or manual with auto-ISO, 1/1000s minimum (1/2000s for birds in flight), continuous autofocus, and burst mode. Cap auto-ISO around 6400 and let the camera ride exposure while you track the animal.
APS-C wins for distant birds because the crop factor multiplies your reach. A 40MP APS-C body turns a 400mm lens into a 600mm-equivalent frame. Full-frame is better for larger mammals in low forest light where high-ISO headroom matters more.
For wary species, yes. A basic pop-up hide costs about the same as a mid-range memory card and routinely halves your working distance, which on a fixed lens is like buying more focal length for a tenth of the price.
Keep your distance, never bait or disturb nesting sites, and accept that some frames aren’t worth taking. A long lens exists so you don’t have to crowd your subject. A stressed animal gives flat behavior anyway, so ethics and good images align.
For birds in flight, use 1/2000s or faster. Perched birds need 1/1000s minimum. Drop slower only for deliberately static, tripod-locked subjects, since long focal lengths magnify every twitch of motion.

The best telephoto lens for wildlife is a 150-600mm class zoom: it reaches far enough…
A wildlife hide is the single biggest jump in keeper rate you can buy without…
The core wildlife photography camera settings are simple: shutter priority or manual with auto-ISO, 1/1000s…
Leave a Reply