Essential Camera Accessories: The Gear That Actually Improves Your Photography
The camera body you shoot matters less than the accessories you use with it. A…
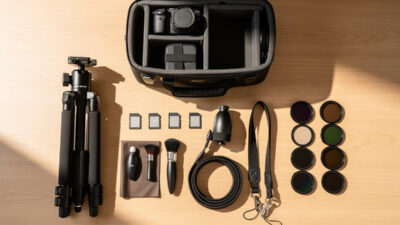
A camera bag is the one accessory every photographer owns, and most own the wrong one. The right bag gets the camera from safe to shooting in under five seconds. The wrong bag sits in a closet — which is how I damaged my first lens.
I own two bags — a Peak Design Everyday Sling 6L for everyday and street work, and a Lowepro PhotoSport BP 200 for landscape days — and that is exactly the number I need. Buying the right camera bag comes down to matching the bag to how you actually shoot, not how you imagine you will shoot.
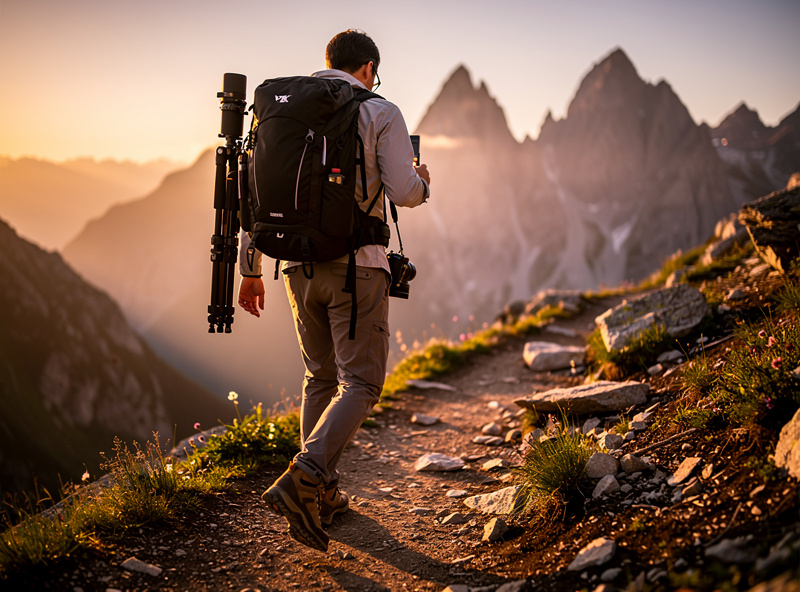
A camera backpack carries the most gear with the least fatigue. It distributes weight across both shoulders, leaves both hands free, and holds two bodies with four lenses plus accessories without straining. A backpack is the right choice for hiking, landscape work, multi-day trips, and any situation where you walk more than a mile with your gear. The trade-off is access speed — you have to set the backpack down to open it and swap lenses, which takes 30 seconds compared to 5 seconds from a shoulder bag. That 25-second difference adds up across a full day of shooting, and it is the reason a backpack is the wrong choice for street photography or event work where the moment does not wait.
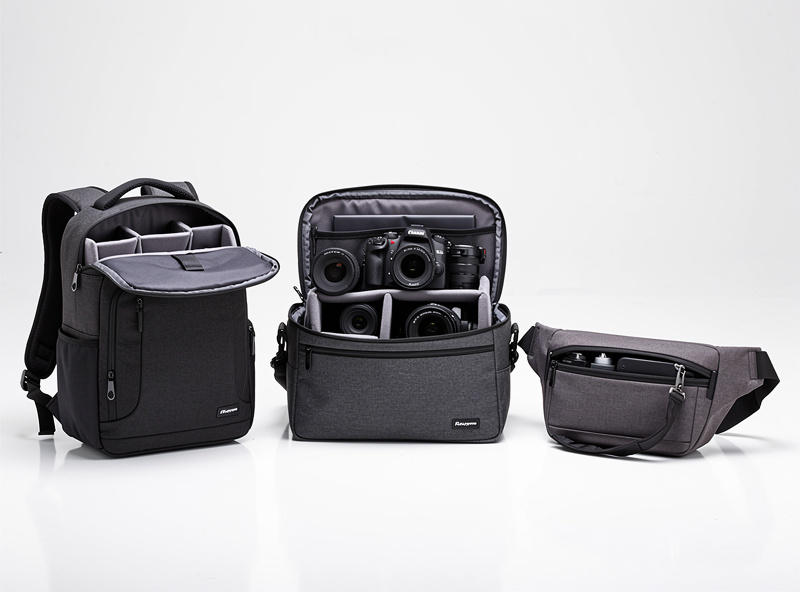
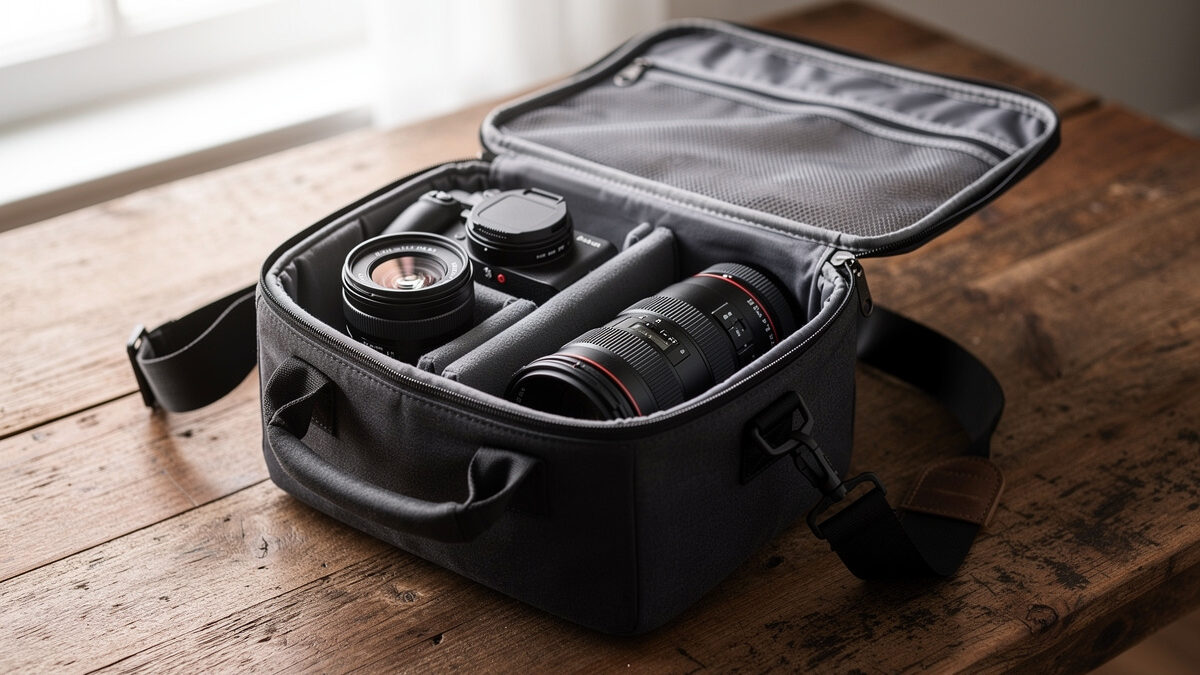
A shoulder bag prioritizes access speed over carrying capacity. It holds one body and two to three primes, sits at your hip, and lets you swap lenses without putting anything down. A shoulder bag is the right choice for street photography, casual shooting, and any situation where you are on your feet and need to react quickly. The trade-off is weight distribution — a shoulder bag with a body and two lenses weighs about 6 pounds hanging off one shoulder, which becomes uncomfortable after about two hours. For shorter sessions, the access speed is worth the weight. For all-day events, a sling or backpack is a better choice.
A sling bag splits the difference. It rides on your back like a small backpack but rotates to the front for access, combining the weight distribution of a backpack with the access speed of a shoulder bag. A sling holds one body and two lenses, which is enough for most single-day shooting, and it is the bag I recommend for shooters who need to carry gear all day but want to access it quickly. The limitation is capacity — a sling cannot carry a second body or a full flash kit, and if your kit grows beyond the sling’s capacity, you are back to choosing between a backpack and a shoulder bag.
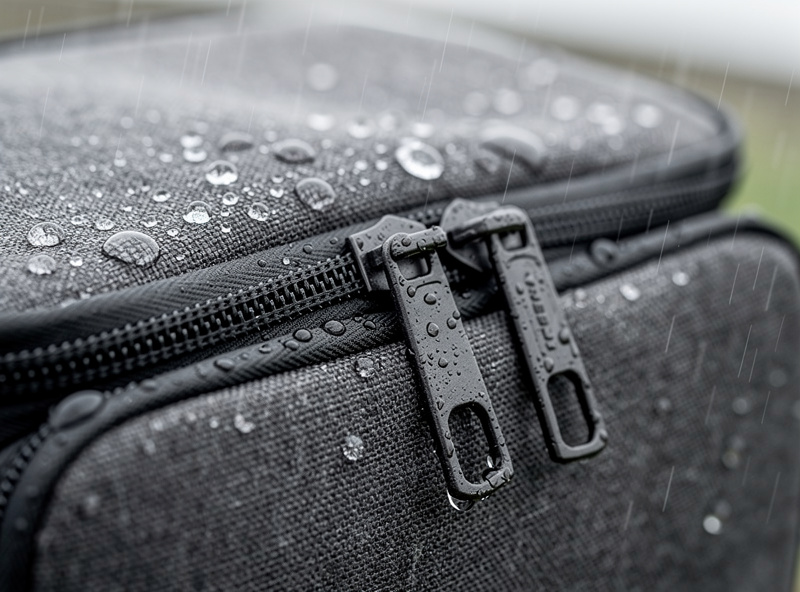
Weather resistance is the first feature that separates a good bag from a decorative one. A bag that cannot handle 20 minutes of rain is not safe for outdoor photography, and outdoor photography is where the best images happen. Look for a rain cover included with the bag or built-in water-resistant fabric with sealed zippers. I have been caught in sudden Swedish rainstorms with my gear in a weather-sealed bag, and the relief of knowing the camera is dry is worth the premium paid for the bag. The IEC 60529 standard defines IP ratings for water and dust ingress (IPX4 splash-resistant, IPX5 low-pressure jets), and bag manufacturers cite these inconsistently — treat any bag without a stated IP rating as splash-resistant at best. The sensory tell that a bag is genuinely sealed is the resistance in the zipper pull: a $30 bag’s zipper slides like silk because nothing is sealing it, while a $150 weather-sealed bag’s zipper takes a half-second longer to close because the urethane seal is doing its job. If your zipper closes silently and effortlessly, you do not own a weather-resistant bag.
A rigid bottom panel is the second feature that matters. The bottom of the bag absorbs impact when you set it down, and a soft-bottom bag transfers that impact directly to the lens mounted on the body. A rigid bottom panel with foam padding absorbs the shock instead. This is not a luxury — it is the difference between a lens that survives three years of shooting and a lens that needs a trip to the repair shop after being set down too hard on concrete.
The third feature is a layout that lets you grab the camera without taking the bag off. A shoulder bag with a top flap that opens away from your body does this naturally. The Peak Design Everyday Sling I use rotates to the front for one-handed access without removing a strap. A backpack almost never does it — and that is the design trade-off you accept for the carrying comfort. For more on how bag choice fits into a complete accessory strategy, the essential camera accessories guide covers how bags, tripods, and straps work together as a system.
The mistake I see most often is buying a bag for the kit you plan to own, not the kit you actually carry. A bag sized for two bodies and six lenses when you own one body and two lenses is a bag full of empty dividers that weighs more and costs more than a properly sized bag. Buy the bag that fits your current kit plus one slot for the next lens you actually plan to buy — not the bag that fits the kit you would own if you won a shopping spree.
My rule for sizing: lay your gear on a table. Measure the footprint. Buy the bag that fits that gear with one empty slot for a future addition. If your gear outgrows the bag, you upgrade the bag — but by then you will know exactly what kind of shooting you do and what bag features matter for that shooting. The first bag is rarely the last bag, and the cost of starting with a correctly sized $80 bag and upgrading to a $180 bag when your needs are clear is lower than buying a $250 bag that is too big for your current kit and too compromised for your future needs. The camera buying guide follows the same principle — buy for the photography you do, not the photography you imagine.
The fabric a bag is built from matters as much as its shape, and it is the spec sheet detail most buyers skip past. Ballistic nylon and Cordura are the two materials worth paying attention to. Cordura’s own fiber testing under the ASTM D3884 abrasion standard puts its high-tenacity nylon at roughly three times the abrasion resistance of standard nylon — the kind of number that matters when the bag is getting set on granite, dragged across a car trunk edge, or scraped against a tripod leg every single outing. Canvas looks better in a product photo than either of them, but it absorbs water and adds weight once it is wet, which is exactly the wrong failure mode for a bag whose entire job is keeping gear dry.
Denier — the fiber-thickness number printed on nearly every bag’s spec sheet — is the other figure worth reading before you buy. A 1000D Cordura panel is a genuinely different product from a 420D ripstop panel wearing the same silhouette; the higher number is heavier but shrugs off years of abrasion that would fray the lighter fabric within a season. I look for 500D or higher on the bottom panel specifically, since that is the surface doing the most contact with rock, pavement, and truck beds — the rest of the bag can run a lighter denier without much practical cost. None of this shows up in a product photo, which is exactly why it is worth checking the spec sheet instead of judging a bag by the marketing copy.
| Type | Budget Pick | Best Mid-Range | Capacity | Weight |
|---|---|---|---|---|
| Shoulder Bag | Lowepro Tahoe BP 150 ($50) | Peak Design Everyday Sling 6L ($120) | 1 body + 2 lenses | 1.5 lbs |
| Sling Bag | Amazon Basics Sling ($30) | Think Tank TurnStyle 10 ($90) | 1 body + 2 lenses | 1.2 lbs |
| Day Backpack | Lowepro PhotoSport BP 200 ($80) | Shimoda Explore V2 25 ($230) | 2 bodies + 4 lenses | 3.5 lbs |
| Travel Backpack | Manfrotto Advanced Travel ($100) | Peak Design Travel Backpack 30L ($230) | 2 bodies + 3 lenses | 3.0 lbs |
| Hiking Backpack | Lowepro Flipside 300 ($90) | F-Stop Guru UL ($200) | 2 bodies + 4 lenses | 2.5 lbs |
The table covers the five major bag categories at two price points. The shoulder bag and sling bag tiers are where most mirrorless shooters should start — they hold the typical one-body two-prime kit and prioritize access speed for the kind of reactive shooting that mirrorless cameras excel at. The backpack tiers are for shooters who carry a full kit on long walks, and the premium paid in those tiers buys lighter materials and better weather sealing rather than more capacity.
For the bag I reach for every day, the shoulder bag format wins on access speed. I carry one body, two primes, spare batteries, and memory cards — that fits in my Peak Design Everyday Sling 6L that weighs under 2 pounds loaded. The backpack comes out when the tripod comes out, which is landscape-specific and happens less often than the everyday shooting the shoulder bag supports. Two bags, two purposes, and I have not bought a third in three years — which is the metric that says the system works.
A dedicated camera bag is not the only path to protecting gear, and it is worth saying plainly because most buying guides skip it entirely. A padded camera insert — a soft cube with adjustable dividers — turns any ordinary backpack, duffel, or carry-on into a camera bag the moment you drop it in, and it turns back into an ordinary bag the moment you take it out. For travel specifically, this matters more than it sounds like it should: a generic-looking backpack draws no attention from anyone eyeing camera gear, while a bag with an obvious brand logo and a camera-shaped silhouette does exactly the opposite. I have used this approach on trips where the destination made a conspicuous camera bag feel like a bad idea, and the insert did its job invisibly.
The trade-off is access speed, and it is a real one. Reaching a body and lens means opening the outer bag and then the insert, which is slower than any dedicated shoulder bag or sling on this list. That is a fair price for the flexibility on a trip where the same backpack needs to carry camera gear one day and hiking layers or laundry the next. I do not reach for this setup for daily shooting around home, where a dedicated bag earns its keep through speed, but for a trip where the bag needs to serve double duty, an insert is the more honest answer than trying to force a dedicated camera bag to also be a general-purpose travel bag. Buy the insert sized to your actual kit, the same rule that applies to every bag in this guide, and the backpack you already own quietly becomes a second camera bag without costing you a second bag’s worth of money.
A shoulder bag for street photography, events, and shoots under two hours — it offers the fastest lens access. A backpack for hiking, landscape, and multi-day trips where carrying comfort outweighs access speed. A sling bag splits the difference for all-day urban shooting with a minimal kit.
Lay your current gear on a table and measure the footprint. Buy a bag that fits that gear plus one empty slot for your next planned purchase. Do not buy a bag sized for a kit you do not own yet — oversized bags are heavier, more expensive, and encourage carrying gear you do not need.
Yes, absolutely. A bag that cannot handle 20 minutes of rain is not safe for outdoor photography. Look for a rain cover included with the bag or built-in water-resistant fabric with sealed zippers. The cost of weather sealing is far lower than replacing a water-damaged body or lens.
Ballistic nylon and Cordura are the gold standards for durability and water resistance. ASTM D3884 abrasion testing from INVISTA shows Cordura-grade fabrics outlast standard nylon by a significant margin. Canvas bags look good but absorb water and weigh more. Ripstop nylon is lighter but less abrasion-resistant. For daily use in all conditions, a ballistic nylon bag with a rain cover lasts the longest.
Yes, and this is a smart approach for travel photography. A padded camera insert cube placed inside a normal backpack provides gear protection without advertising that you are carrying expensive camera equipment. The trade-off is slower access — you have to open the backpack and then the insert.
The camera body you shoot matters less than the accessories you use with it. A…
Sensor dust is the silent killer of landscape shots. You will not notice it at…
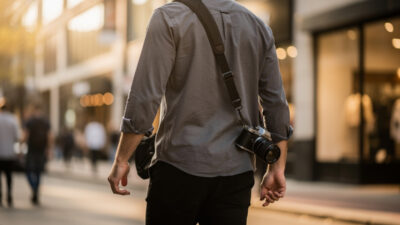
A bad camera strap hurts your neck physically. After an hour with the thin nylon…
Leave a Reply