Hyperfocal Distance Made Simple: Getting Everything in Focus
Hyperfocal distance is the closest focus setting that keeps everything from half that distance out…
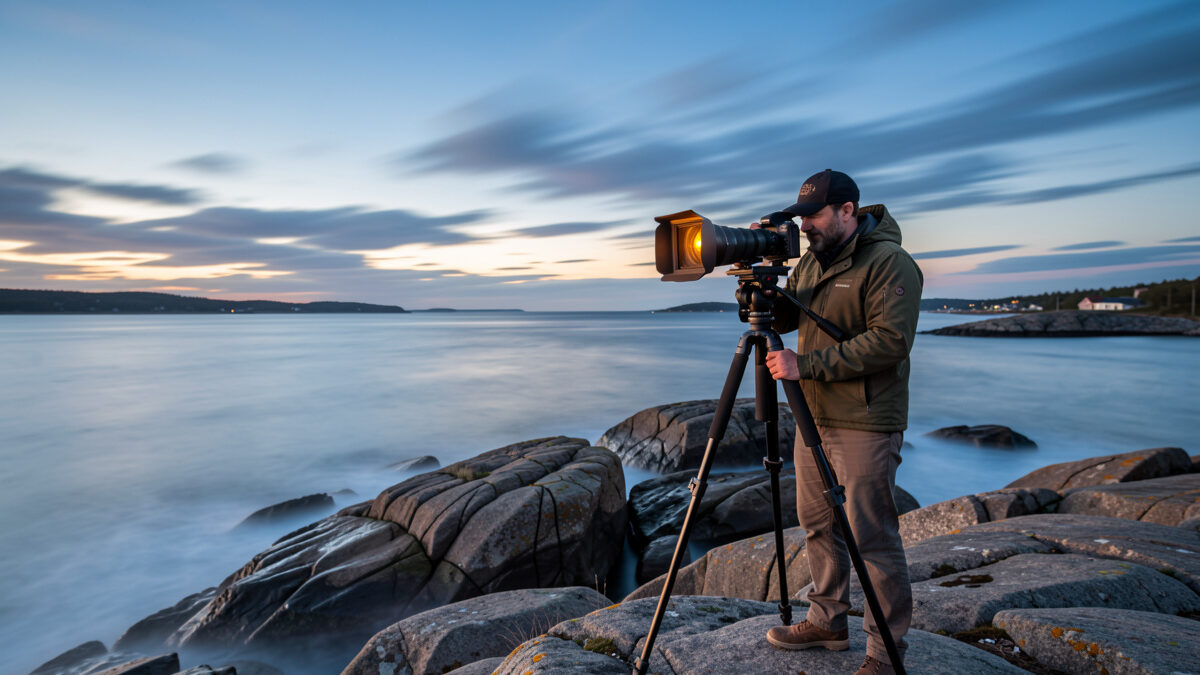
Daytime long exposure photography means stacking a strong neutral-density filter over your lens so the shutter can stay open for seconds or minutes in bright light, turning moving water, clouds, and crowds into smooth motion while everything static stays razor sharp. A 10-stop ND turns a 1/60s reading into roughly 15 seconds. That single conversion is the whole craft in miniature.
I shoot this stuff on a Fujifilm X-T5, and that 40MP APS-C sensor is unforgiving: a tripod that flexes half a millimeter in a gust shows up as a smeared horizon at 100%. So when I say daytime long exposure lives or dies on three things — the right filter density, an exposure calculation you can trust, and a locked-down platform — I’ve earned each of those the hard way, usually by driving 40 minutes to a waterfall and coming home with 30 soft frames.
This is the map for the whole cluster. Below I’ll walk the gear, the math, the subjects that actually reward the technique, and the failure modes that eat your card. Every deep dive — the ND math, silky water, cloud motion, vanishing crowds, light painting, the softness fixes, the remote releases — branches off from here.
A daytime long exposure is any bright-light frame where you deliberately push the shutter past the point where moving elements blur — practically, anything from about 1/2 second to several minutes shot when the sun is up. The defining feature isn’t the clock; it’s that you’re fighting too much light, not too little, which is the opposite problem from night shooting.
That distinction matters because the entire toolkit flips. At night you open the aperture, crank ISO, and hunt for photons. In daylight you do the reverse: base ISO, a mid aperture, and a filter that throws away 90 to 99.9 percent of the light so the shutter has an excuse to stay open. On my X-T5 at ISO 125, f/11, a bright overcast beach reads about 1/125s naked. Drop a 10-stop ND on and the same scene wants 8 seconds. Nothing about the light changed — I just changed how long I let it in.
People conflate this with the light-trail and star-trail work you see at night, but the craft is genuinely separate. If you want the after-dark version, that’s its own discipline; here the sun is your antagonist. The census of long-exposure guides online is stuffed with night tutorials and nearly empty of serious daytime ND work, which is exactly the gap this cluster fills.
You need four things and only four: a camera that shoots in manual with a bulb mode, a genuinely rigid tripod, a neutral-density filter of the right strength, and a way to trigger the shutter without touching the camera. Everything else is comfort. I’ve made frames I’ve printed to A2 with exactly that list.
The camera almost doesn’t matter — this is one of the few genres where a body upgrade is truly sideways. My X-T5 and my Sony a7 IV produce indistinguishable long exposures once the filter is on, because at 8 seconds neither sensor’s autofocus or burst rate is doing anything. What matters is that the camera can meter manually and hold bulb for arbitrary durations. The lens matters more than the body: I reach for the XF 16-55mm f/2.8 as my do-everything long-exposure zoom because its 77mm front thread takes my filter holder cleanly and it’s sharp corner-to-corner by f/8, which is exactly where I shoot these.
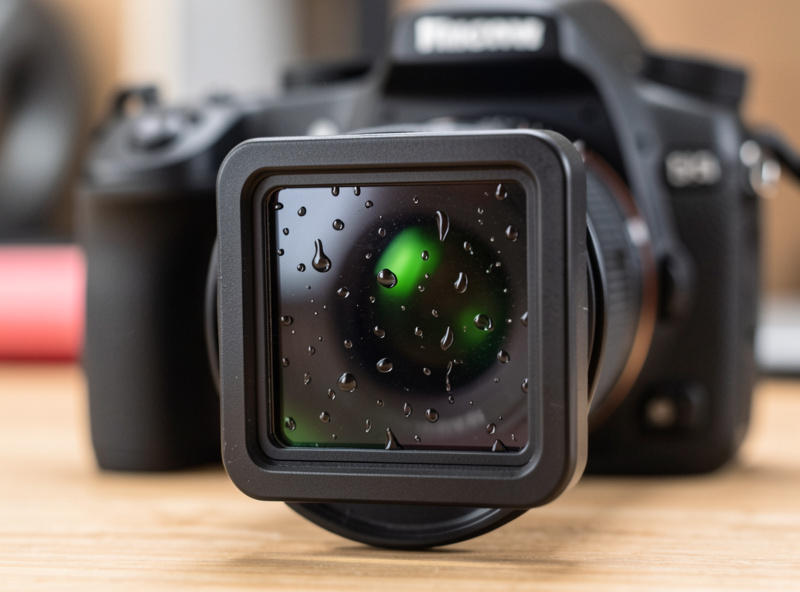
The tripod is where beginners underspend and pay for it forever. A flexy travel tripod with the center column extended is the single most common reason daytime long exposures come out soft — I’ve diagnosed it on my own frames enough times to write a whole piece on it. I run a carbon travel tripod with a geared head, legs planted wide, center column down, and I hang my bag off the hook in wind. If your exposures keep coming out mushy, start there before you blame the lens; I break down every cause in why your long exposures are soft.
The trigger is the cheap insurance most people skip. Pressing the shutter with your finger at 8 seconds usually survives; at 4 minutes it doesn’t, and bulb mode needs something to hold the shutter open anyway. A basic remote release or a programmable intervalometer removes your hand from the equation entirely — I cover which ones are worth buying in the best remote shutter releases and intervalometers.
For most daytime long exposures you want a 6-stop and a 10-stop ND, and that pair covers roughly 90 percent of real shooting. A 6-stop gets you into the 1–4 second range for silky streams under cloud; a 10-stop pushes you to 15–60 seconds for smooth clouds and vanishing crowds. Anything stronger is a specialist tool.
Neutral-density strength is quoted three confusing ways — stops, optical density number, and filter factor — and manufacturers mix them, so a chart earns its place. Here’s how the common strengths line up and what each one is actually for, based on how I use them in the field.
| Stops reduced | ND number | Filter factor | 1/125s becomes | What I use it for |
| 3 stops | ND8 / 0.9 | 8× | 1/15 s | Waterfalls in shade, slight blur |
| 6 stops | ND64 / 1.8 | 64× | 1/2 s | Streams, seascapes under cloud |
| 10 stops | ND1000 / 3.0 | 1000× | 8 s | Smooth clouds, thinning crowds |
| 15 stops | ND32000 / 4.5 | 32000× | 4 min 20 s | Bright-sun minutes-long cloud streaks |
| Variable ND | ~1–9 stops | range | varies | Video, quick adjustments (X-pattern risk) |
I own a 6-stop and a 10-stop in a 100mm square system, plus a cheap variable ND I only trust for video. Variable NDs save time but the honest ones top out around 6 real stops before the dreaded dark cross-pattern appears in the corners — a physics artifact of two polarizers, not a defect you can shop your way out of. For a fixed strength, buy quality glass: a cheap 10-stop resin filter will dump an ugly magenta or teal cast across the whole frame that costs you an hour in Lightroom. The full breakdown of picking a density for a given effect lives in the ND filter long exposure calculation guide.
The math is one rule: every stop of ND doubles your shutter time. Meter the scene without the filter, count the stops of your filter, and double the base time that many times. A base of 1/60s through a 10-stop ND becomes 1/60 doubled ten times — about 15 seconds. Do it on your fingers and you’ll never trust a wrong app reading again.
Here’s the sequence exactly as I run it on the X-T5. Compose and focus first, meter in manual until the histogram sits where I want it — I expose to the right (ETTR) to protect shadow detail, then note the shutter, say 1/125s. My 10-stop adds ten stops. Counting the doublings from 1/125: 1/60, 1/30, 1/15, 1/8, 1/4, 1/2, 1s, 2s, 4s, 8s. Ten doublings lands on 8 seconds. I set bulb, dial 8 seconds on the intervalometer, and shoot. If the histogram after the frame is off, I adjust by whole stops — double to 16s to brighten, halve to 4s to darken.
Two traps eat beginners here. First, the doubling counts from your metered speed, not from a round number — a common app misreads because you fat-fingered the base ISO or aperture. Second, past about 30 seconds some sensors show slight reciprocity-style drift and long-exposure noise reduction can double your wait, so verify your first minutes-long frame rather than trusting the calculation blind. PhotoPills has a solid ND calculator if you’d rather not count on your fingers, but I want you to understand the doubling first. The full worked examples — including the fractional-stop filters that break the neat doubling — are in how to calculate long exposure times with an ND filter.
You focus and set your entire exposure before the ND goes on, then switch to manual focus so nothing hunts in the dark. A 10-stop filter makes the viewfinder nearly black — the camera can’t autofocus reliably through it, so any change after mounting is a gamble. This ordering is the difference between a keeper and a soft mess, and it’s the step people skip when the light is dropping and they rush.
My routine is fixed muscle memory now. Level the tripod on the geared head. Compose. Autofocus on the key subject, then flick the lens or body to manual focus so it holds. Meter and lock exposure in manual, note the shutter. Dial in a two-second self-timer or the remote so my hand never touches the body at release. Then slide the ND into the holder and recheck that focus ring hasn’t shifted. On a windy seawall last autumn I skipped the manual-focus flick, the a7 IV re-hunted through the filter, and I lost a full blue-hour window to a stack of frames focused on nothing. One flick of a switch would have saved it. I never forget it now.
There’s a light-leak wrinkle too: on mirrorless bodies at multi-minute exposures, stray light can creep in through the eyepiece and stain the frame. I cover the viewfinder with the little rubber cap or my hand for anything over a minute. It sounds fussy until you see the magenta smear it prevents.
There’s no universal number — the right duration is the one where the moving element reaches the amount of blur you want, and that’s set by how fast the subject moves and how far it travels across your frame. A stream at 1 second reads differently than the same stream at 8 seconds, and neither is “correct.” But after enough coastlines I’ve built a mental starting table I dial in from, then adjust by eye.
For flowing water I start at 1/2 second for a fast mountain stream where I want texture, 1 to 2 seconds for a classic silky waterfall that still shows direction, and 4 seconds or more only when I want total milk. Seascapes are slower because waves are slower and I’m averaging a whole set: 10 to 15 seconds pulls the foam into streaks, 30 seconds and up turns the sea into flat mist and the rocks into islands. Clouds need the most time of all — even brisk wind aloft moves the sky slowly relative to your frame, so 30 seconds is a minimum for visible streaking and one to four minutes is where cloud long exposures get dramatic. For thinning a crowd I plan on 30 seconds to two minutes depending on how fast people are walking through the frame.
The practical consequence is that your filter choice and your subject are linked: if I want two-minute cloud streaks in bright midday sun, a 10-stop isn’t enough and I reach for the 15-stop. If I only want one-second water under cloud, a 6-stop is plenty and a 10-stop would push me past the look I want. I decide the duration first from the subject, then pick the ND that delivers it at my metered light — not the other way around. That reversal is the single most useful habit I can hand a beginner.
For the daytime, seconds-long exposures most people shoot, the sensor format barely matters — my APS-C X-T5 and full-frame a7 IV produce interchangeable results because neither is starved for light with a filter on and base ISO locked. Format only starts to matter at the extremes: minutes-long frames, where thermal noise and hot pixels appear, and there the physics slightly favors the larger sensor’s bigger photosites.
I shoot both mounts specifically so I can separate sensor behavior from lens behavior, and long exposure is a clean test of it. Run a four-minute frame with the lens cap on, on a warm day, and you’ll see scattered bright hot pixels — sensor thermal noise, not anything the lens did. The full-frame a7 IV shows marginally fewer at the same duration, but the difference is small enough that on the X-T5 I just enable long-exposure noise reduction (which shoots a matching dark frame and subtracts the hot pixels) or clean them up in Lightroom with a quick heal. What genuinely matters more than format is keeping the sensor cool: I don’t leave the camera baking in direct sun between frames, and I accept that LENR doubles my wait on every minutes-long shot.
So don’t let anyone sell you a body upgrade for long exposure. The 40MP APS-C sensor’s real advantage here is the opposite of what you’d guess — at that pixel pitch it ruthlessly exposes a soft frame, which makes it a better teacher of long-exposure discipline than a forgiving low-resolution body. If your technique holds up on 40MP APS-C, it holds up anywhere.
Three subjects pay you back the most: moving water, moving clouds, and moving crowds. Each one converts chaotic motion into something a naked eye never sees — silk, streaks, or an eerily empty public space. The technique is a tool for simplifying a busy frame, and those three are where the simplification is most dramatic.
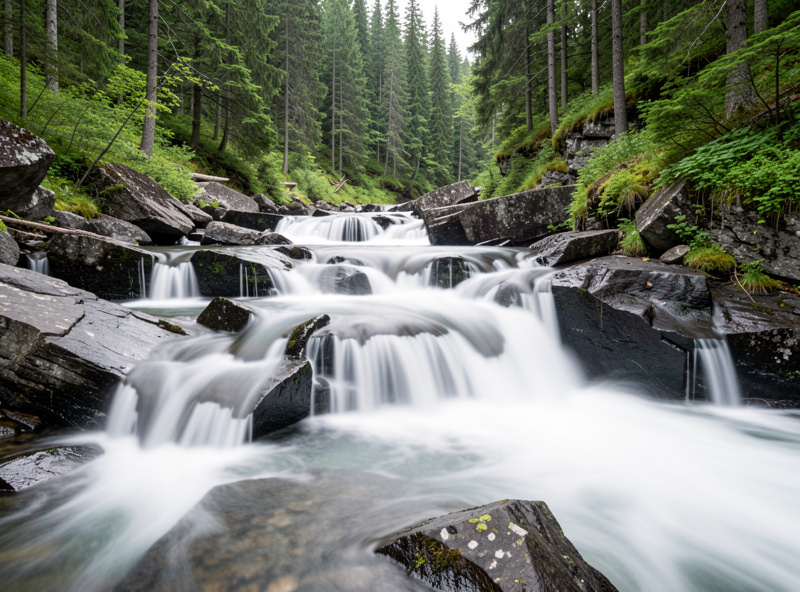
Water is the gateway drug. A stream at 1/2 to 2 seconds keeps texture and looks alive; push past 4 seconds and it goes full milk. I aim for the in-between where you still read the water’s direction. Seascapes want longer — 15 to 30 seconds to average out the waves into low mist around the rocks. The full field method, including how to time your shutter to a wave set, is in how to shoot silky water.
Clouds are the subject you have to read before you shoot. Still air gives you nothing; you want wind aloft moving the sky across your frame during the exposure, and the direction relative to your lens changes everything — clouds moving toward the camera streak radially and dramatize a composition, clouds moving sideways smear flat. I check the sky and the forecast before I even set up; the whole reading-the-sky method is in cloud motion long exposures.
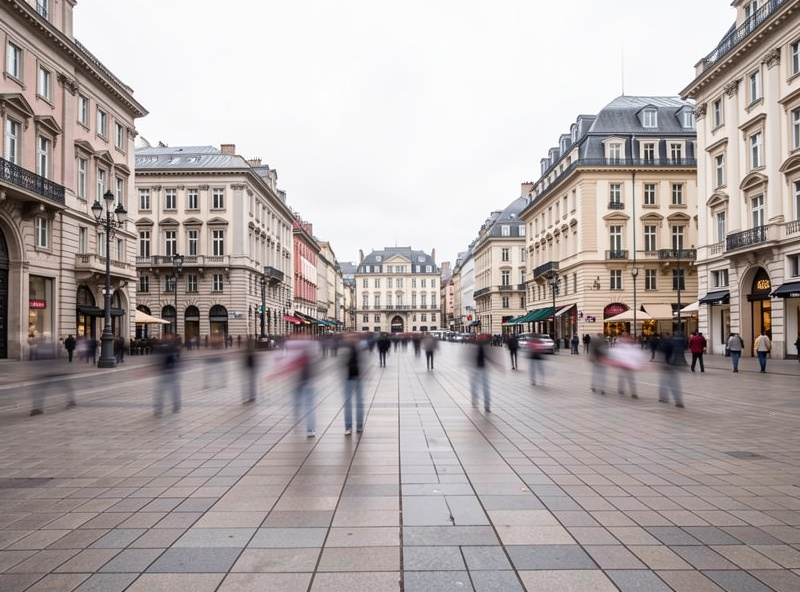
Crowds are the party trick that’s actually useful: a long-enough exposure erases anyone who keeps walking, leaving a landmark clean of tourists. It takes more time than people expect — someone who pauses to take a selfie stays as a ghost — and the density math is specific. I walk through exactly how long it takes to empty a plaza in removing people from a scene with a long exposure.
There’s a fourth, after-dark cousin worth naming because it uses the same locked-down platform: light painting, where you drag a light source through a dark frame during a long exposure to draw with it. It’s the one long exposure where you add light instead of subtracting it — the primer is light painting basics.
The four killers are a soft frame from vibration, a color cast from cheap glass, vignetting from stacked filters, and blown highlights from a metering error. Every one of them is preventable, and every one of them has cost me a shoot at least once. Softness is the most common and the most maddening because it looks fine on the rear screen and only reveals itself at home.
Softness comes from the tripod flexing, the shutter or mirror slapping (an EFCS or electronic-shutter setting fixes it on my mirrorless bodies), or wind. The fix is a rigid platform, a delayed or remote release, and hanging weight on the tripod — I diagnose all of it in why your long exposures are soft.
Color casts are a glass-quality problem. Strong resin NDs, especially cheap 10-stops, throw a heavy magenta or blue tint. Better glass minimizes it, and a custom white balance plus a raw file recovers most of the rest, but you can’t fully fix a filter that isn’t spectrally neutral. Vignetting shows up when you stack a polarizer under an ND or use a screw-in filter on a wide lens — the answer is a slim holder and a wide enough filter for your widest lens. Blown highlights come from metering wrong under the filter; expose to the right but check the blinkies on your first frame and pull back a stop if the sky is clipping.
Here’s the whole sequence condensed, the checklist I actually run coastline-side so I don’t lose a window to a dumb miss. Arrive early, scout, and set up before the light peaks — blue hour and the golden hour shoulders are when daytime long exposure sings, and you don’t get to rewind them.
Plant the tripod wide with the center column down. Level on the geared head. Compose and lock focus, then flick to manual. Meter without the filter and note the shutter. Calculate the ND time by doubling. Mount the filter, cover the eyepiece for long frames, and trigger with the remote or self-timer. Chimp the histogram and the corners at 100 percent on the very first frame — not the tenth — and adjust by whole stops. Then, and only then, start working the composition. The discipline of verifying frame one is what separates a productive session from a hard drive of soft regret. That habit — check early, check the corners, trust the histogram over the pretty rear-screen thumbnail — is the through-line of every guide in this cluster.
The same X-T5 and tripod that make these coastal frames also document the welded sim rig, the hydroponic tent, and the leather wallet on my bench — long exposure is just one more thing the camera earns its keep doing. Master the daytime version and you’ll never look at moving water the same way again.
Yes, almost always. In daylight there is too much light to keep the shutter open for seconds without massively overexposing, even at base ISO and a small aperture. A neutral-density filter blocks light so the shutter can stay open. A 6-stop and a 10-stop ND cover most daytime long exposure work.
For streams and waterfalls under cloud, a 6-stop ND usually lands you in the half-second to two-second range that keeps the water looking alive. For seascapes where you want the waves to average into mist, a 10-stop ND for 15 to 30 seconds works better. Shade lets you use a weaker 3-stop.
The most common causes are a flexing tripod, especially with the center column raised, the shutter or mirror vibrating the camera, and wind. Plant the legs wide with the column down, hang weight on the hook, use an electronic or electronic-first-curtain shutter, and trigger with a remote or self-timer rather than your finger.
Meter the scene without the filter, then double your shutter time once for every stop of ND. A 10-stop filter means doubling the base time ten times. For example, a metered speed of 1/60 second doubled ten times lands at about 15 seconds. Set bulb mode and use a timer for anything over 30 seconds.
Only in low light. At dawn, dusk, blue hour, or in deep shade you may already need a multi-second exposure with no filter. In bright daylight you cannot get a long shutter without an ND filter unless you stop the lens down so far that diffraction destroys sharpness.
Strong neutral-density filters, especially inexpensive resin 10-stops, are not perfectly neutral and add a magenta or blue tint across the frame. Better glass reduces it, and shooting raw with a custom white balance recovers most of the remainder. A filter that is badly non-neutral cannot be fully corrected.
External references I trust for the fundamentals: the Lee Filters resource pages for ND system specifics, and the PhotoPills planning app whose ND calculator and sun/blue-hour tools I use to plan coastal shoots.
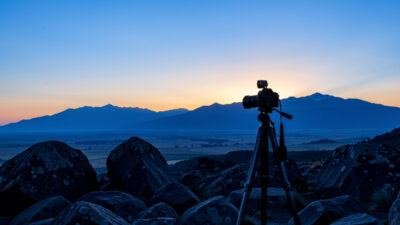
Hyperfocal distance is the closest focus setting that keeps everything from half that distance out…

Manual focus stacking is the field discipline of locking your camera on a tripod, freezing…
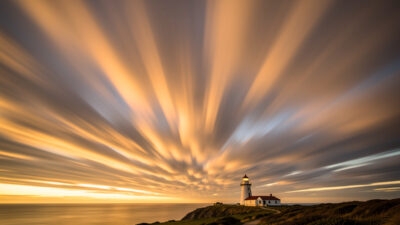
Cloud motion long exposures work when three things line up: wind moving the clouds during…
Leave a Reply