Best Camera for Travel Photography: How to Choose
The question I get most about travel photography is which camera to buy, and it’s…
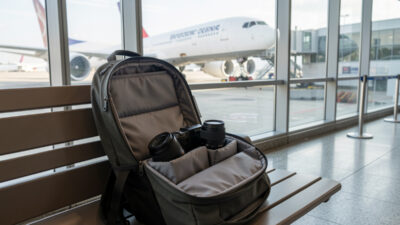
How you pack a camera bag for travel is a different skill from which bag you buy, and it’s the one that decides whether your gear survives the trip and whether you can actually get to it when the shot happens. I’ve packed the same bag hundreds of times now, and the way I load it has almost nothing to do with cramming the most in — it’s about protection, fast access, weight distribution, and security, in roughly that priority order. Get the packing right and the bag becomes invisible: gear protected, everything where your hand expects it, nothing announcing that you’re carrying thousands in glass.
This guide assumes you’ve already chosen a bag — if you haven’t, the camera bag buying guide covers picking the right one for a mirrorless kit and for cabin limits. Here I’m focused purely on what goes where and why, the packing system I run every time so I never arrive with a scratched lens or spend a museum visit digging for a battery.
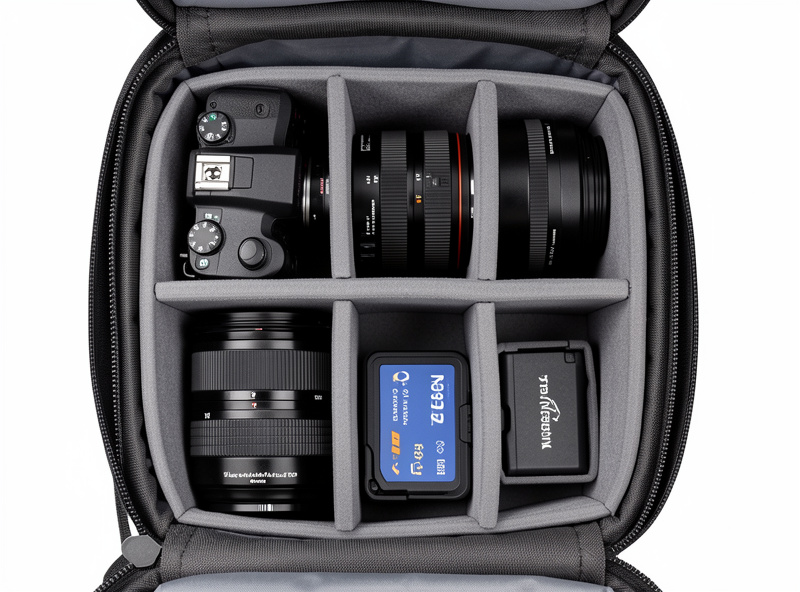
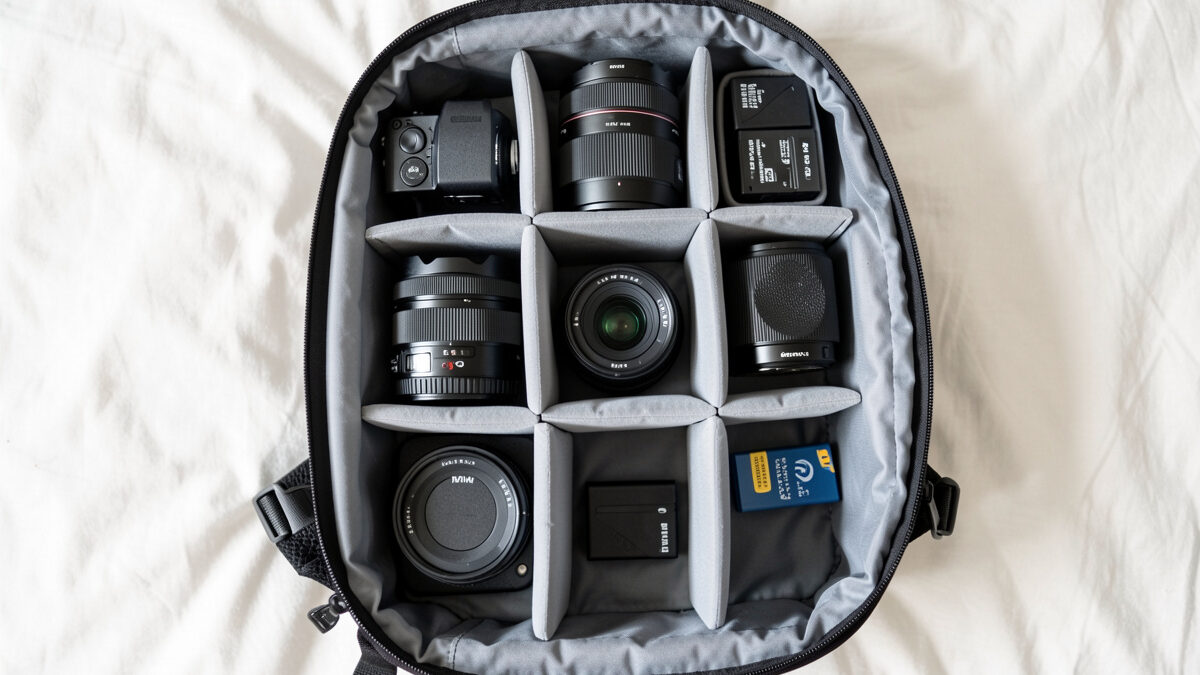
The first job of packing is making sure nothing hard touches anything else. Lenses knocking against each other or a body banging a tripod is how scratches, dented filter threads, and worse happen in transit. I use the bag’s padded dividers to give every item its own walled-off space, and I make sure each divider is snug rather than loose — a lens that can shift in its slot is a lens that’s rubbing against its neighbor with every step. If a divider doesn’t hold something firmly, I add padding rather than letting it rattle. As an Amazon Associate I earn from qualifying purchases. If your bag’s stock dividers are thin or won’t hold your lenses snugly, a set of padded camera insert dividers can turn an ordinary backpack into a properly protective one, or firm up a camera bag whose walls have gone soft with use.
Bodies go in with a lens attached, which protects both the mount and the rear element and saves space versus packing them separately — one of the small efficiencies that adds up. Loose small items, the things that scratch glass without you noticing, go in their own case rather than rolling around the main compartment. The principle is simple: imagine the bag dropped or thrown, because in transit it will be, and pack so nothing inside can move. If you can shake the closed bag and hear or feel things shift, repack it.
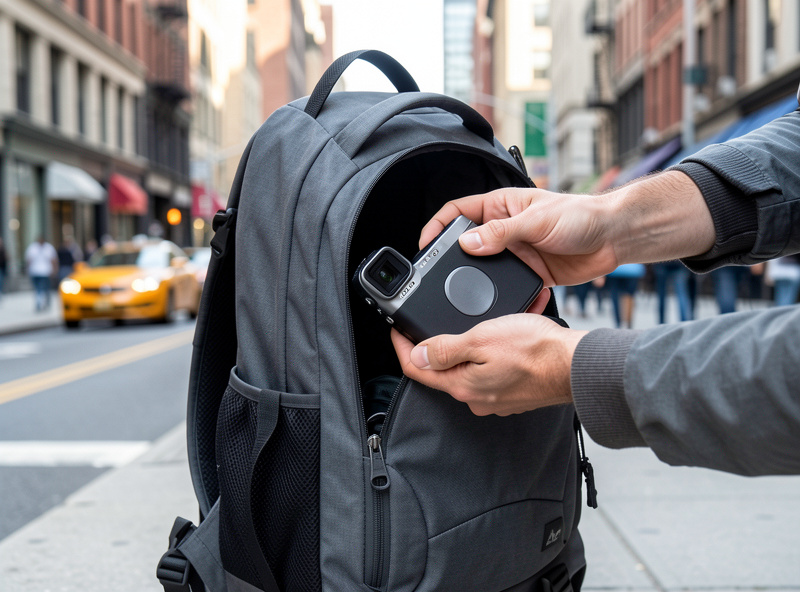
Protection is pointless if the bag is so well-packed you miss every candid moment digging for the camera. The second priority is access, and it changes how I order things. The body-and-lens combo I expect to shoot most goes in the fastest-access spot — a top compartment or a side that opens without taking the bag fully off. The gear I’ll need occasionally sits one layer deeper. The stuff I won’t touch until the hotel, like chargers and cables, goes at the bottom or in an outer pocket out of the way.
This access hierarchy is why I pack the bag the same way every single time: after a few trips my hand goes straight to the battery, the spare card, the cleaning cloth without looking, because each lives in its assigned home. On the road that muscle memory is the difference between catching a fleeting moment and watching it pass while you rummage. Decide where each thing lives once, then never change it — consistency is worth more than any clever organization scheme.
A camera bag full of glass is heavy, and how that weight sits decides whether you’re comfortable at hour eight or aching by lunch. The heaviest items — bodies, big lenses — go closest to your back and centered, not out at the front or sides where they pull on your shoulders and tip the load away from you. Lighter items fill the outer and peripheral spaces. This is basic backpacking logic applied to camera gear, and it makes a genuinely heavy kit feel manageable for a full day of walking.
The strap and carry system matter as much as the packing here — a load-spreading harness turns a punishing weight into a tolerable one, which is why the right carrying setup is its own consideration covered in the broader accessories thinking. But even the best bag packs badly if the weight is in the wrong place. Centered and close to the spine is the rule, every time. If you’re still choosing the bag that carries this weight comfortably, a travel camera backpack with a proper back-panel harness and a body-hugging fit is worth more on a long shooting day than any feature on the spec sheet. And be honest about total weight before you leave: the packing discipline from the lens guide — carry less — is the real fix for a heavy bag, because the lightest gear is the gear you left at home.
A camera bag full of expensive gear is a target, and packing for security is partly about not looking like one. I favor bags that don’t scream “camera” — no loud branding, nothing that says “valuable electronics here” to a thief scanning a crowd. The most valuable, irreplaceable items get distributed: bodies and lenses in the main bag, but cards and a spare battery on my person, so a snatched bag doesn’t take everything. The images especially ride in my pocket, because a memory card holds something no insurance can replace.
On travel days specifically, the security packing overlaps with airline rules: the valuable glass goes in the bag that stays with me in the cabin, never checked, and ideally in the under-seat personal item where I can see it. The full set of flight-day rules — batteries, carry-on sizing, security — is in the airline guide elsewhere in this cluster. Day to day, the rule is just to keep the bag closed, keep it in front of you in crowds, and never set it down where you can’t feel it.
My packing actually starts the night before, with a routine that’s become automatic. I charge every battery and format every card so I leave with everything full and empty in the right ways. I lay out the whole kit on the bed and pack it deliberately, item by item, into its assigned home — which also serves as a final check that nothing’s forgotten. I confirm the bag closes comfortably and fits the strictest cabin limit on the trip. And I do a shake test: if anything moves, I repack until it doesn’t.
That ritual takes ten minutes and prevents the small disasters that derail a shooting day — the dead battery, the full card, the lens left on the desk. The broader question of which accessories are even worth packing in the first place is in the essential accessories guide; once you’ve decided what comes, this packing system is how it all rides safely. Pack for protection, then access, then weight, then security, do it the same way every time, and the bag stops being something you think about and becomes something that just works — leaving all your attention for the photography.
Pack in priority order: protection first, then access, then weight, then security. Give every item its own snug padded compartment so nothing hard touches anything else, put the camera you’ll shoot most in the fastest-access spot, keep the heaviest gear closest to your back, and don’t advertise that you’re carrying valuables. Pack it the same way every trip so your hand finds each item without looking.
Yes. Packing a body with a lens attached protects both the lens mount and the body’s rear element, and it saves space compared to packing them separately. Choose the lens you expect to start shooting with so you’re ready the moment you pull the camera out. Just make sure the combined unit sits snugly in its compartment so it can’t shift in transit.
Use a bag that doesn’t look like a camera bag, distribute the irreplaceable items so a single snatched bag can’t take everything, and keep memory cards and a spare battery on your person. In crowds keep the bag closed and in front of you, and never set it down where you can’t feel it. On travel days the valuable glass stays in your cabin carry-on, never checked.
Put the heaviest items, bodies and large lenses, closest to your back and centered, with lighter gear filling the outer spaces. This keeps the load from pulling on your shoulders and makes a heavy kit far more comfortable over a full day. A load-spreading harness helps too, but no carry system fixes weight that’s packed out at the front or sides.
The night before, charge every battery and format every card, then lay the whole kit out and pack it deliberately into assigned spots, which doubles as a check that nothing’s forgotten. Confirm the bag closes comfortably and fits the strictest cabin limit on your itinerary, then do a shake test, repacking until nothing moves. Ten minutes of ritual prevents the dead-battery and forgotten-lens disasters.
The question I get most about travel photography is which camera to buy, and it’s…
If you only get one thing right about your travel kit, make it the lens.…
The most nervous I ever get with a camera has nothing to do with photography.…
Leave a Reply