Landscape Photography Guide: Best Settings, Lenses, Locations
For landscape photography, use aperture priority mode at f/8 to f/11, ISO 100-400, and focus…
Photographing a vinyl record properly requires a macro lens at f/8 to f/11 and raking light from a single off-camera source at roughly 30 degrees to the record surface. A $40 vintage 50-millimeter macro lens on a mirrorless body outperforms a $1,500 zoom — because record photography is about working distance and light angle, not glass quality at infinity.
Get the light angle wrong — even by 10 degrees — and you will spend an afternoon producing perfectly sharp, perfectly flat, perfectly useless images. I learned that the hard way on my Fuji X-T5 with the XF 56mm f/1.2: at macro distances the shallow depth of field means the raking light must be positioned precisely, and a single degree of angle error turns groove texture into gray smudge. The raking light catches the groove modulation as alternating bands of highlight and shadow, and the macro lens resolves individual modulations that a phone camera renders as a shapeless black disc. More on the specific flash placement that finally solved it in the lighting section below.
The challenge of photographing vinyl is that records are simultaneously reflective (the glossy vinyl surface), textured (the groove modulation), and large (a 12-inch disc at close range requires focus stacking to keep the entire label and grooves sharp). A single exposure at f/8 from 30 centimeters away has roughly 8 millimeters of depth of field — enough for the grooves but not enough for the label, which sits 1 to 2 millimeters above the groove surface. Two exposures at different focus points, stacked in post, render the full record sharp from the outer groove to the spindle hole. The setup takes 10 minutes per record and produces an image that shows the groove texture, the label typography, and the vinyl’s surface finish in a single frame. For a deeper look at how to display and preserve the records you photograph — because documenting a collection goes hand-in-hand with protecting it — the vinyl record care guide covers storage, cleaning, and collection management.
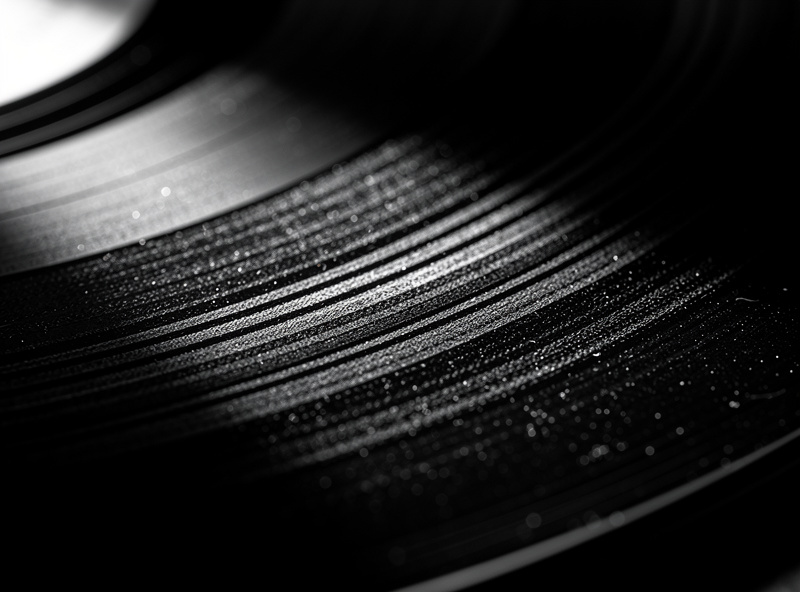
My main body for this work is the Fuji X-T5 — the 40-megapixel sensor exposes lens weaknesses ruthlessly, which is exactly what you want for groove-level detail. I keep a vintage 50mm macro in the bag alongside it. Raking light — light striking the record surface at a low angle, 20 to 30 degrees from horizontal — casts the groove walls into relief the way low-angle sunlight reveals texture on a landscape. The raised groove wall facing the light catches a highlight; the opposite wall falls into shadow. The pattern of light and dark bands is the groove modulation, and it is the only visual record of the audio waveform pressed into the vinyl. Direct on-axis light from a ring flash or a softbox directly above the record flattens the grooves into a featureless gray surface because the light hits every part of the groove at the same angle and eliminates the shadow that creates the relief.
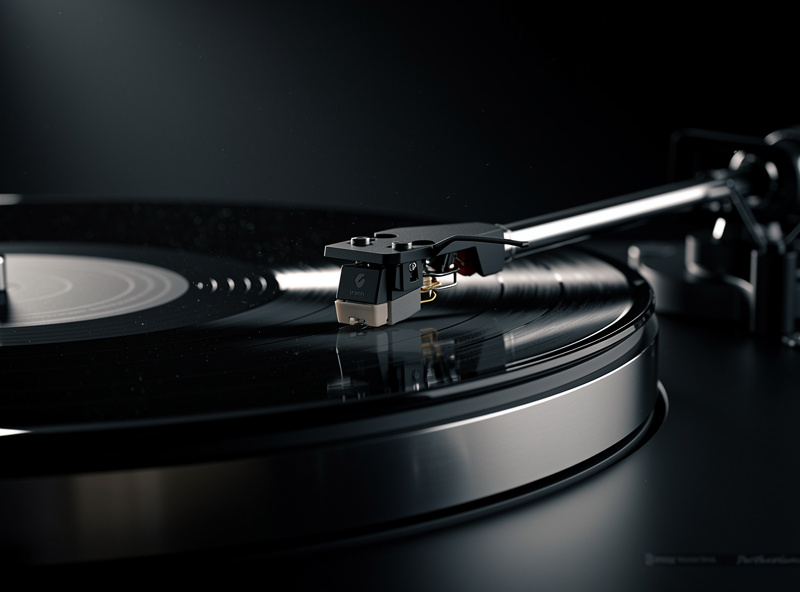
A single off-camera speedlight with a grid or a snoot, positioned at 30 degrees to the record surface and 45 degrees off-axis from the camera, produces the ideal groove-revealing light. The grid restricts the beam spread to roughly 20 degrees, preventing spill onto the background and keeping the light directional at the groove level. A continuous LED panel works for static records but introduces vibration from the cooling fan that blurs the image at macro magnifications — flash freezes motion at the 1/1,000th-of-a-second burst duration and is the correct tool for macro record photography. The flash power at 1/16 to 1/32 of full output is sufficient at f/8 and ISO 200 from a working distance of 30 to 50 centimeters. Higher power overexposes the glossy vinyl highlights and loses the groove modulation in a whiteout. I burned through an entire afternoon on a first-edition Blue Note before realizing my speedlight at 1/4 power was blowing out the lead-in groove completely — the glossy section at the outer edge reflects twice as much light as the modulated grooves. Dialing down to 1/32 and moving the flash back 10 centimeters fixed it instantly, but the lesson stuck: meter for the gloss, not the groove.
On my X-T5 I use a manual-focus vintage 50mm f/3.5 macro that cost $40 — and at 1:2 magnification it resolves groove walls the XF 56mm f/1.2 cannot touch below 1:10. A macro lens optimized for magnification ratios between 1:4 and 1:1 — that is, between one-quarter life-size and full life-size on the sensor — resolves vinyl grooves at the level where individual modulations become visible. A 50-millimeter macro lens at minimum focusing distance captures roughly a 4-centimeter-wide section of the record surface, which is enough to show 30 to 40 groove walls in a single frame. A 100-millimeter macro lens gives more working distance — the lens is farther from the record, making it easier to position the raking light without the lens casting a shadow — but the longer focal length also magnifies camera shake, and a tripod with a 2-second self-timer or a remote release is mandatory at 100 millimeters and 1:2 magnification.
Lensrentals’ finite-conjugate MTF bench tests confirm what you see on a test chart: dedicated macro primes hold their contrast at close focusing distances in a way that zoom lenses labeled “macro” generally do not — and groove modulation lives at 30-50 lp/mm on a 40-megapixel sensor. Modern zoom lenses with “macro” in the name — typically achieving 1:3 or 1:4 maximum magnification — cannot resolve individual groove modulations because the minimum focusing distance is too long and the magnification ratio is too low. The groove walls at 1:4 magnification are roughly 4 pixels wide on a 24-megapixel sensor, and the modulation detail — the high-frequency squiggles that encode cymbal decay and vocal sibilance — is lost between pixels. A $40 used manual-focus 50-millimeter f/3.5 macro from the 1970s resolves grooves better than a $1,000 modern zoom because magnification ratio matters more than glass quality for this specific application.
I use the X-T5 with the XF 56mm f/1.2 stopped down to f/8 for label work — the 56mm’s micro-contrast at moderate apertures pulls typography off the paper better than any zoom. Record labels are printed on paper with ink that fluoresces under UV light and fades under direct sunlight — photographing them accurately requires flat, diffused light and a color-checker reference in the frame for the first shot of each session. A softbox or a diffused LED panel positioned directly above the record at 90 degrees to the surface eliminates glare from the paper and reveals the ink color and typography as the eye sees them. Raking light that works for grooves ruins labels — it casts the paper fiber into relief and turns the ink from a flat color into a textured mess that no white-balance adjustment can fix.
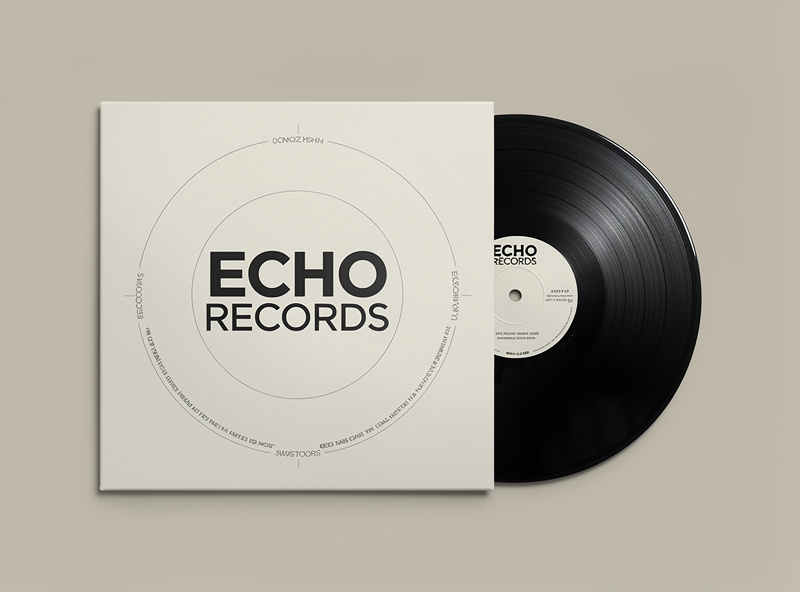
A color-checker card — a $15 pocket-sized reference with 24 calibrated color patches (built around the CIE 1931 standard observer color-matching functions that every digital camera profiling tool is built on) — in the corner of the first frame provides a known reference for white balance and color profile correction in Lightroom. Vinyl labels printed in the 1960s and 1970s used ink formulations that have yellowed differently than modern inks, and the camera’s auto-white-balance algorithm guesses wrong on vintage paper tones. One click on the color-checker’s neutral gray patch in Lightroom corrects the entire session, and the labels in the final images match what the eye sees under daylight-balanced viewing conditions.
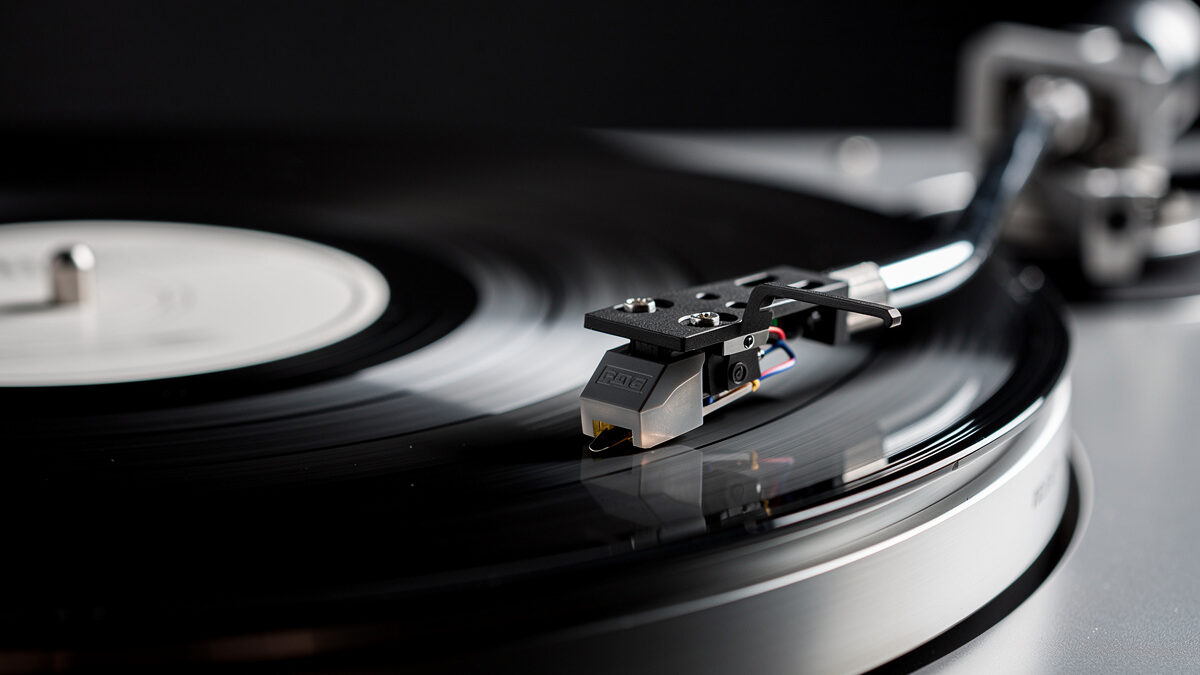
A record photographed on a turntable platter with the tonearm in the frame tells the story of vinyl as a playback medium, not just as a collectible object — the same macro photography setup that captures groove detail also makes the cartridge and stylus the visual anchor of the composition. The composition places the record label at the center or slightly off-center on the rule-of-thirds intersection, with the tonearm entering from the right edge and the cartridge hovering just above the groove. The depth of field at f/5.6 to f/8 from a working distance of 40 centimeters keeps the cartridge and the nearest grooves sharp while the far edge of the record softens into a blur that directs the eye to the stylus-contact point — the visual center of attention in any turntable photograph.
The turntable itself should be clean — dust on the platter, fingerprints on the tonearm, and a stray record-sleeve in the background turn a product photograph into a snapshot of a messy listening room. A microfiber cloth wiped across the platter, a rocket blower on the cartridge, and a plain dark background — a sheet of black velvet or a piece of dark foam core — isolate the turntable and record as the only subjects in the frame. The velvet absorbs light and renders as pure black in the final image; foam core reflects slightly and shows texture that distracts from the record surface. Velvet is $8 per meter at a fabric store and is the cheapest studio-background upgrade in photography.
Static is the enemy nobody warns you about until it ruins a session. Vinyl holds a stubborn electrostatic charge, especially in the dry winter air I shoot in most of the year, and that charge pulls dust back onto a freshly cleaned surface within seconds of a carbon-fiber brush pass. I ground the record briefly against the turntable’s metal platter spindle before the final brush pass, work in short bursts rather than one long cleaning session, and keep the record away from synthetic fabric — a wool sleeve or a cotton cloth generates far less static cling than fleece or polyester ever will. None of this replaces careful lighting, but a groove full of static-caught dust reads as noise in the modulation pattern at macro magnification, and no amount of raking-light precision fixes a dusty groove after the fact.
If I were starting fresh with record photography today I would spend $40 on a used 50mm macro, $15 on a color-checker card, $8 on black velvet, and exactly zero dollars on anything else — then spend the first afternoon finding the raking-light angle that makes the grooves sing on my specific turntable and lens copy. Every cent beyond that is diminishing returns until you have shot 50 records and can identify which groove-wall modulation pattern corresponds to a good photograph without zooming in. The gear you already own — a tripod, a speedlight, and a mirrorless body — is enough.
A manual-focus 50-millimeter macro lens capable of 1:2 to 1:1 magnification, available for $40 to $80 used. The magnification ratio resolves individual groove modulations that modern zooms cannot capture. A 100-millimeter macro works for greater working distance but requires a tripod and remote release to eliminate camera shake at macro magnifications.
The light is hitting the record surface at too steep an angle. Direct on-axis light from a ring flash or overhead softbox flattens groove detail into a gray surface. Raking light at 20 to 30 degrees from horizontal casts the groove walls into relief and reveals the modulation pattern.
Use flat, diffused light positioned directly above the label at 90 degrees to the surface. A polarizing filter on the lens cuts remaining reflections from the paper surface. A color-checker card in the first frame provides a white-balance reference for vintage paper tones that confuse auto-white-balance.
Yes. At macro magnifications of 1:4 or closer, camera shake from handholding at any shutter speed below 1/500 second blurs the groove detail. A tripod with a 2-second self-timer or remote release is mandatory. Use flash for the exposure to freeze any residual vibration rather than relying on the tripod alone.
f/8 to f/11 for groove detail shots at macro distances — this provides 5 to 8 millimeters of depth of field, enough for the grooves. For full-record shots showing both label and grooves, shoot at f/8 with two exposures at different focus points and stack them in post. Wider apertures like f/2.8 at macro distances have less than 1 millimeter of sharp depth — not enough for even the groove surface.
Clean the record with a carbon-fiber brush immediately before shooting. Use a rocket blower to remove dust from the turntable platter and tonearm. Shoot in a room with minimal air movement — a ceiling fan or an open window introduces floating dust that settles on the record mid-shoot. A microfiber cloth and blower are faster than cloning out dust in post.

For landscape photography, use aperture priority mode at f/8 to f/11, ISO 100-400, and focus…

What Shutter Speed Do You Need for Sports Photography? Use 1/1000s minimum for most sports…

This wildlife photography beginner guide starts with the foundation every new shooter needs: the right…
Leave a Reply