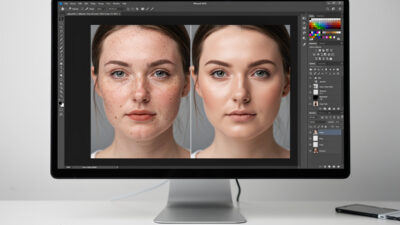
Natural Portrait Retouching Without the Plastic Look
Natural portrait retouching means cleaning up distractions while keeping the person looking like themselves —…
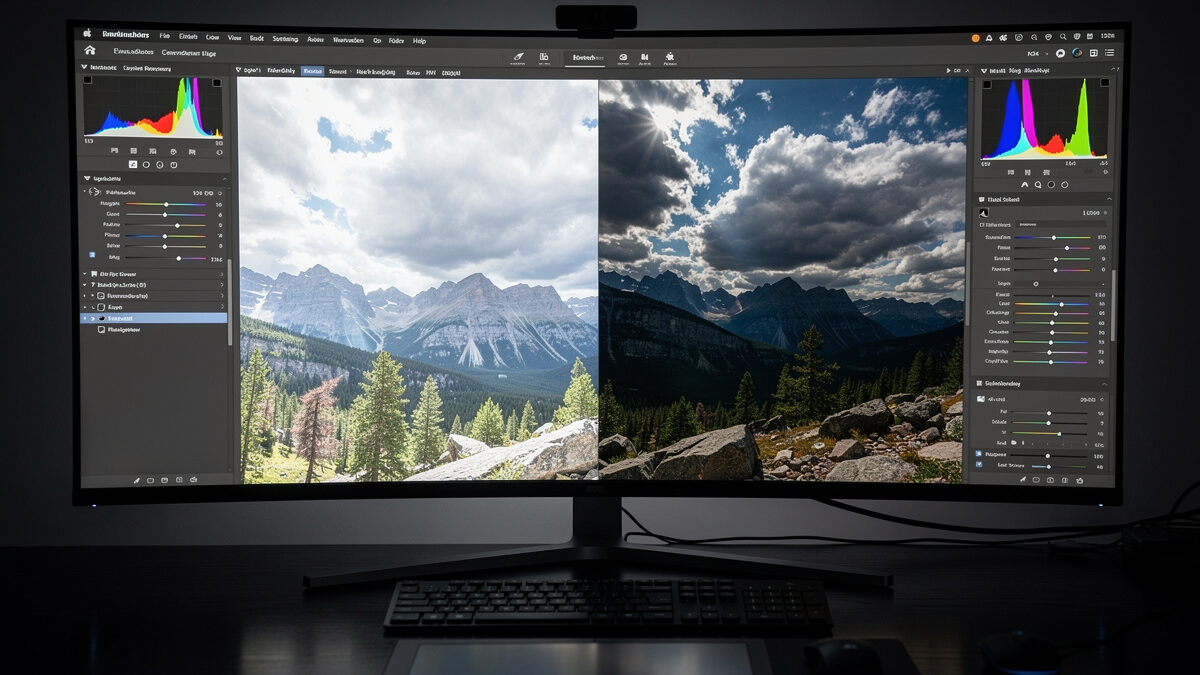
RAW photo processing is the act of converting your camera’s raw sensor data into a finished image. A RAW file is not a picture — it is unprocessed 14-bit data with no white balance, contrast, or sharpening baked in. Processing it gives you enormous latitude to recover highlights, lift shadows, and set color exactly, far beyond anything a JPEG allows.
I shoot RAW on both my bodies — the 40MP Fujifilm X-T5 and the Sony a7 IV — and never let the camera make the final call on a file that matters. The whole point of how I expose, pushing the histogram right to capture maximum data, only pays off when I process the RAW afterward to bring it back into balance. This guide covers what a RAW file actually contains, why it beats JPEG, and how I process one from flat capture to finished image. It is the file-level companion to my full photo editing workflow guide and pairs naturally with the develop steps in my Lightroom for beginners walkthrough.
A RAW file is the unprocessed readout from your sensor’s photosites, stored in high bit depth before the camera applies any interpretation. A JPEG, by contrast, is that same data already processed and compressed in-camera using settings you mostly did not choose — and then thrown away down to 8 bits. RAW keeps everything; JPEG keeps a finished guess.
The practical consequence is headroom. A 14-bit RAW holds thousands of brightness levels per channel where an 8-bit JPEG holds 256, which is why you can pull detail out of a sky that looks pure white in the JPEG, or open a shadowed face the JPEG rendered as black mush. RAW also means white balance is a free decision after the fact, not a baked-in mistake. The cost is file size and a mandatory processing step — a RAW straight out of camera looks flat and dull on purpose, because it has not been interpreted yet.
New RAW shooters panic when the file on the computer looks flatter than the punchy preview on the camera back. That preview is a JPEG the camera generated with its own contrast and saturation; the RAW underneath has none of that applied yet. Nothing is wrong — you are simply seeing the unprocessed data, which is your job to develop.
This is a feature, not a bug. That flat starting point is precisely the latitude you wanted: all the highlight and shadow information is sitting there intact, waiting for you to decide how to render it. The camera’s JPEG made those decisions and discarded the rest. Processing the RAW means you make them deliberately, with the full range still available. Once you internalize that the flat file is the raw clay and not a failed photo, RAW stops being intimidating.
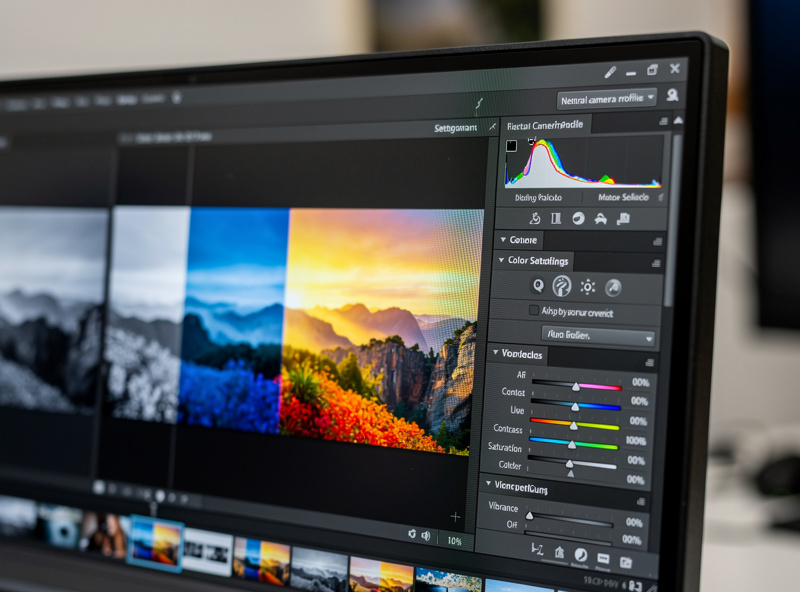
Before you move a single slider, your RAW converter applies a camera profile — a baseline interpretation of color and tone. Adobe defaults to a generic profile, but most converters can apply the manufacturer’s own film-simulation-style profiles, and which one you start from changes everything downstream. I start from a neutral, accurate profile rather than a punchy one, because a flat honest canvas is easier to grade than a contrasty one I have to undo.
On the Fuji files this matters more than usual — Fuji’s film simulations are genuinely good, and choosing the right base profile gets me most of the way to a look before I touch the Basic panel. The lesson applies to any system: the camera profile is the foundation under all your edits, so pick a neutral, predictable one and build from there rather than fighting a baked-in style.
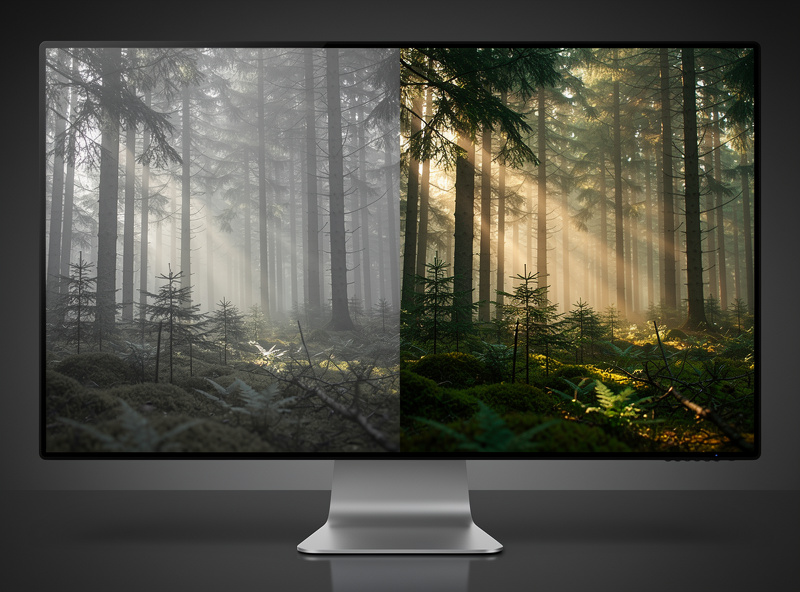
The single most impressive thing RAW does is recover detail that looks gone. A sky that reads as blank white in the JPEG often has full cloud detail recoverable in the RAW, because the sensor captured it — the JPEG just clipped it. Pulling the Highlights slider down on a RAW brings that detail back; doing the same on a JPEG only greys out white pixels with no data behind them.
Shadows work the same way in reverse, with a limit: lifting deep shadows reveals real captured detail, but push too far and you expose sensor noise that was hiding in the dark. On my 40MP files I lift shadows confidently to a point, then stop — that sensor is clean but aggressive recovery still surfaces pattern noise in the deepest darks. The discipline is recovering the detail that exists without manufacturing noise that does not need to be there. This recovery headroom is the entire reason I expose to the right and shoot RAW in the first place.
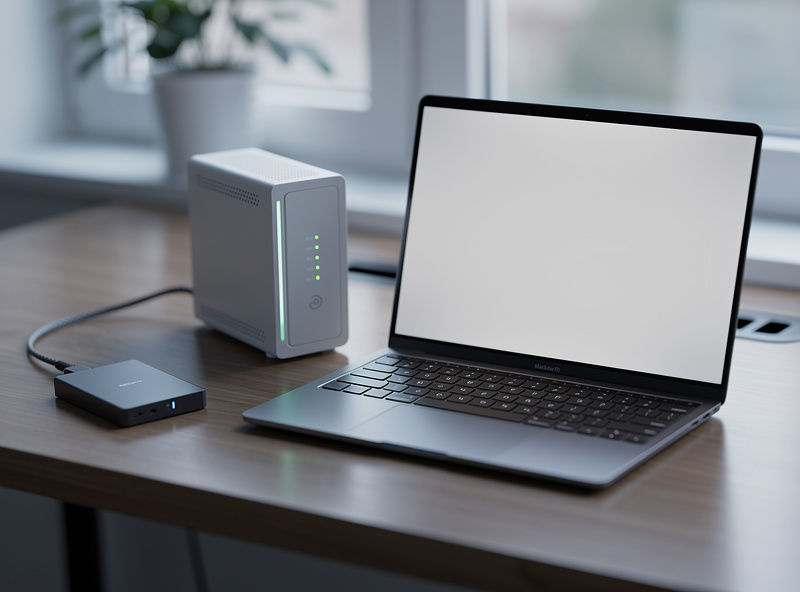
RAW’s one real cost is size. A single 40MP RAW can run several times the size of its JPEG, and a day’s shoot fills cards and drives fast. That makes storage and backup part of RAW processing, not an afterthought — you cannot process files you have lost to a dead drive.
My discipline is simple and non-negotiable: working files on a fast drive, a second copy on a local NAS, a third offsite. RAW masters are irreplaceable, and a single drive failure should never cost a shoot. As an Amazon Associate I earn from qualifying purchases. A fast portable external SSD is the workhorse here — quick enough to edit directly off and small enough to be the offsite copy you actually carry. I link it because RAW workflows live or die on storage discipline, not to pad the page. Keep the RAW masters forever; you can always re-process them, but you can never un-process a JPEG.
Process RAW in a consistent order and it becomes fast. My sequence: choose a neutral camera profile, set white balance, set exposure, recover highlights then shadows, set white and black points, then contrast and presence, then any local masking, and finally export with output sharpening. The order is the lesson — profile and white balance first because everything downstream depends on them, sharpening last because it is output-specific.
Because RAW processing is non-destructive in every serious converter, you can revisit a file years later, change your mind, and re-export with zero quality loss. That is why I treat the RAW as a negative and the exported JPEG or TIFF as a print: the print is disposable, the negative is forever. Build the sequence into muscle memory and a RAW file takes under two minutes from flat capture to finished frame.
Because it is unprocessed sensor data with no contrast, saturation, or sharpening applied. The punchy image on the camera back is a JPEG preview. The flat RAW is normal and is exactly the latitude you want for editing.
For editing, yes. A 14-bit RAW holds far more tonal data than an 8-bit JPEG, so you can recover blown highlights, lift shadows, and reset white balance with no quality loss. JPEG discards that data in-camera.
Often yes. If the sensor captured the cloud detail, pulling the highlights down in a RAW converter brings it back. A JPEG that clipped the sky has no data behind the white pixels, so the same move only greys them out.
As far as the noise allows. Lifting shadows reveals real captured detail up to a point, then surfaces sensor noise hiding in the dark. Lift confidently, then stop when you see noise crawling into the deepest areas.
Yes, keep them as masters. RAW processing is non-destructive, so you can revisit and re-export a file years later with no loss. Treat the RAW as a negative and the exported image as a disposable print.
Natural portrait retouching means cleaning up distractions while keeping the person looking like themselves —…
Lightroom for beginners comes down to one screen: the Develop module. Import your photos, cull…

Mobile photo editing is no longer a toy. Apps like Lightroom Mobile and Snapseed open…
Leave a Reply