Culling Workflow: How to Pick Your Keepers Fast
Culling is the stage where you reject the duds and pick your keepers before any…
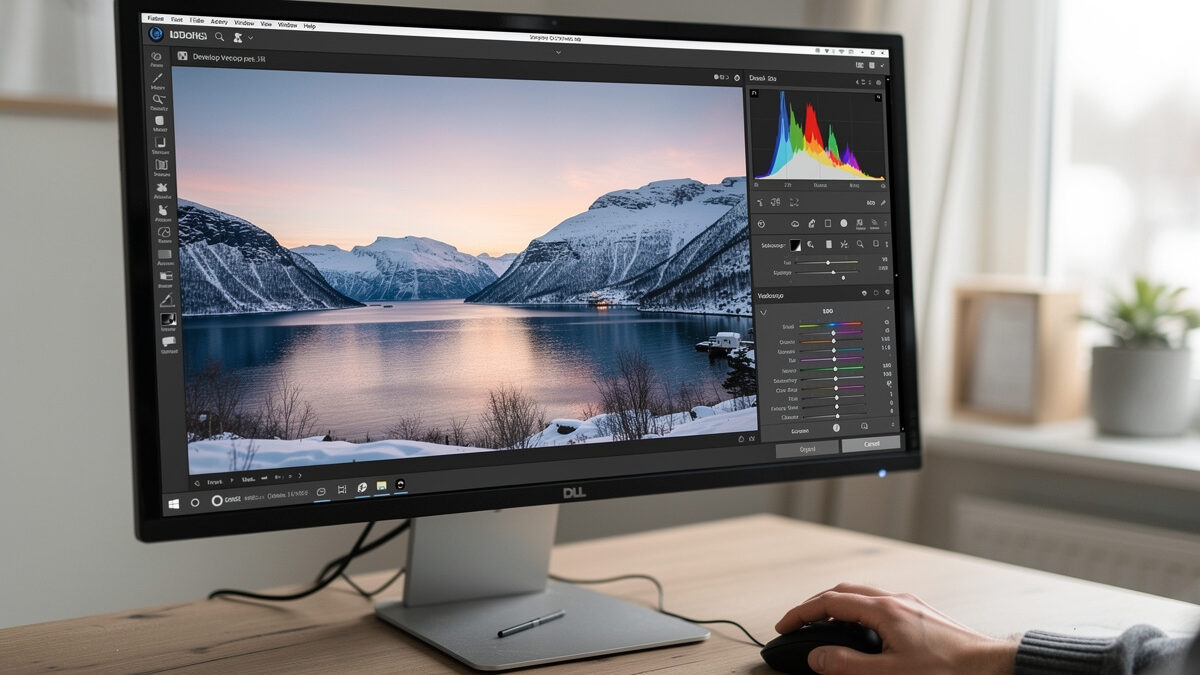
Lightroom for beginners comes down to one screen: the Develop module. Import your photos, cull to keepers, then work the Basic panel top to bottom — white balance, exposure, highlights and shadows, then contrast and presence. Master that sequence and you can edit a RAW file confidently in under two minutes, because Lightroom edits non-destructively and you can always undo.
I run Lightroom Classic as the develop hub for both my systems — the 40MP Fujifilm X-T5 files and the Sony a7 IV files all land in the same catalog. Beginners get overwhelmed because Lightroom does two jobs that look like one: it is a library manager and a RAW developer bolted together. This guide separates them, then walks the Develop module the way I actually use it, so you stop poking sliders at random and start editing with a plan. It is the hands-on companion to my broader photo editing workflow guide.
The first thing that confuses beginners is that Lightroom has two main rooms. The Library module is where you import, organize, flag, and search; the Develop module is where you actually edit pixels. You cull in Library and develop in Develop, and keeping that division clear stops half the confusion.
On import, Lightroom does not move your files into a black box — it builds a catalog that points at your photos wherever they live, and stores your edits as instructions in that catalog. The originals are never overwritten. That is the single most reassuring fact for a nervous beginner: you cannot ruin a RAW file in Lightroom. Every slider is undoable forever, even years later. Set up a simple year/month import folder structure once, and the catalog handles finding things for you.

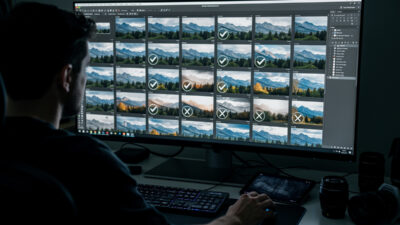
Editing every frame is a beginner trap. In the Library module, go full-screen and make a fast binary pass: press P to flag a keeper, X to reject, arrow to the next. Do not pixel-peep on this pass — you are picking the strongest frame from each burst, not judging sharpness yet. A second pass narrows the flagged shots to the ones you will actually develop.
This matters because developing 300 frames burns you out and produces inconsistent edits, while developing the 30 keepers is fast and focused. The skill that takes longest to build is killing a technically fine image because the one beside it is simply better. Good culling is what gives a portfolio its consistency, and it costs nothing but discipline.
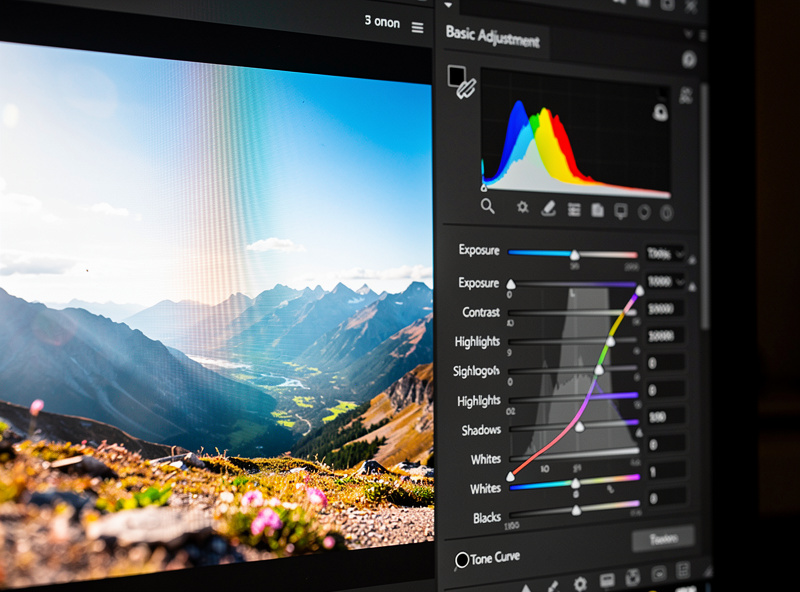
White balance comes first because every later color decision depends on a neutral starting point. In the Develop module’s Basic panel, the Temp and Tint sliders sit at the top for a reason. Use the eyedropper on something neutral grey in the scene, or drag Temp warmer or cooler until the image looks honest rather than orange or blue.
For a RAW file, white balance is fully flexible after the fact — the camera’s setting is just a starting suggestion you can override completely with no quality loss. I set it by eye on a known-neutral element when I did not shoot a grey card. Get the file looking truthful here before you make it look stylish; a wrong white balance poisons every adjustment below it.
Work the Basic panel top to bottom. After white balance: set Exposure for overall brightness, pull Highlights down to recover a bright sky, lift Shadows to open dark areas, and use Whites and Blacks to set the true endpoints. Contrast and the tone curve come after, not before — they shape what you have already balanced.
On my 40MP files I am cautious lifting Shadows too far; that sensor is clean but aggressive shadow recovery still reveals noise in deep darks. The order inside this stage is the lesson: brightness, then highlight recovery, then shadow recovery, then contrast last. Beginners who crank Contrast first then fight to recover the clipped highlights it created are working backward. The tone curve gives finer contrast control than the blunt Contrast slider once you are comfortable.
The bottom of the Basic panel is where beginners overcook images. Texture adds fine detail, Clarity adds midtone contrast, and Vibrance and Saturation push color. A little of each helps; a lot turns skies into HDR nightmares and skin into leather. My default is small positive Texture, a touch of Clarity on landscapes and almost none on portraits, and Vibrance over Saturation because Vibrance protects already-saturated colors and skin tones.
The rule I follow: make the adjustment until it looks right, then pull it back by a third. Clarity especially is seductive at +40 and embarrassing at +40 a week later. Restraint is the whole game — a good edit is felt, not noticed.
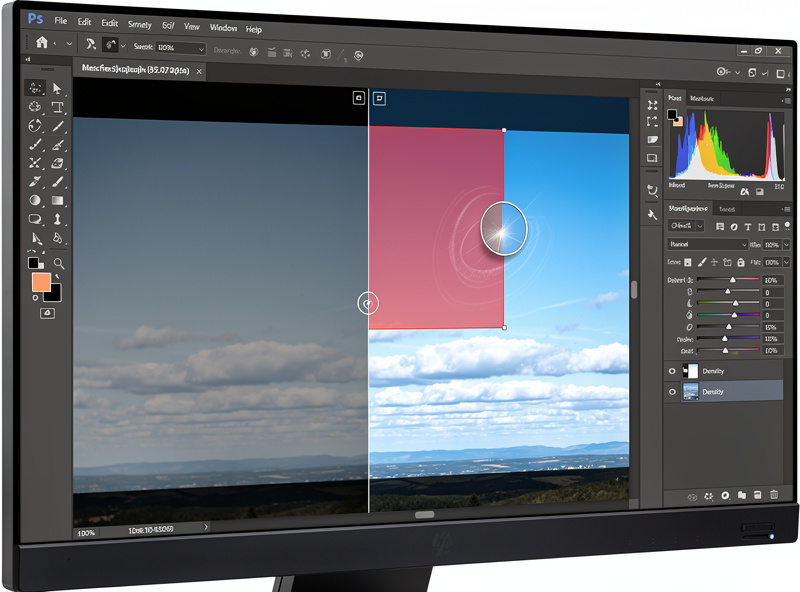
Global sliders affect the whole frame; masking lets you edit just the sky, just the subject, or just a face. Lightroom’s masking has improved enormously — Select Sky and Select Subject do automatically what used to take minutes of manual brushing. Darken a bright sky, brighten a backlit subject, warm just the foreground — all without touching the rest of the frame.
This is the stage where precise pen input genuinely helps. A graphics tablet makes brush masking and dodge-and-burn far more controllable than a mouse, because you can vary pressure and draw naturally. As an Amazon Associate I earn from qualifying purchases. If you do a lot of local work, a graphics drawing tablet is the one accessory that meaningfully speeds up masking and retouching — I link it because it changes how the work feels, not to pad the page. A mouse works fine to start; add the tablet when masking becomes a regular part of your editing.
Once you have an edit you like, save it as a preset to apply the same starting point to similar shots. Build your own from edits you trust rather than relying on one-click packs — a preset is a baseline you still adjust per image, not a finished look. For a set shot under one light, a preset plus a quick exposure nudge per frame gets you a consistent result fast.
Export is the final step, and it is output-specific. Resize for the destination, apply output sharpening sized to it (a little for web, more for print), and choose the right color space — sRGB for web, a wider space only if your print lab asks for it. Export a separate file for each use; the sharpening that looks crisp on a screen looks harsh on paper.
Yes. Lightroom edits non-destructively, so you cannot ruin a RAW file, and the Develop module’s Basic panel is designed to be worked top to bottom. Learn that one sequence and you can confidently edit most photos.
Library is for importing, organizing, flagging, and searching photos. Develop is where you actually edit them. You cull in Library and adjust exposure and color in Develop. Keeping the two roles separate removes most beginner confusion.
Work the Basic panel top to bottom: white balance first, then exposure, highlights, shadows, whites and blacks, then contrast and the tone curve, and presence sliders last. Adjusting out of order means fighting yourself.
No. Lightroom stores edits as instructions in its catalog and never overwrites the original file. Every change is reversible forever, even years later, and you can always reset to the untouched RAW.
Not to start. A mouse handles all global edits fine. A graphics tablet helps once you do regular masking, brushing, and dodge-and-burn work, where pressure-sensitive pen input is far more controllable than a mouse.
Culling is the stage where you reject the duds and pick your keepers before any…
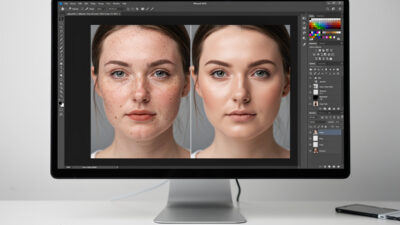
Natural portrait retouching means cleaning up distractions while keeping the person looking like themselves —…
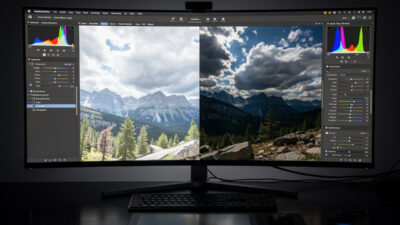
RAW photo processing is the act of converting your camera’s raw sensor data into a…
Leave a Reply