RAW Photo Processing: Getting the Most From Your Files
RAW photo processing is the act of converting your camera’s raw sensor data into a…
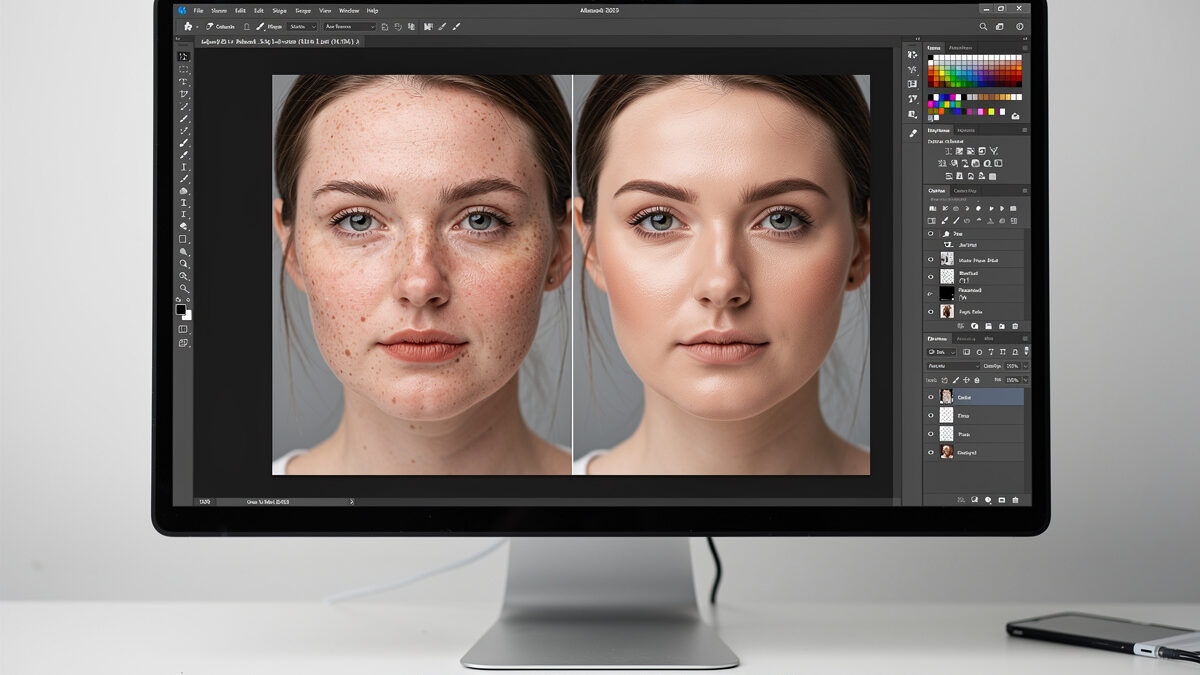
Natural portrait retouching means cleaning up distractions while keeping the person looking like themselves — pores, fine lines, and real skin texture intact. The plastic look that screams “edited” comes from blurring texture away. The honest workflow removes temporary blemishes, evens skin tone without erasing detail, and shapes light with subtle dodge and burn, so the result is the subject on their best ordinary day.
I shoot portraits with the XF 56mm f/1.2 on the Fuji and a fast 85mm on the Sony, and my retouching philosophy is restraint: clean the frame, do not rebuild the face. I will be honest up front — deep commercial beauty retouching is the one editing area where I defer to dedicated portrait retouchers who run far more involved workflows than my single-subject work needs. What I cover here is the natural, believable retouch most photographers actually want. It is the portrait-specific branch of my full photo editing workflow guide, and it pairs with the lens choices in my portrait lens recommendations.
Before any technique, settle the intent. Natural retouching aims for the subject looking rested and confident, not transformed into someone else. The test I use: would the person recognize themselves instantly and feel flattered, or would they feel erased? Removing a temporary spot or a stray hair passes; reshaping a nose or smoothing away every line fails. The character of a face is in its texture and asymmetry, and sanding those off is what produces the uncanny mannequin look.
This intent drives every decision downstream. It tells you to remove the blemish that will be gone next week but keep the freckle that is part of the person. It tells you to even out a blotchy patch but leave the skin reading as skin. Get the philosophy right and the techniques fall into place; get it wrong and the most technically skilled retouch in the world still looks fake.
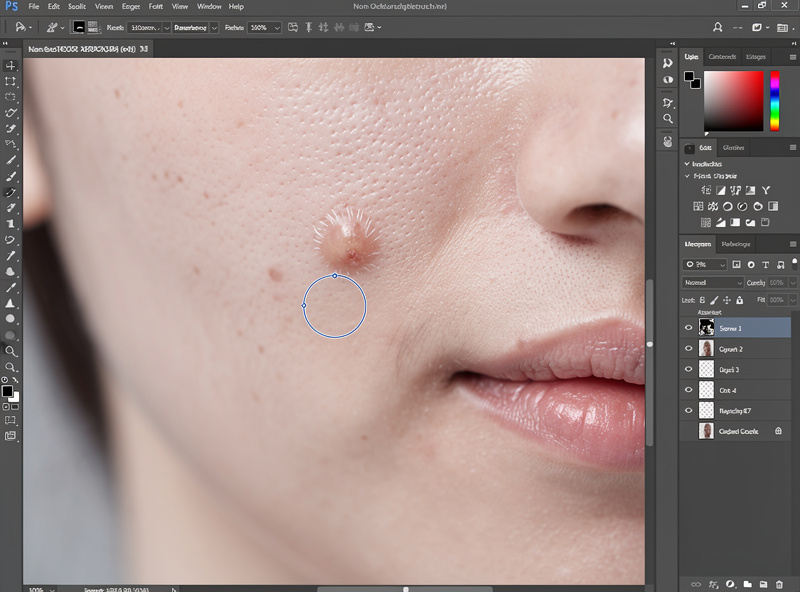
The first and most forgiving step is removing temporary distractions — blemishes, a stray hair across the face, a piece of lint on a collar. The healing brush samples clean nearby skin and blends it over the spot, matching texture and tone automatically. This is the safest retouching there is, because you are removing something that genuinely was not a permanent part of the subject.
Work at a comfortable zoom, use a brush slightly larger than the blemish, and let the tool blend. The judgment call is what counts as temporary: a pimple, yes; a permanent mole or a characterful scar, leave it unless the subject asks. I clone out the things that would have been gone on a different day and keep everything that makes the face that specific face. Done well, nobody can tell anything was removed — which is exactly the point.
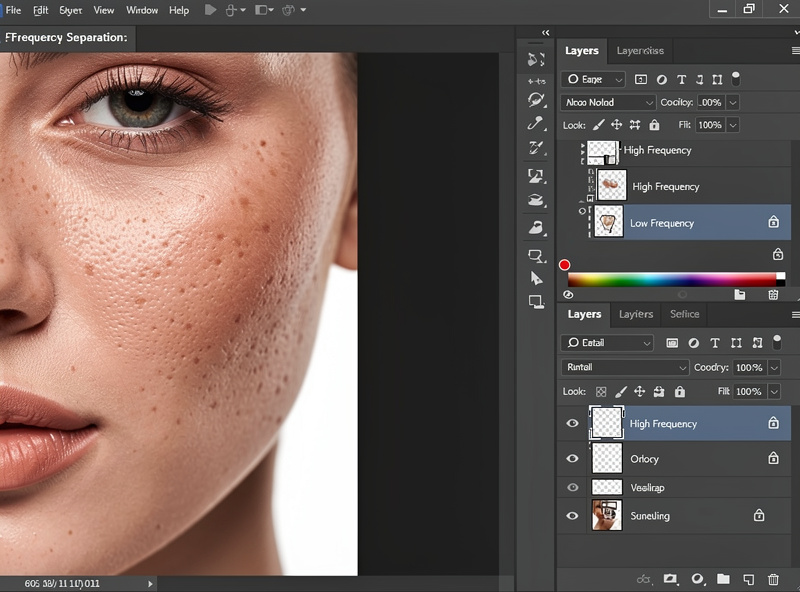
Uneven skin tone — redness around the nose, a blotchy patch, shine on the forehead — is the next target, and it is where most beginners destroy the photo by reaching for blur. Blurring evens tone but obliterates texture, producing plastic skin. The correct approach separates the two problems: fix color and tone unevenness while leaving the fine texture completely untouched.
Frequency separation is the classic technique for exactly this — it splits the image into a texture layer and a color/tone layer so you can smooth blotchy color on one without affecting the pores on the other. It sounds advanced but the concept is simple: never edit color and texture together. Even without frequency separation, a low-opacity tool that targets color while preserving detail beats any blur. The rule to tattoo on your monitor: if you can no longer see pores, you have gone too far.
Dodging (selectively brightening) and burning (selectively darkening) is the oldest darkroom technique and the most powerful for portraits. At a subtle level it evens out distracting light and shadow patches on skin and gently enhances the natural contouring the light already created — lifting a shadowed eye socket, calming a hotspot on the forehead. It guides the eye to the face without anyone noticing a thing was changed.
This is precision work, and it is where a pen genuinely beats a mouse. As an Amazon Associate I earn from qualifying purchases. A pressure-sensitive graphics tablet for retouching makes dodge-and-burn and brush work far more controllable, because you can vary pressure and draw naturally over the contours of a face — I link it because retouching is the one task where it changes the result, not to pad the page. Keep the moves tiny and build them on a low-opacity brush; aggressive dodge and burn produces the over-contoured, sculpted look that reads as fake.
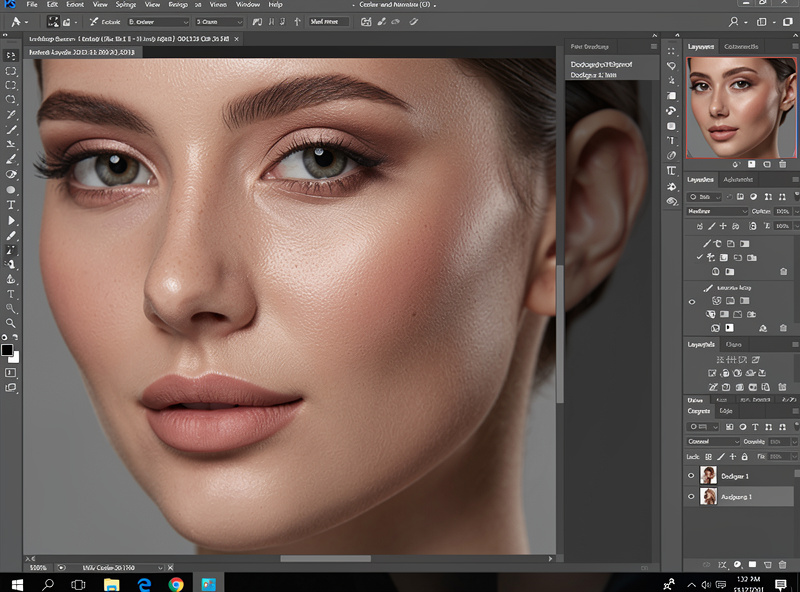
A small lift to the eyes and teeth finishes a portrait, but it is the easiest place to overdo it. For eyes, a gentle brightening of the catchlight and a touch of clarity on the iris adds life; whitening the whites into glowing orbs looks alien. For teeth, reducing yellow slightly with a desaturation of the warm tones reads as natural; pure-white teeth look painted on.
The same restraint rule governs both: make the adjustment, then halve it. Real eyes have some redness in the corners and real teeth are not paper-white, so the moment they become perfect they become fake. I treat these as the last 5 percent of a retouch — tiny moves that nobody consciously notices but that make the subject look rested and alive. Overdo them and you undo every careful natural choice you made earlier.
Every fake-looking portrait shares the same tells: skin smoothed until pores vanish, eyes and teeth bleached, faces reshaped, and dodge-and-burn cranked into heavy contouring. They all come from doing too much, and they all stem from editing on a screen too long without fresh eyes. The fix is the same one that fixes most editing: do the work, walk away, come back tomorrow, and pull everything back.
The honest measure of a good natural retouch is that it is invisible — the subject looks great and nobody can point to what you did. For the deep, polished beauty work seen in commercial campaigns, dedicated retouchers go far beyond this with layered dodge-and-burn over hours per image, and that is genuinely their craft, not mine. For the believable portrait that respects the person, restraint and clean texture are the whole game.
Never edit color and texture together. Remove temporary blemishes with the healing brush, even out blotchy tone while leaving pores untouched, and avoid blur. If you can no longer see skin texture, you have gone too far.
A technique that splits an image into a texture layer and a color and tone layer. It lets you smooth uneven skin color without affecting the fine pores and detail, which is how you fix blotchiness while keeping skin looking real.
Generally no. Remove temporary things like blemishes or stray hairs that would be gone on another day. Keep permanent features like moles, freckles, and characterful scars unless the subject specifically asks, since they are part of the person.
It helps significantly. Dodge-and-burn and brush work are precision tasks where a pressure-sensitive pen is far more controllable than a mouse. A tablet is the one accessory that meaningfully improves retouching, though a mouse works to start.
Very little. A gentle catchlight lift and slight iris clarity add life to eyes; reducing warm tones slightly evens teeth. Glowing white eyes and paper-white teeth look fake. Make the move, then halve it, because real eyes and teeth are never perfect.
RAW photo processing is the act of converting your camera’s raw sensor data into a…
Photo editing is the develop stage that turns a correctly exposed RAW file into the…
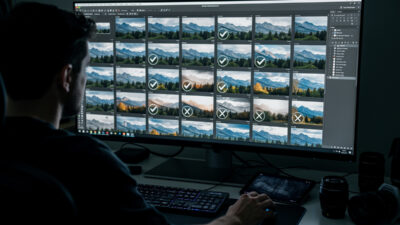
Culling is the stage where you reject the duds and pick your keepers before any…
Leave a Reply