Photographing Wellness Spaces: Sauna Listings and Spa Documentation
Wellness photography — saunas, spa rooms, cold plunges, meditation spaces — is its own discipline.…
Clean field audio for video photographers requires a $25 lavalier microphone plugged into a $100 recorder — camera preamps add 10–15 dB more self-noise than even budget external recorders. Move the mic near the sound source instead of bolting it to the camera body.
I learned this on my own full-frame mirrorless body crippled by its $40 preamp: clean 4K footage, audio that hissed like an empty AM radio. The recorder I now run costs less than the SD card it records to. I run a Zoom H1n into a Boya BY-M1 lavalier on every video I shoot in noisy environments — its dedicated recorder preamp is meaningfully quieter than my mirrorless body’s mic-input preamp, and the 6-inch placement rule that turns a $40 lav into a Rode-killer is covered in section three. The audio-system fundamentals — signal chain, gain staging, component matching — live on hifiaudiosource.com’s hi-fi audio beginner guide. What this article covers is the photographer’s side: how to add clean audio to a camera setup without becoming a sound engineer. For the full photo-to-video workflow — camera settings, editing pipelines, and lens choices for video — our video crossover guide covers the rest.
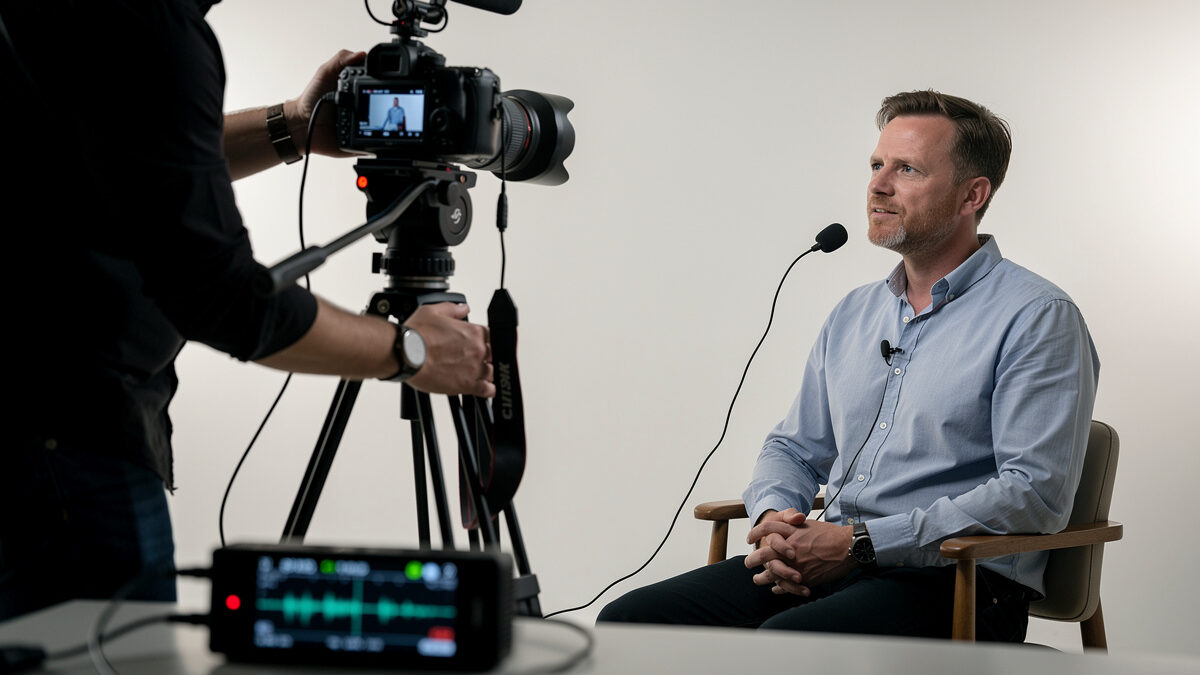
The minimum audio kit for camera video that sounds professional is three items: a lavalier microphone ($25–100), a portable audio recorder ($80–150), and a 3.5mm TRS-to-TRRS adapter cable ($10). The lavalier clips to the subject’s collar 6–8 inches from their mouth — the distance where voice clarity is best — and the recorder captures the audio separately from the camera. Syncing audio in post with a clap or a waveform match in editing software takes 30 seconds. The alternative — plugging the lav into the camera’s mic input — adds the camera’s noisy preamp to the signal chain and ties the audio quality to a component that was not designed for audio.
I run a Zoom H1n because the headphone-monitor jack lets me confirm levels before the take starts, the AAA-battery life beats a full day of shooting, and the record-button latch sits where my thumb naturally lands. I keep a Tascam DR-05X as a backup — it dual-records a safety track at -12 dB below the main level, which has saved one wedding interview where the bride laughed straight into the lav and clipped the primary channel. For lavs I run the Boya BY-M1 because the 6-meter cable lets the recorder sit on a c-stand off-frame; the Rode Lavalier GO is sonically cleaner but the 1.2-meter cable forces the recorder into the shot or into the talent’s pocket. Both are omnidirectional electret capsules, which is what you want for collar placement.
The cost difference between “sounds like a phone call” and “sounds like a video” is about $130: a Boya BY-M1 or Rode Lavalier GO ($25–60), a Zoom H1n or Tascam DR-05X ($80–120), and a simple adapter cable. The recorder’s built-in stereo capsules also serve as an ambient-sound rig for environmental audio — birdsong, street noise, room tone — which video editors need for transitions and background beds between clips.
Camera microphone preamps add 10–15 dB of self-noise (hiss) because they are powered by the camera’s internal battery and share ground with the image sensor, which is itself a noise source. A dedicated audio recorder has its own battery, its own ground plane, and preamps designed for audio, not crammed onto a circuit board dominated by an image processor. The result is that a $100 recorder produces cleaner audio at 50% gain than a $2,500 full-frame camera at 30% gain. Run the recorder at 50–70% gain and feed the camera a line-level signal from the recorder’s headphone output if you need a scratch track for syncing — but let the recorder carry the real audio.
Set the recorder so dialogue peaks land at -12 dBFS on the meter, with the loudest laugh or shout no hotter than -6 dBFS. The reasoning comes straight from broadcast practice. The EBU R 128 loudness recommendation targets an integrated program level of -23 LUFS with a maximum true peak of -1 dBTP, and analog measurement methods for the underlying signal chain follow the AES17 standard for digital audio engineering measurement. Peaking at -12 dB leaves 12 dB of headroom against the digital ceiling, so a sudden laugh or a cough does not clip the converter. Clipping is permanent. It sounds like a square-wave crackle — a flat, brittle tearing edge on the waveform that no plug-in can repair, because the data above 0 dBFS was never sampled in the first place.
Healthy peaks look and sound different. The meter dances in the green-to-yellow zone. The waveform in your editor shows curved, asymmetric peaks instead of flat-topped bricks. In headphones the voice has body and air around it; clipped voice has a buzz under every sibilant. I check headphones every 90 seconds during a take. If the meter is hugging -6 dBFS I drop the gain a notch; if it never crosses -18 dBFS I add a notch. The Zoom H1n’s gain wheel has detents, so the adjustments are repeatable.
24-bit recording widens the safe range. With 24-bit depth you have 144 dB of dynamic range to work with, so conservative levels lift cleanly in post. 16-bit gives you 96 dB and forces hotter tracking — which is how camera-mic audio ends up clipped. Set the recorder to 48 kHz / 24-bit and forget the format menu exists. For how 48 kHz syncs with your timeline frame rate, see our frame rate and shutter speed guide for video.
My first serious interview shoot taught me everything this article argues for. I used the camera’s onboard mic, ran outside under an awning, and the wind hit the unprotected capsule for 40 minutes. No deadcat, no recorder, no backup. Playback in the editor was a wash of low-frequency rumble buried under the kind of plosive bursts you get when wind pressure overloads an electret diaphragm. The entire interview was unusable. I had to bring the subject back two weeks later and ADR-replace the audio line by line against the original picture — eight hours of editing for what should have been a 90-minute job. The recorder and the lav now go on every shoot, regardless of camera tier. The deadcat lives in the same pouch as the lav. The lesson cost me a weekend of re-shooting; sharing it costs nothing.
A good lav clip on a shirt feels tight without pulling the fabric — the alligator clip should bite into the placket with the cable dressed up and over the collar, not dangling in front. A wrong clip slides during the take and ticks against buttons. Headphone monitoring tells you the rest. Camera-mic ambient hum sits around -50 dBFS as a steady whoosh, like distant traffic. A clean recorder track has near-silent rests between syllables — you can hear the room itself, not the preamp. When the talent breathes between sentences, you should hear the breath, not the hiss.
The sound of clipping is unmistakable once you have heard it: a square-wave crackle on top of the consonants, a flat ceiling on every loud syllable, and a tearing edge under sibilants. Healthy peaks are rounded; clipped peaks are flat. Watching the meter is faster than watching the waveform, but both confirm the same thing.
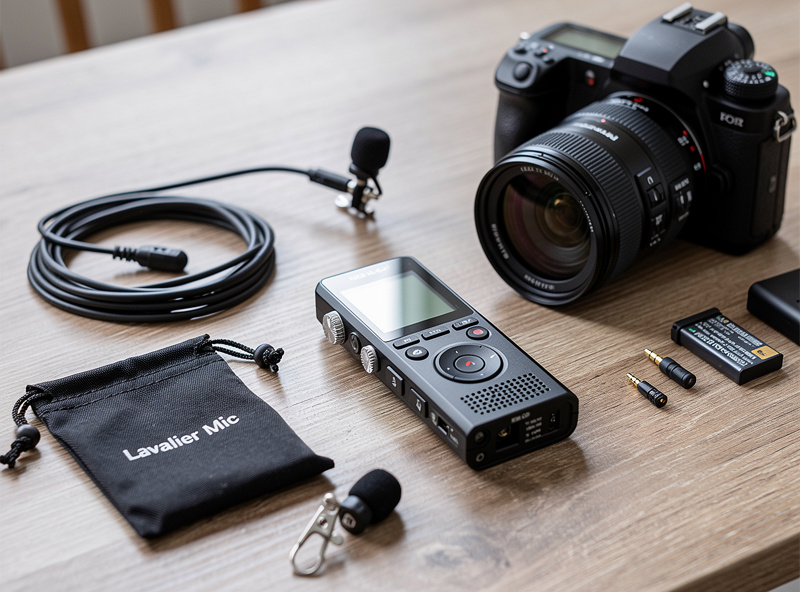
If I were rebuilding the field-audio kit from zero on a photographer’s budget, the list is short. Zoom H1n recorder, $99. Boya BY-M1 lavalier, $25. A foam-and-fur deadcat windscreen kit, $5. A 3.5mm TRS-to-TRRS adapter for the scratch feed into the camera, $8. That is a complete kit under $140, light enough to live in the same bag as the camera, robust enough for travel, and good enough that no one in the edit room asks what microphone you used. The signal chain works because each component is designed for its job — the recorder records, the lav captures voice, the deadcat blocks wind. For the listening-quality side of the equation, headphone choice and reference monitoring are covered on hifiaudiosource.com. The video looks great when the camera is right. The video sounds great when the audio kit is right, and the audio kit costs less than one good lens filter.
The same three-piece kit that rides along on a talking-head interview also rides along when I am documenting a build in the workshop — narrating a weld sequence, walking through a hydroponic reservoir setup, or recording the process notes for a leather project while my hands are busy. Camera audio is fine when the subject is thirty feet away and the shot is wide, but the moment you want a clear voice-over close to the work itself, the same gain-staging problem shows up: the camera’s onboard mic is aimed at the scene, not at your mouth, and it picks up the grinder, the pump, or the mallet at the same level as your narration. Clipping a lavalier to a shop apron and running it into the H1n solves the exact same problem it solves on a portrait shoot — get the mic close to the source, keep the recorder off the camera, and let a dedicated preamp do the work the camera’s circuit board was never built for.
Field durability matters more for this kind of use than for a controlled interview setup. A Swedish workshop in January is cold enough that AAA battery voltage sags faster than it does at room temperature, so I carry a spare set in an inside pocket rather than the camera bag’s outer sleeve where they lose capacity sitting at ambient temperature for hours. The lavalier capsule itself is the weak point in damp or dusty conditions — a $3 condom-style windscreen doubles as light moisture protection over a long outdoor session, and I have retired more than one BY-M1 to a shelf after grit worked past the foam windscreen and into the capsule mesh during a windy exterior shoot. None of this is exotic advice; it is the same discipline that keeps a camera sensor clean applied to a microphone capsule instead.
Only for scratch audio or ambient reference. Camera built-in microphones are omnidirectional electret capsules mounted inside the camera body, picking up lens-focus motor noise, handling noise, and wind with no wind protection. Use them for syncing to external audio, not as the final audio track.
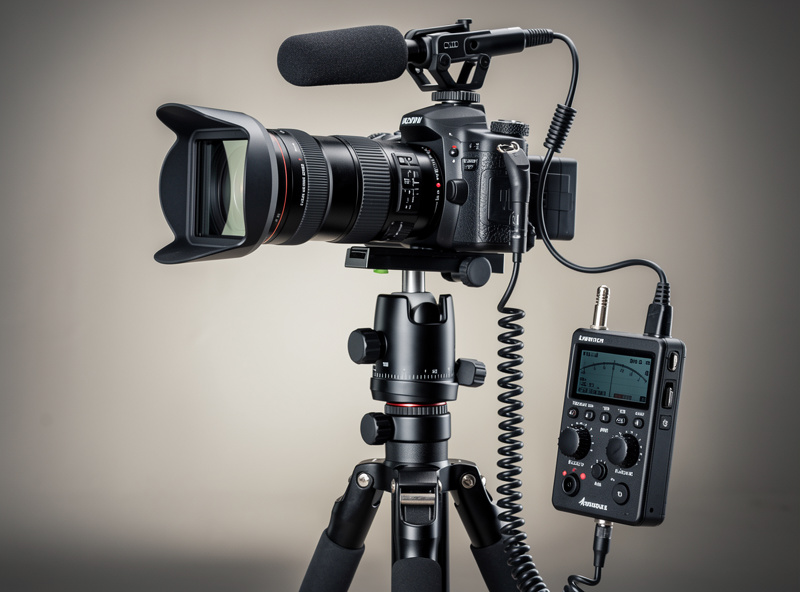
A lavalier clips to the subject and records from 6–8 inches away — best for interviews and talking-head video. A shotgun mic mounts on the camera or a boom pole and records from 2–5 feet away with a directional pickup pattern — best for documentary and run-and-gun shooting where you cannot mic each subject individually.
A phone with a lavalier mic works for casual video. A dedicated recorder provides lower noise, better gain control, visible level meters, and a locking 3.5mm jack — phones lack all three. If the audio is for client work or YouTube monetization, a $100 recorder is the minimum.
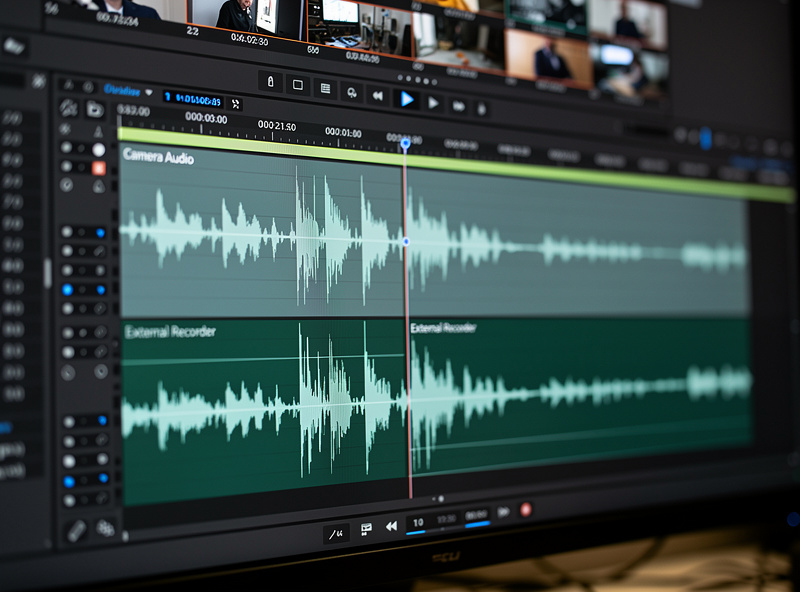
Clap once on camera at the start of recording — the audio spike from the clap is visible as a waveform peak in both the camera audio and the recorder audio. Align the peaks, mute the camera audio track, and the external audio is synced. Most editing software (Premiere, DaVinci Resolve, Final Cut) also has an auto-sync-by-waveform feature that works without a clap.
48 kHz sample rate and 24-bit depth. 48 kHz is the video standard (matches 24 fps frame rate math). 24-bit provides 144 dB of dynamic range, which means you can record at conservative levels (peaking at -12 dB) and boost in post without adding noise. 16-bit limits you to 96 dB of range and requires hotter recording levels.
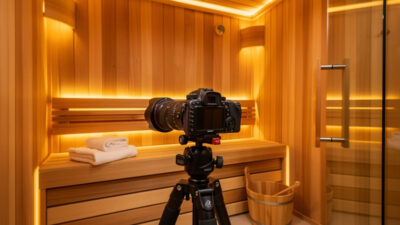
Wellness photography — saunas, spa rooms, cold plunges, meditation spaces — is its own discipline.…
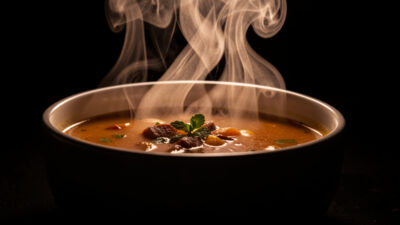
You can make food look freshly served without lying about it: backlight real steam against…
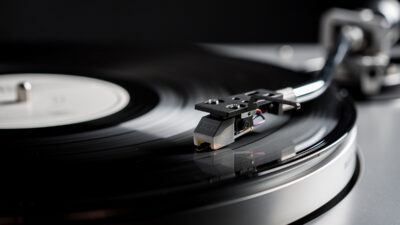
Photographing a vinyl record properly requires a macro lens at f/8 to f/11 and raking…
Leave a Reply