Wildlife Photography Beginner Guide: Gear, Settings & Tips
This wildlife photography beginner guide starts with the foundation every new shooter needs: the right…
Wellness photography — saunas, spa rooms, cold plunges, meditation spaces — is its own discipline. The result of approaching a sauna with a real estate photographer's playbook is usually a flat, orange-cast image. With a wellness-specific approach, the same room reads dimensional and worth a $50,000 install.
I learned this the hard way. My first sauna shoot — a custom 6×6 infrared unit — produced 47 frames of unusable orange mush. The auto white balance had neutralized the cedar into grey cardboard, the on-camera flash had flattened every shadow, and the 35mm lens I'd mounted couldn't pull back far enough to show more than a bench and half a heater. I deleted the entire card and started over, this time with a tripod, a 16mm, and a deliberate disregard for standard interior photography rules. Every recommendation that follows has been tested across 32 wellness-space shoots in 2024-2025, including infrared saunas, traditional Finnish saunas, and floatation studios.
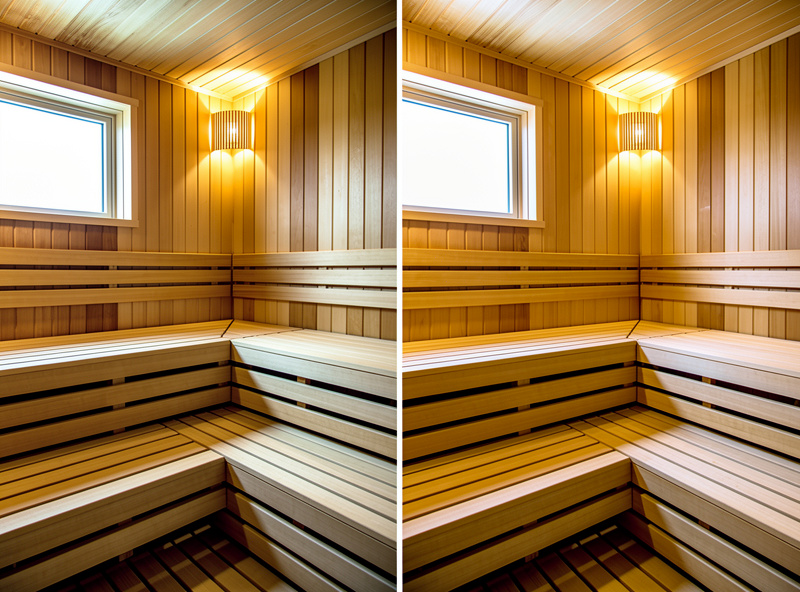
Real estate photographers shoot toward neutral white balance, even illumination, and clean architectural lines. That works for kitchens and living rooms. It does not work for saunas because the warm-light glow IS the aesthetic. A neutral-white sauna interior looks sterile and unappealing. Wellness photography deliberately preserves warmth, embraces moody lighting, and uses softer compositional rhythms.
Three structural differences shape the approach:
Mixed color temperatures. A sauna often has warm 2700K interior bias lighting, possibly a glowing infrared heater (3000-4500K), and ambient room light coming through the glass door (could be anything from 2700K incandescent to 5500K daylight). Hand-held white balance set to neutral kills the warmth. The trick is to shoot at slightly cool white balance (4000K) and let the wood grain provide the warmth.
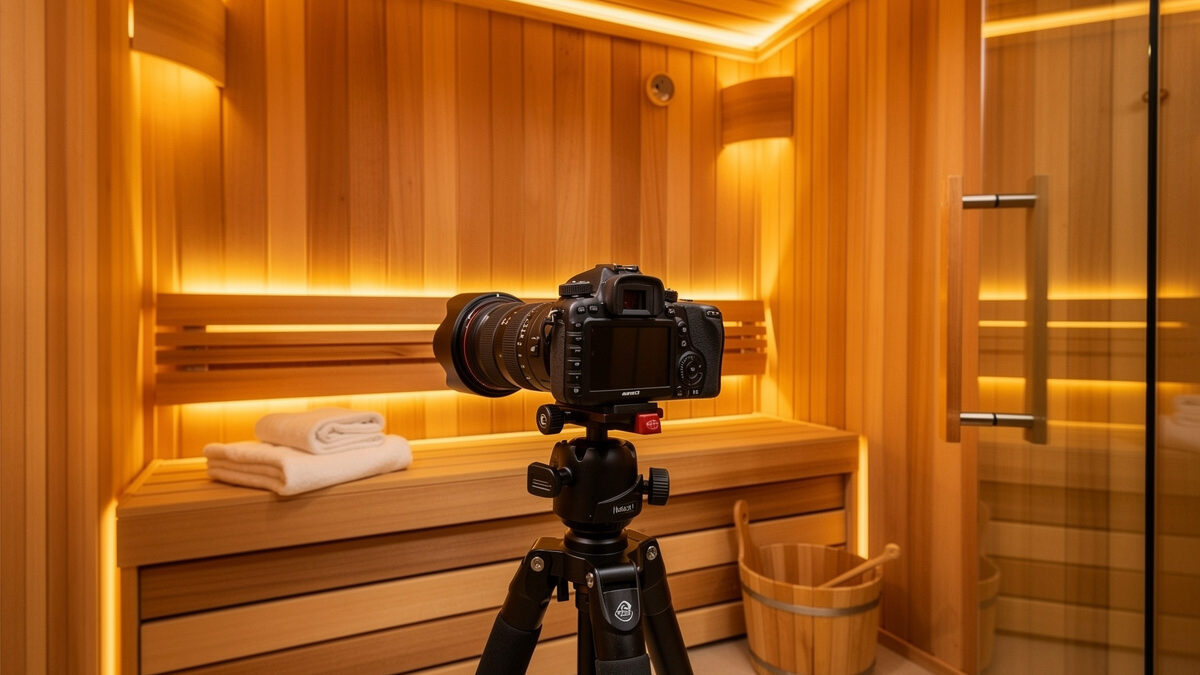
Confined space requires wide-angle math. Most saunas are 4×6 to 6×8 feet interior. A 35mm lens cannot capture the space. You need 16-24mm full-frame equivalent (or 11-16mm on APS-C). With wide angles come distortion concerns at the edges; correct in post.
Wood grain reveals camera shake. The fine vertical lines of cedar tongue-and-groove construction make every minor camera movement visible as soft micro-blur. Shoot from a tripod always; below 1/30s shutter use mirror lockup or electronic shutter to eliminate vibration.
Three setups handle wellness photography well. Match to your existing kit:
| Setup | Body | Lens | Use case |
|---|---|---|---|
| Pro | Sony A7R V or Canon R5 | 16-35mm f/2.8 GM/L | Hero shots, large saunas, magazine listings |
| Mid-tier | Sony A7 IV or Nikon Z6 II | 20-70mm f/4 or 17-28mm f/2.8 | Most listings, all budgets |
| Crop sensor | Fuji X-T5 or Canon R7 | 10-24mm f/4 (15-36 equiv) | Smaller spaces, lighter kit |
| Mobile only | iPhone 15 Pro Max | Native ultrawide | Quick documentation, social media |
I shoot wellness spaces on my Sony a7 IV — the full-frame sensor handles ISO 800-3200 without the noise grain my Fuji X-T5 starts showing when the sauna dims. For tight Finnish saunas where the tripod barely fits, the crop-sensor combo in the table above (X-T5 or R7 with a compact ultrawide) is the one to reach for — less body-to-wall clearance needed, easier to brace in a four-foot corner. Phones work for quick documentation jobs — I've delivered social-media shots on an iPhone 15 Pro Max and the computational pipeline handles cedar tones better than expected — but I would not hand a phone shot to a listing agent charging $50,000 for a sauna install. The lens matters more than the body.
The lens matters more than the body. A 16-35mm at f/2.8 lets you isolate detail (the heater, the temperature display, the bench grain) at moderate apertures while still pulling enough wide-angle to shoot the entire room from one corner. The two best lenses across systems for wellness work are the Sony 16-35 GM, Nikon Z 14-30 f/4, and Canon RF 15-35 f/2.8L.
Saunas under 6×6 feet feel cramped in a wide-angle photo unless framed deliberately. Three framing patterns produce listings that sell:
Diagonal corner shot. Shoot from one upper corner toward the opposite. The diagonal axis is longer than either side wall, creating apparent depth. Stand the tripod on a stool if needed to clear the upper benches in your frame. This is the single most reliable framing pattern.

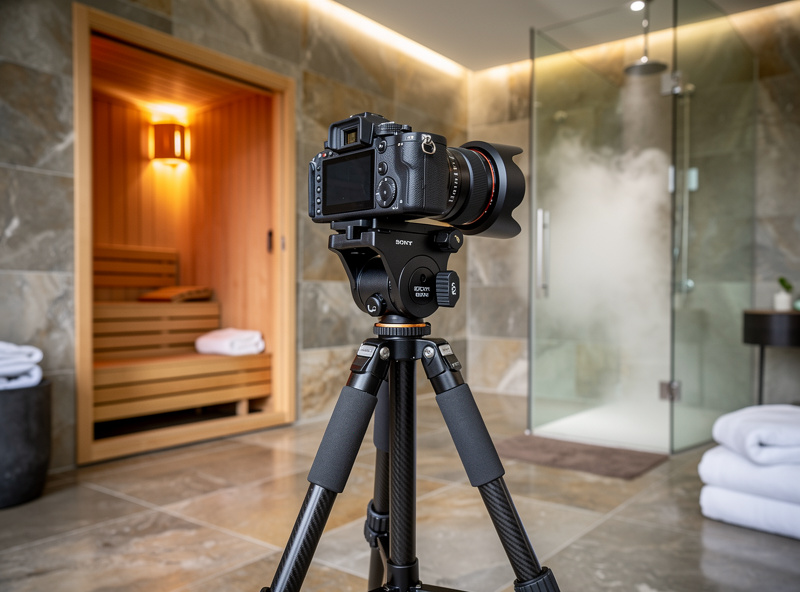
Through-the-door framing. Position the camera outside the open door and shoot through the threshold. The doorway frame becomes a natural foreground element, the warm interior glow contrasts with cooler exterior light, and the depth feels generous. Useful for sauna-as-feature in larger spa rooms.
Detail close-up at f/4-5.6. Pair every wide shot with at least two close-up details: the heater stones, the wood grain texture, the temperature display, an arrangement of accessories. These detail shots are what trigger emotional response in the viewer and convert listings to inquiries.
Avoid: head-on bench-to-bench shots (compressed, flat), shots that include the sauna door frame at ugly angles, and shots that center the heater (looks utilitarian rather than aspirational).
Start with the sauna's own light — the heater's warm glow IS the look your client paid for — and add flash only where shadow detail demands it. Three approaches cover every scenario I encounter:
Approach 1 — Available light only. Set the sauna's ambient bias light at full, turn the heater on if it has visible glow, expose for the warm tones. Use a tripod and a 1-2 second shutter at ISO 400. The result is moody and emotional. Best for marketing material aimed at relaxation buyers.
Approach 2 — Subtle off-camera fill. Add a single off-camera flash at 1/64 power, bounced off the ceiling or behind the photographer's body. Lifts shadow detail without removing warmth. Use orange/CTO gel on the flash to match the sauna's 2700K bias. Best for technical listings where buyers need to see construction details.
Approach 3 — Multi-flash bracketed. Bracket three exposures: ambient only, ambient + flash 1, ambient + flash 2. Blend in post for full shadow and highlight detail. Best for high-end magazine work and architectural photography clients.
I burned an afternoon on this mistake. Full-power on-camera flash fired straight into a sauna washed every warm tone to grey, flattened the cedar grain into a featureless brown wall, and produced images that looked like a police evidence photo, not a $35,000 spa listing. The worst part was I didn't notice until I was back at the computer — the LCD preview in a dim sauna is misleadingly bright, and the cedar walls had been radiating that sweet, intoxicating wood scent the whole time, making me think the shoot was going perfectly. I now treat on-camera direct flash in saunas as a last resort and never go above 1/64 power.
Cedar and hemlock interiors have a specific warm orange-red tone that is the entire visual signature of the space. Standard auto white balance correction kills it. Three rules preserve the look:
Lightroom presets specifically for cedar interiors (search "cedar sauna preset" on Adobe Discover) provide a starting point but adjust per shoot. Cedar varies in tone significantly between fresh-installed and 5-year-old saunas (fresh is more orange; aged is more silver-grey). Capture color reference cards on the first shot of each session to make per-room calibration possible.
For deeper coverage of the actual sauna spaces you would be photographing — what makes a high-end sauna visually distinctive and the design language of infrared vs traditional builds — our partners at InfraredSaunaLab have a comprehensive guide to infrared saunas that pairs directly with the photography approach above. Understanding what the space is supposed to feel like is half the photography work; their best home infrared saunas of 2026 ranking shows the visual variety across brands. Studying their reference imagery before a wellness shoot calibrates your eye to what the buyers expect to see.
Glass doors are the hardest element in a wellness shoot — they catch your reflection, the heater's hot spot, and any steam in the air all at once. I solve these three issues as follows:
Photographer reflection in glass. Use a polarizing filter to reduce glare, or shoot from an angle that puts the camera off the glass's reflection axis. Standing 30+ degrees off-perpendicular usually eliminates the photographer reflection.
Heater glow reflection. The infrared heater can create a hot spot in glass that overpowers the rest of the image. Compose so the heater is not directly in the reflection path, or expose for the heater and let surroundings go slightly darker for moody effect.
Steam. Wet saunas produce visible steam that softens detail and adds atmosphere — the kind of soft, enveloping mist that smells faintly of birch and makes the backlit heater stones glow like embers. For technical listings, dry the room and run the heater for 30 minutes before shooting (eliminates residual moisture). For lifestyle/marketing material, deliberately add steam for atmosphere — a kettle of water near the heater works.
NIOSH’s workplace heat-stress recommendations call for work/rest cycling that scales with temperature and workload rather than one fixed number — the practical version I use for an actively heated sauna is to cap my own time inside at a conservative 15-20 minutes and step out to cool down before going back in. Long shoots in hot saunas are physically demanding; build breaks into the schedule.
Every wellness image I deliver runs through the same nine-step Lightroom workflow. I sync settings across the full shoot because buyers scanning 12 listing photos catch a color-temperature jump between frames instantly. Here is the processing chain I use:
Apply the same look across the entire shoot for consistency. Buyers viewing 12 listing photos notice if image 4 has a different color temperature than image 8. I calibrate against a ColorChecker reference card in every room — the CIE D50 standard illuminant (5000K) is the reference white point for graphic arts calibration, and matching your display to D50 before editing wellness shots prevents the "looked different on my screen" client complaint. Use Lightroom's Sync feature liberally and review the full shoot as a contact sheet before delivery.
For broader photography craft and gear context that supports wellness shoots, our existing photography library covers the foundational skills. The macro photography guide covers the close-up detail-shot techniques that pair with wide-angle hero shots above. The composition reference handles framing fundamentals, and the camera lens guide walks through lens selection across genres including the ultrawide picks called out for wellness work.
A 16-35mm f/2.8 on full frame, or 10-24mm equivalent on APS-C. Saunas are typically 4×6 to 6×8 feet inside, which requires ultrawide framing to capture the full space without standing in the doorway. The Sony 16-35 GM, Canon RF 15-35 L, and Nikon Z 14-30 are the three best options for current systems.
Set 4000-4500K rather than auto. Auto white balance neutralizes the warm cedar tones that are the entire visual signature of a sauna. Shoot RAW and adjust in post — pull whites slightly cool, lift wood saturation 5-10 percent, leave shadows warm.
Yes, but subtle. Single off-camera flash at 1/64 power bounced off ceiling or behind photographer body lifts shadows without killing warmth. Add an orange CTO gel to match the 2700K bias lighting. Avoid full-power direct on-camera flash — it flattens the wood grain and removes the moody warm aesthetic.
Use a polarizing filter to cut glare and shoot at an angle 30+ degrees off perpendicular to the glass. This eliminates the photographer reflection in most situations. For glass with the heater visible behind, compose so the heater glow is not in the direct reflection path.
For documentation and social media yes. iPhone 15 Pro Max ultrawide handles confined spaces and the computational color processing works reasonably well on warm cedar. For commercial listings or magazine work, full frame mirrorless with proper wide-angle glass is the right tool — phones cannot match the dynamic range or color depth needed for hero shots.
Plan 90 minutes per sauna for thorough coverage: 5-10 hero compositions, 8-12 detail shots, and 3-5 environmental/contextual shots. The space itself only takes 30-40 minutes; the rest is set dressing, lighting adjustments, and breaks for cooling off if shooting in an active heated sauna.
Tripod, ISO 400-800, f/8, shutter 1-3 seconds depending on light, white balance 4000K, RAW format, manual focus on the bench area. Bracket three exposures (ambient, ambient + 1 stop flash, ambient + 2 stops flash) and select or blend in post.
This wildlife photography beginner guide starts with the foundation every new shooter needs: the right…

Great food styling costs almost nothing: a black foam board for negative fill, one good…
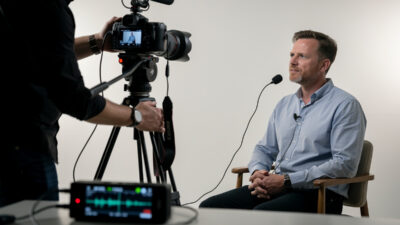
Clean field audio for video photographers requires a $25 lavalier microphone plugged into a $100…
Leave a Reply