Light Modifiers Explained: Softboxes, Umbrellas, Reflectors, and Diffusers
Light modifiers are tools placed between your flash and your subject that reshape light quality…
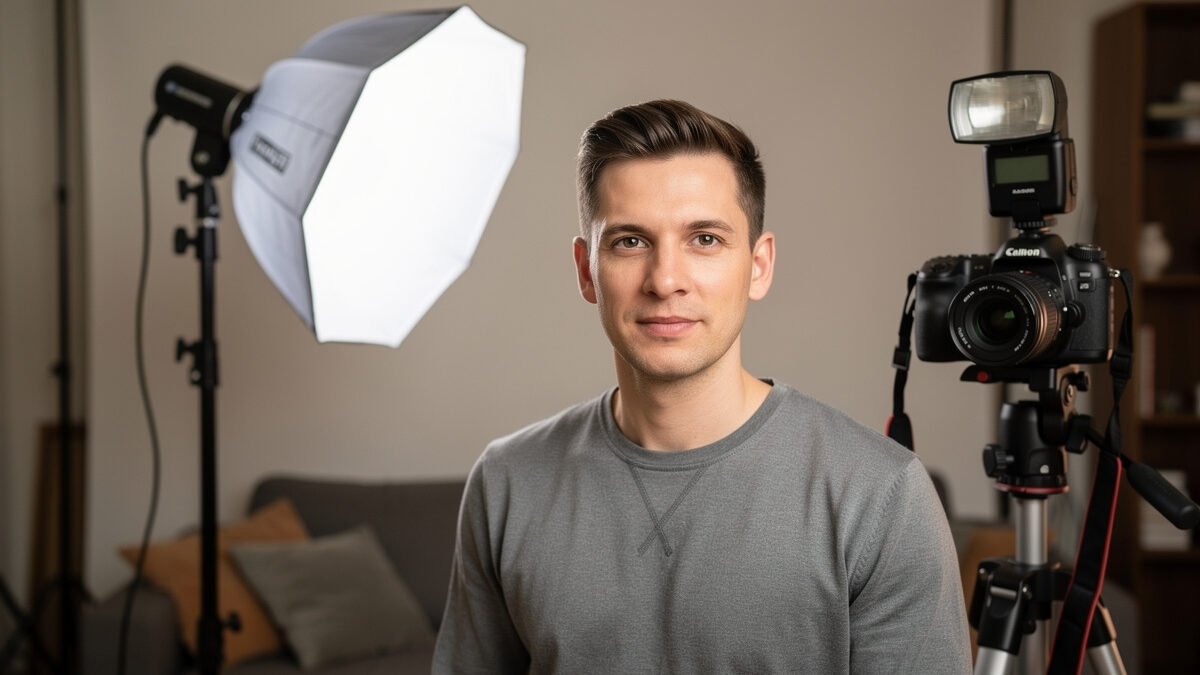
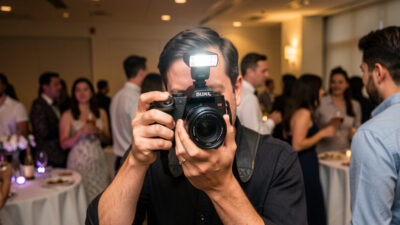
Taking your flash off the camera gives you control over shadow direction, depth, and texture that on-camera flash cannot produce. On-camera flash flattens faces into passport-photo territory because the light travels parallel to the lens axis, eliminating every shadow that defines shape. The moment I moved a Godox TT600 onto a $25 light stand at 45 degrees to my subject, I gained three things: a highlight side that defined bone structure, a shadow side that created dimensionality, and catchlights in the eyes that made portraits look alive instead of deer-in-headlights. Most photographers spend years buying lenses before they buy a light stand and an umbrella, which is exactly backwards — $130 in lighting gear changes your images more than a $1,300 lens ever will. I learned this the hard way after three years of shooting natural light only in Gothenburg’s eight-month grey season, convincing myself I was being “authentic” when I was really just underexposed.
The physics here is straightforward. Light from the same axis as your lens eliminates texture because the shadows cast by skin pores, fabric weave, and facial contours all fall directly behind the subject where the camera cannot see them. Move the light 45 degrees off-axis and those same shadows become visible to the camera, creating the three-dimensional rendering that separates a snapshot from a portrait. This isn’t gear worship or complexity for its own sake — it’s the single biggest image-quality improvement per dollar you can make in photography, period.
If you are still bouncing an on-camera speedlight off a white ceiling and calling it good, I need you to hear this: bounce flash is the training-wheels version of lighting. It works in rooms with white ceilings under 3 meters tall and fails everywhere else. The cathedral-ceiling wedding venue, the outdoor evening event, the room with wood-paneled ceilings that tint everything orange — all of those situations demand a speedlight on a stand rather than a speedlight on your hotshoe. The jump from on-camera to off-camera is where you stop being a camera operator and start being a photographer who controls light.
A functional off-camera flash setup requires exactly four pieces of equipment: a flash, a trigger, a stand, and a modifier. You can build a complete kit that produces directional, controlled light for under $200. I have tested this exact shopping list with three different friends who were starting from zero, and all three produced portrait work within their first weekend that looked better than anything they had shot in the previous two years. The goal here is not to collect gear — it is to get to the minimum viable setup that lets you control light direction and quality, then stop buying things and start shooting.
The flash itself does not need to be expensive. I use Godox TT600 units ($65 each) for 90% of my off-camera work. They are manual-only, which forces you to learn exposure by adjusting power in 1/3-stop increments from 1/1 down to 1/128, and that deliberate learning process is a feature, not a bug. The TT600 has a built-in 2.4GHz radio receiver compatible with the Godox X system, so you don’t need external receivers hanging off the flash with sync cables — one less thing to fail on location. If you insist on TTL, the Godox TT685II is $130 and adds TTL plus HSS in a more compact body — it still runs on four AA batteries (alkaline or NiMH), good for about 330 full-power pops per Godox’s official spec sheet, not a built-in lithium cell like the higher-tier V1 Pro. Honestly, I rarely use TTL when the flash is on a stand at a fixed distance from the subject. Manual power is set once and stays consistent frame to frame.
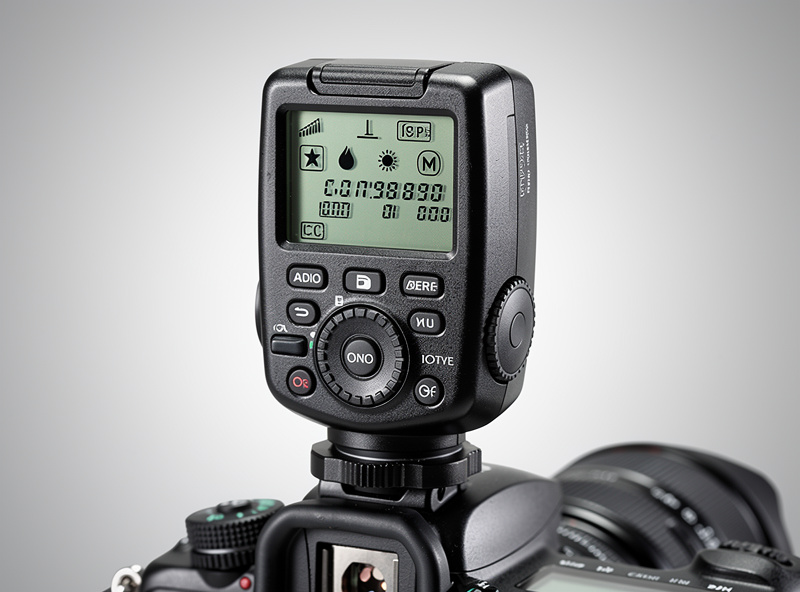
The trigger is the brain of the system. I use the Godox X2T ($59) which sits in my Fuji X-T5 hotshoe and controls up to 5 groups of flashes independently. The X2T has a clear LCD that shows each group’s power setting at a glance, and the physical dial lets me adjust power without looking through a menu. The cheaper X1T ($46) works fine but the interface is slower — if you are going to spend money anywhere, spend it on the trigger you will touch every time you shoot. Both triggers support high-speed sync up to 1/8000s, which matters enormously when mixing flash with natural light outdoors.
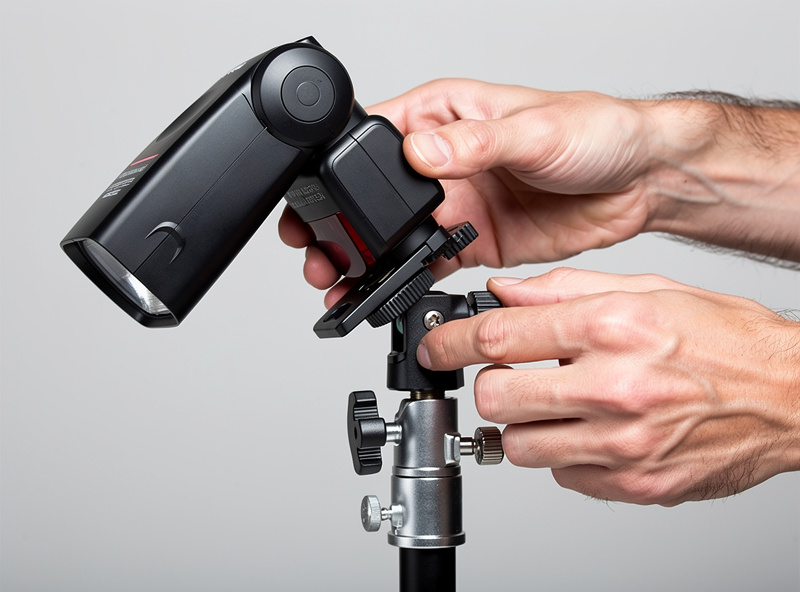
The light stand is where beginners make the biggest mistake by buying the cheapest option. A $14 aluminum stand with plastic locking collars will wobble in wind, collapse under a 33-inch umbrella in a mild breeze, and eventually strip the locking threads so the stand becomes a $14 paperweight. I recommend a 2.6-meter air-cushioned stand like the Neewer Pro 9-foot ($32) or a used Manfrotto 1004BAC. The air cushioning means if you accidentally loosen a section without holding it, the stand descends slowly instead of slamming down and pinching your fingers or shattering your flash. The 5/8-inch stud on top is the universal mounting standard — every flash bracket and modifier mount in existence fits it.
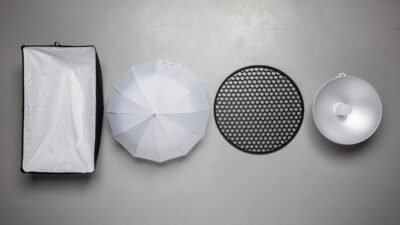
Your first modifier should be a 33-inch white shoot-through umbrella ($15) or an S-type bracket with a 60cm x 60cm softbox ($40). I will cover modifiers in depth in the light modifiers guide, but for your first setup, the shoot-through umbrella is the right call because it is cheap, weighs almost nothing, sets up in 10 seconds, and produces soft light with a 180-degree spread that wraps around a single subject beautifully. The downside is light spill — an umbrella throws light everywhere, which is fine in a dark studio but wasteful outdoors where you want every watt-second directed at your subject. That is when you graduate to a softbox with a grid, but you don’t need to buy that on day one.
You can go from unboxing to a properly exposed portrait in roughly 15 minutes if you follow a systematic order of operations. The sequence matters because skipping steps creates a cascade of confusion — I have watched photographers spend 20 minutes adjusting power settings while their flash was in the wrong group channel and never actually firing. Here is the exact order I follow every time I set up on location, developed through enough failures that I eventually wrote it down so I would stop repeating them.
Step one: mount the flash to the stand via an S-type bracket, attach the umbrella, and position the stand. Extend the stand so the flash sits roughly 15 to 20 centimeters above your subject’s eye level, angled downward about 30 degrees. Set the stand about 1 to 1.5 meters from your subject at a 45-degree angle to the camera-subject axis. This is your starting position — the classic Rembrandt-light distance that produces a small triangle of light on the shadow-side cheek. Do not deviate from this position until you have taken test shots and confirmed the baseline exposure is correct.
Step two: set the flash channel and group. On the TT600, hold the CH/OK button and dial to channel 1, then set the group to A. On the X2T trigger on your camera, set the same channel and confirm group A is active. If your flash has an optical slave mode enabled, disable it — optical slave will fire the flash whenever any other flash fires, including tour groups with pop-up flash at tourist attractions behind you, which I have experienced and it is exactly as confusing as it sounds.
Step three: set your camera to manual exposure mode. Start at ISO 200, shutter speed 1/125s (or your camera’s sync speed — check your photography lighting fundamentals if you’re unsure), and aperture f/4 for a single subject or f/5.6 for small groups. Take a shot with the flash turned off. The resulting image should be nearly black — this is your ambient-light baseline, and it tells you that all the light hitting your subject will come from the flash you control. If the ambient exposure is visible, either lower your ISO, stop down your aperture, or increase shutter speed up to your maximum sync speed.
Step four: turn on the flash at 1/16 power, which is the halfway point between minimum and maximum on a 7-stop range. Take a test shot. If the subject is too bright, drop to 1/32. If too dark, increase to 1/8. Most indoor portraits with a shoot-through umbrella at f/4 and ISO 200 land somewhere between 1/8 and 1/32 power depending on modifier distance. The key insight I wish someone had told me earlier: power adjustments are logarithmic, not linear. Going from 1/16 to 1/8 doubles the light output even though it looks like a small change on the display.
Step five: evaluate the image on your camera’s rear LCD, but do not trust its brightness — use the histogram. The right edge of the histogram should approach but not touch the wall, which indicates your highlights are exposed without clipping. If the histogram is bunched up on the left quarter, increase flash power. If it is slammed against the right edge, decrease. This five-step workflow takes under two minutes once you have done it three times, and it produces a correctly exposed baseline from which you can make creative decisions about lighting ratios and mood.
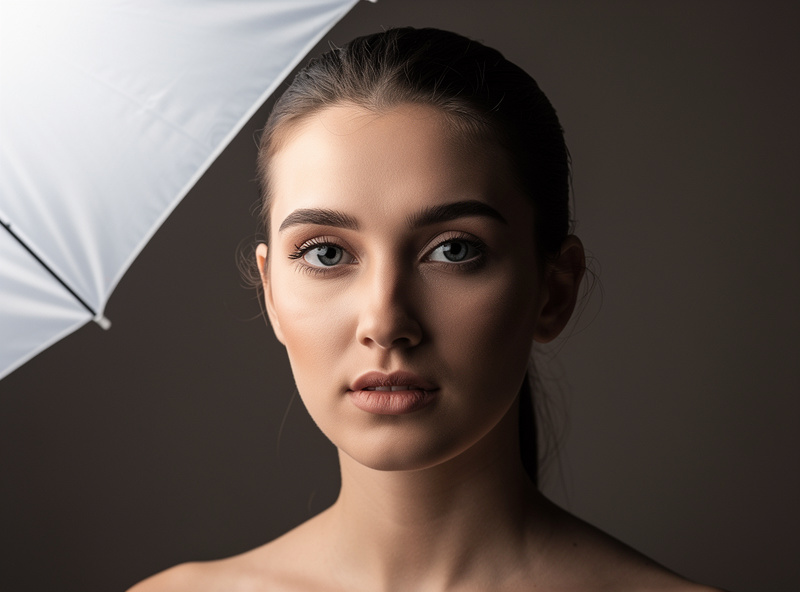
The 45-degree key light position is the most useful flash placement in portrait photography because it creates one lit side and one shadowed side on the face, producing the dimensionality that separates amateur from intentional lighting. Place the flash 45 degrees to one side of your subject and about 30 degrees above eye level, angled downward. This produces a shadow that falls across roughly one-third of the far side of the face, with a small triangle of light under the far eye — the Rembrandt pattern that has been the standard for single-light portraiture since the 17th century. I default to this position for probably 70% of the single-person portraits I shoot because it works across every face shape and requires zero adjustment between subjects.
Distance between the flash and subject controls two things simultaneously: light intensity (inverse square law) and light softness (relative size of the source). At 1 meter, a 33-inch umbrella is proportionally large relative to the subject and produces soft, forgiving light. At 3 meters, that same umbrella becomes a small source that produces harder shadows. I keep the modifier between 1 and 1.5 meters from the subject for the softest light, then adjust power to compensate rather than moving the stand further away. If I need harder light for a dramatic look, I remove the umbrella entirely and use the bare flash head, which is effectively a 5cm light source — about as hard as light gets from a speedlight.
The height of the stand matters more than most beginners realize. A flash at exactly eye level produces flat, passport-style lighting with no shadow modeling on the face. A flash too high (above 45 degrees) creates deep eye-socket shadows that read as tired or sinister — this is the Universal monster-movie lighting mistake, and I made it consistently for my first six months with off-camera flash because I was trying to avoid glare on glasses. The sweet spot for most faces is about 15 to 20 centimeters above eye level, which creates natural-looking nose shadows that fall downward at roughly a 45-degree angle toward the corner of the mouth. If the nose shadow touches the upper lip, the light is too high. If the nose shadow disappears entirely, the light is too low.
For fill light, I rarely reach for a second flash. A $5 white foam core board from an art supply store, positioned opposite the key light and just outside the frame, bounces enough light back into the shadow side to reduce contrast without eliminating it. The distance between the reflector and the subject controls the fill ratio: at 60cm, the fill is about 1 stop darker than the key side, which reads as natural and three-dimensional. At 1.5 meters, the fill drops to about 2 stops below key, producing dramatic shadow-side falloff. This single-light-plus-reflector setup is what I use for probably 80% of my off-camera work — it is fast to set up, fits in one bag, and produces light that looks intentional without looking lit. For more on the relationship between lens choice and lighting, the portraiture fundamentals matter as much as the flash placement.
Manual flash power is controlled in fractions of full power, and understanding the math behind these fractions eliminates the guesswork that makes beginners afraid to leave TTL mode. Full power (1/1) is the maximum output of your speedlight, typically around 60 to 80 watt-seconds for a AA-powered unit like the Godox TT600. Each step down the scale — 1/2, 1/4, 1/8, 1/16, 1/32, 1/64, 1/128 — halves the light output and requires either opening your aperture by one stop or doubling your ISO to maintain the same exposure. This is the same stop-based math as shutter speed and aperture, so if you understand the exposure triangle, you already understand flash power ratios.
I adjust power based on the histogram, not a light meter. A handheld incident meter like the Sekonic L-308X ($230) — built to the ISO 2720 standard for incident-light photometry — is the most accurate tool for flash metering and I will not pretend otherwise, but for learning and for 90% of real-world shooting, the camera histogram plus a test shot is faster and costs nothing. Take a frame, check the histogram for highlight clipping, adjust power up or down, and reshoot. The entire cycle takes about 5 seconds once you have the muscle memory for where the playback button is on your camera. When I am shooting in consistent conditions — same modifier distance, same indoor ambient — I set the power once and never touch it for the rest of the session.
Flash-to-subject distance follows the inverse square law: double the distance and you quarter the light hitting the subject. A flash at 1 meter from a subject at 1/8 power produces the same exposure as a flash at 2 meters at 1/2 power. This relationship is why moving your stand even 30cm forward or backward changes exposure noticeably, and why you should lock the stand position before fine-tuning power. It is also why bouncing a flash off a 4-meter ceiling consumes nearly all your power — the light travels 4 meters up, hits a surface that absorbs 30-50% of the light, and travels 4 meters back down, which by the inverse square law means barely 1/64th of the original output reaches your subject. This is why direct off-camera flash with a modifier is so much more power-efficient than ceiling bounce.
Aperture controls flash exposure, shutter speed controls ambient exposure. This is the single most important technical principle in flash photography and the one that took me the longest to internalize. The flash duration of a speedlight at full power is roughly 1/300s to 1/1000s depending on the unit — far shorter than any shutter speed you can set on a focal-plane shutter. This means the shutter speed, as long as it is at or below your camera’s sync speed, has almost no effect on the flash exposure. Shutter speed only controls how much continuous ambient light reaches the sensor during the exposure. So if you want a dark dramatic background while your flash-lit subject is correctly exposed, shoot at 1/200s or 1/250s (your sync speed) with a low ISO and stopped-down aperture. If you want the ambient room light to contribute to the exposure, drop the shutter to 1/60s or 1/30s. This is called dragging the shutter, and it is how you get those wedding reception photos where the couple is sharp but the string lights in the background trail beautifully.
The five mistakes below account for roughly 95% of the troubleshooting questions I see in photography forums, and all five have simple fixes that take less time to implement than it takes to read about them. I made every single one of these mistakes myself, usually more than once, because flash photography has a steep initial learning curve that flattens out dramatically once you understand a handful of core principles.
The first mistake is leaving the camera in aperture-priority or program mode while using manual flash. The camera’s meter reads the ambient light and adjusts shutter speed to expose for it, which means in a dim room you end up at 1/15s and your flash-lit subject is sharp but surrounded by motion-blurred ambient ghosts. Switch to manual exposure mode, set your shutter to your sync speed (typically 1/200s or 1/250s), and control ambient contribution by adjusting shutter speed downward from there if you want it. This single change eliminates most of the inconsistency that drives beginners back to natural light.
The second mistake is placing the flash too far from the subject and compensating with higher power, which produces hard light with sharp-edged shadows that look like crime-scene evidence photos. The size of the light source relative to the subject determines softness, not the power setting. A 33-inch umbrella at 1 meter is a large source producing soft light regardless of whether you shoot it at 1/128 or 1/1 power. Move that umbrella to 3 meters and it becomes a small hard source, also regardless of power. Keep the modifier close, manage exposure with power rather than distance, and your light quality stays consistent.
The third mistake is ignoring the flash zoom setting. Most speedlights have a motorized zoom head that focuses the light into a narrower or wider beam, and the default auto-zoom setting changes based on your lens focal length. For off-camera flash with an umbrella or softbox, set the zoom to its widest position (typically 20mm or 24mm) so the flash fills the entire modifier surface. If the zoom is set to 105mm, the flash throws a narrow beam that only hits the center of your umbrella, turning a 33-inch modifier into an effective 8-inch source. Check this setting every time you set up — it is buried in the flash menu and easy to forget between sessions.
The fourth mistake is fighting the ambient light instead of working with it. Flash does not need to obliterate the existing light in a scene. Some of my favorite portraits use flash at 1/64 or 1/128 power — just enough to add a subtle catchlight and lift the shadows by half a stop — while the ambient window light does most of the heavy lifting. This is called fill flash and it is, in many ways, more technically demanding than full key-light flash because overdoing it by even a third of a stop crosses the line from natural-looking to obviously lit. The essential camera accessories like a good lens hood also matter here — lens flare from a window behind your subject will wash out the subtle fill-flash effect faster than any power-setting mistake.
The fifth mistake is not shooting enough. Flash photography has a failure rate in the first month that would discourage anyone, and the only way through it is volume. Set up your stand in the living room, put a stuffed animal or a patient friend in front of it, and shoot 200 frames while changing one variable at a time — power, distance, modifier angle, shutter speed for ambient mix. The principles that feel abstract in an article become intuitive after about 500 frames of deliberate practice. I shot 1,200 frames across three weekends before I could walk into a room, set up a single light, and nail exposure on the third test shot. That ratio is normal. It is not a talent gap — it is just seat time with the gear.
The table below covers three budget tiers for building a first off-camera flash kit. I have used equipment from all three tiers and the jump from Budget to Mid-Range is more significant for usability than the jump from Mid-Range to Pro. Buy the best trigger you can afford and do not cheap out on the light stand — those two items outlast flashes through multiple upgrades.
| Component | Budget ($130-$180) | Mid-Range ($250-$350) | Pro ($500-$700) |
|---|---|---|---|
| Flash | Godox TT600 ($65) | Godox TT685II ($130) | Godox V1 Pro ($230) |
| Trigger | Godox X1T ($46) | Godox X2T ($59) | Godox XPro II ($90) |
| Light Stand | Neewer 7ft ($18) | Neewer Pro 9ft Air-Cushioned ($32) | Manfrotto 1004BAC ($120) |
| Modifier | 33-inch White Umbrella ($10) | 60cm Softbox + S-Bracket ($40) | 80cm Glow EZ Lock Softbox ($89) |
| Bracket | Basic S-Type Bracket ($12) | Godox S2 Bracket ($25) | Included with softbox |
| Reflector | White Foam Board ($5) | 5-in-1 80cm Reflector ($25) | 5-in-1 110cm Reflector + Stand Arm ($60) |
| Total | $156 | $311 | $589 |
| Best For | Learning manual flash, indoor portraits, small spaces | TTL option, faster workflow, outdoor HSS | Event work, second shooter kits, daily professional use |
I use manual flash for off-camera work about 90% of the time. Manual gives you frame-to-frame consistency that TTL can’t match when the flash is in a fixed position. A Godox TT600 costs $65 and does everything you need. TTL is useful when shooting events where the subject-to-flash distance constantly changes, but for portraits and product shots, manual is more reliable and easier to learn.
A complete first kit runs $130 to $200. A Godox TT600 flash ($65), a basic light stand ($25), an S-type bracket ($12), and a 33-inch white shoot-through umbrella ($15) is the setup I started with in my apartment in Gothenburg. Add a Godox X2T trigger for $59 and you are at about $175 total. This produces light quality that beats any on-camera flash regardless of price.
Yes, and this is where flash gets really interesting. Outdoors in sunlight you need high-speed sync (HSS) which lets you shoot above your camera’s sync speed, typically 1/200s or 1/250s. HSS is how you get a dark dramatic sky behind a properly exposed subject at f/2.8 in full sun. Most modern speedlights including the Godox TT600 support HSS with the right trigger.
Speedlights run on AA batteries, weigh about 400 grams, and output roughly 60 to 80 watt-seconds of light. Strobes (monolights) plug into wall power, weigh 1.5 to 3 kilograms, and output 200 to 600 watt-seconds. I use speedlights for everything location-based and only reach for strobes when I need to overpower direct sunlight at noon. For beginners, speedlights are the right starting point every time.
The most common cause is the flash being too far above or directly beside the subject with no fill, creating harsh noseshadows and dead eye sockets. Move the flash closer to the camera axis, around 30 degrees off-center and just above eye level. Feather the umbrella slightly rather than pointing it dead-on. Add a white foam board opposite the key light for fill, which costs about $8 at any art supply store.
Light modifiers are tools placed between your flash and your subject that reshape light quality…
On-camera flash gets a bad reputation it only half deserves. Pointed straight ahead, the built-in…
Window light is the best food light there is: place the dish beside a north-facing…
Leave a Reply