Light Painting Basics: Drawing With Light
Light painting is a long-exposure technique where you work in a dark scene, open the…
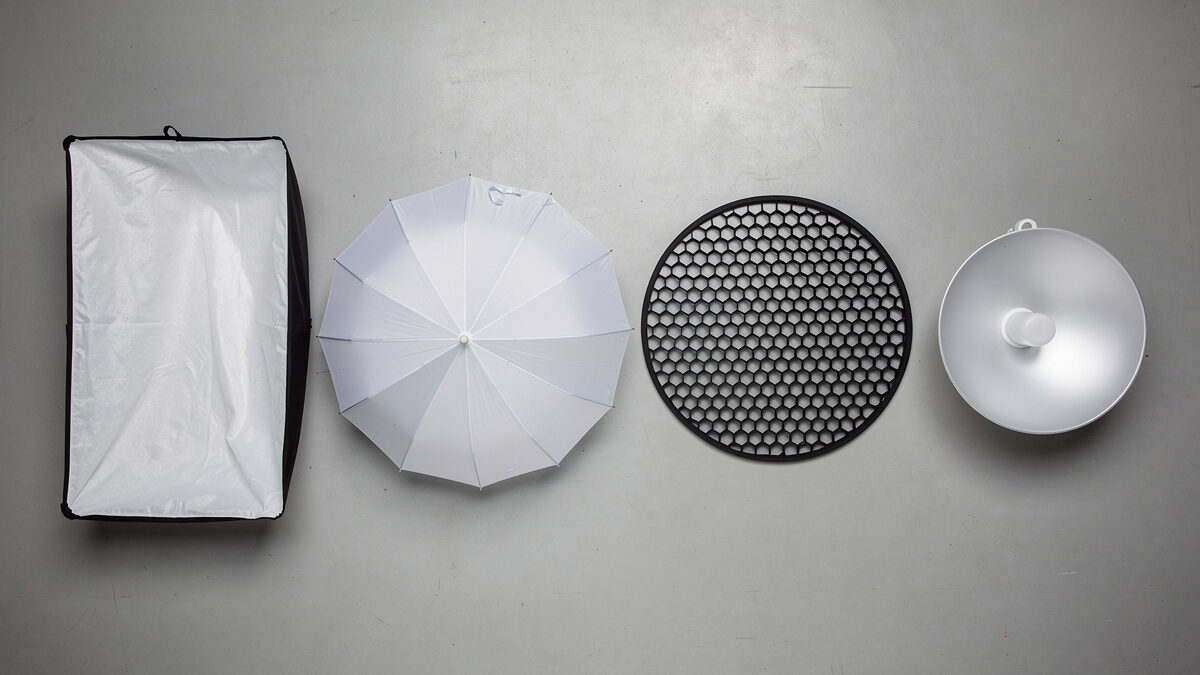
Light modifiers are tools placed between your flash and your subject that reshape light quality by changing source size, direction, or spread — and in every portrait I shoot, the modifier matters more than flash power, body, or lens. A $15 shoot-through umbrella on a $60 speedlight produces better light than a $1,000 strobe fired bare, and I have the aperture-sweep test frames to prove it.
The softness of light is determined by one variable and one variable only: the apparent size of the light source relative to the subject. A larger source wraps light around three-dimensional objects, filling in texture from multiple angles and creating gradual shadow transitions. A smaller source projects light from a narrow angle, producing sharp-edged shadows with abrupt transitions from highlight to shadow. This is not a matter of brand, price, or marketing — it is the geometry of light rays traveling in straight lines, and every modifier in existence is a tool for making your flash appear larger to your subject. I own seven modifiers that I use regularly, and not one of them was purchased because a YouTube reviewer said it was sharp or punchy or had buttery bokeh balls.
The math is worth understanding because it saves you from buying modifiers that are too small for your intended use. A 60cm (24-inch) softbox placed 1 meter from a face has an apparent size of about 60cm, which is roughly twice the width of the subject’s head — this produces soft but directional light. That same 60cm softbox placed 3 meters away for a full-body portrait becomes effectively a 20cm source at that distance, which is a hard light source producing defined shadows. For full-body work, you need a minimum 90cm to 120cm modifier to maintain softness at the 2 to 3 meter working distance required to fit a standing person in frame. This is why understanding lighting fundamentals before buying modifiers saves you from the cycle of buying progressively larger softboxes as you figure out why your portraits look harder than you intended.
I learned this with a 40cm softbox that I bought as my first modifier because it was $28 and fit in my camera bag. It worked fine for headshots at 80cm distance, producing a pleasing soft key light that I used for probably 200 portraits. The first time I tried to light a couple standing together at 2.5 meters, the light was nearly indistinguishable from a bare flash — hard shadows, specular highlights on skin, zero wrap. The modifier had not changed. The distance had, and at 2.5 meters a 40cm source is tiny. I now use a 90cm octabox for any shot where I need to light more than one person or pull back beyond 1.5 meters, and the 40cm lives on a shelf as a reminder that modifier size is relative to working distance, not absolute.
Before diving into specific types, it helps to understand what off-camera flash placement does in combination with modifiers. The modifier changes the quality of light; the placement determines the direction and shadow pattern. Both must be right for the image to work, and getting one right while the other is wrong is the lighting equivalent of nailing focus on the wrong subject.
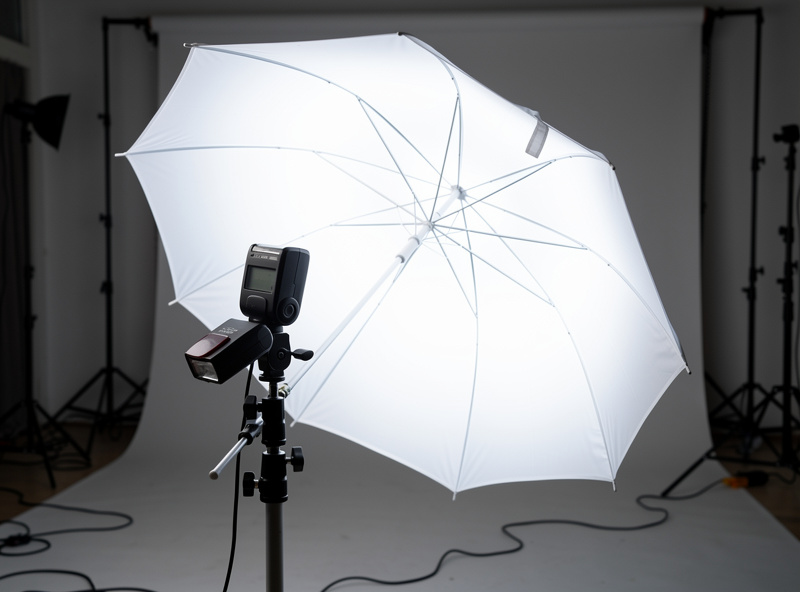
A white shoot-through umbrella is the cheapest, lightest, and fastest-to-set-up light modifier available, and it is the correct first modifier for anyone learning off-camera flash. It works by placing the flash behind a semi-translucent white fabric that diffuses the light across a roughly 180-degree spread. The flash fires through the fabric toward the subject, and the result is soft light with a gentle falloff that wraps around facial features. A 33-inch (84cm) umbrella costs about $10 to $15, weighs under 300 grams, collapses to the size of a folded tripod, and deploys in under 5 seconds. I keep one in my bag at all times even though I own three softboxes, because sometimes the shoot is in a 12-square-meter apartment and the umbrella is the only modifier that fits between the stand and the wall.
The downside of a shoot-through umbrella is light spill. Because the umbrella spreads light in a hemisphere behind and around the flash, roughly 60% of the light goes in directions other than toward your subject. In a small white room, this spill bounces off walls and ceiling and acts as natural fill light — which is actually useful and why umbrellas look so good in home-studio setups. Outdoors or in large dark spaces, that spill is wasted power that never reaches your subject, and a softbox with silver interior lining becomes the more efficient choice. I switch from umbrella to softbox when I am shooting outside at dusk and need every watt-second of a speedlight’s limited output to reach the subject rather than light up the forest behind the stand.
There is also the reflective umbrella variant, which is a black-backed umbrella with a silver or white interior that you fire the flash into rather than through. The light bounces off the concave surface and projects forward with less spill and slightly more contrast than a shoot-through. Reflective umbrellas are more power-efficient but produce slightly harder light because the reflective surface creates a smaller effective source than the full diameter of a shoot-through. I use a reflective umbrella about 15% of the time, almost exclusively outdoors, and reach for the shoot-through for everything else. If you can only buy one, buy the white shoot-through and learn to flag the spill with black foam core when you need more control.
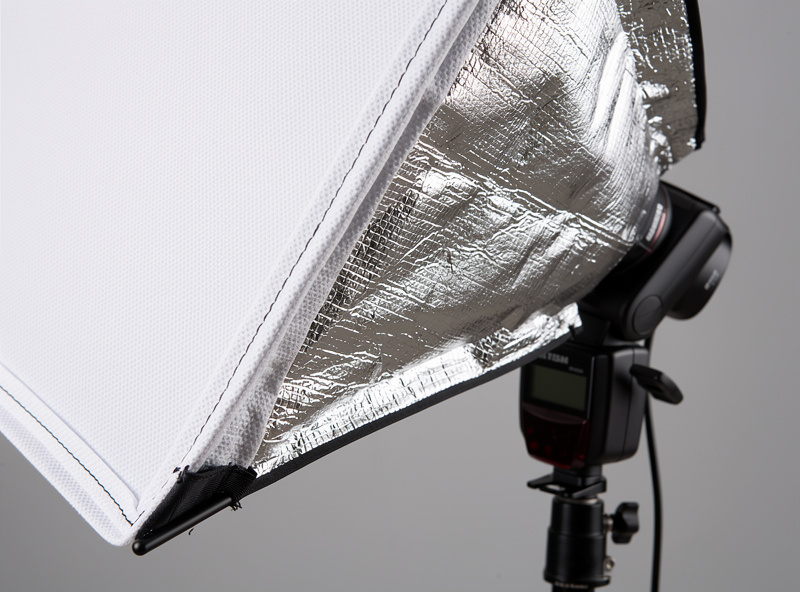
A softbox is a fabric enclosure with a reflective interior and a diffuser panel on the front face that produces soft, directional light with significantly less spill than an umbrella. The reflective interior walls (usually silver) bounce light around inside the box until it exits through the front diffusion panel, which acts as a second-stage diffuser that evens out hotspots. The result is a rectangular or octagonal light source that you can aim precisely at your subject without flooding light onto the background or walls. This directional control is the primary reason to upgrade from an umbrella to a softbox — when you want to light a subject against a dark background and not have your key light contaminate the background exposure, a softbox makes that trivial and an umbrella makes it nearly impossible.
I own three softboxes and the one I use most is a 60cm x 60cm square softbox on a Godox S2 bracket, which together cost about $65. The square shape produces catchlights in the eyes that look like window reflections — natural and believable — whereas an octabox produces round catchlights and a rectangular strip box produces slit-shaped catchlights. This matters more than most photographers admit, because human eyes are wired to read catchlight shape as a cue about the environment the subject is in. Square catchlights read as window light. Round catchlights read as either a ring flash or an overcast sky. The audience may not consciously identify what they are seeing, but they notice when something feels off, and catchlight shape is part of that subconscious evaluation.
Softboxes accept grids (also called eggcrate grids), which are fabric honeycomb panels that attach to the front of the softbox via velcro and restrict the light beam to a narrower angle — typically 20, 30, or 40 degrees. A 40-degree grid on a softbox prevents light from hitting the background while still covering a single subject at portrait distance. A 20-degree grid creates a tight pool of light that can isolate just a face and shoulders against a completely dark background even in a white-walled room. Grids are the single most underrated accessory in lighting because they give you control over where light falls without requiring you to move the stand or add flags. I use a 30-degree grid on my 60cm softbox for probably 40% of my portrait work.
The foldable softbox designs that use metal rib frames (like the Godox or Glow EZ Lock series) are worth the extra $20 over the ones that require you to bend fiberglass rods into grommets. I have broken two fiberglass-rod softboxes during setup in cold weather — the rods get noticeably more brittle and prone to snapping once real winter cold sets in, which is a long stretch of the year where I shoot in Sweden. The rib-frame designs set up and collapse in under 30 seconds and never break. If you shoot outdoors in variable weather, this is not a luxury feature.
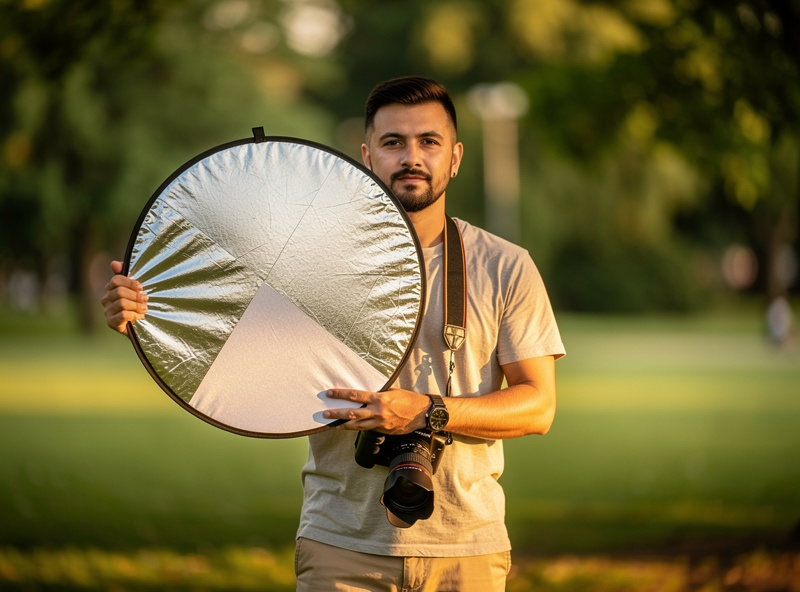
A 5-in-1 collapsible reflector is the most versatile lighting tool you can buy for under $30, and it requires no batteries, no stand, and no trigger. The standard 5-in-1 disc (usually 80cm or 110cm diameter) includes a translucent diffusion panel, a white bounce surface, a silver bounce surface, a gold bounce surface, and a black flag surface — all in a package that folds to one-third its deployed size and weighs about 400 grams. I carry an 80cm 5-in-1 in my location bag every single time I shoot, and I use it on roughly 60% of portrait sessions even when I have flash set up, because a reflector positioned correctly fills shadows in ways that a second flash cannot match for speed or subtlety.
The translucent diffusion panel is the surface I use most often. Hold it between the sun and your subject on a bright day, and it turns harsh overhead sunlight into a massive soft overhead source — effectively a free 80cm softbox powered by the sun. The subject’s exposure drops by about 1 to 1.5 stops depending on the fabric, so you need to compensate with aperture or ISO, but the quality-of-light improvement is dramatic. I use this technique for outdoor portraits between 10am and 2pm when the sun is high and unflattering, and it consistently produces results that look like they were shot during golden hour rather than at solar noon. Combined with natural light photography techniques, a diffusion panel is often all you need for outdoor portraiture.
The white bounce surface provides the softest fill light of any reflector surface, adding about 1 stop of fill at 60cm distance with a subtle, neutral color cast. It is effectively a portable white wall, and it is the surface to use when you want fill light that the viewer will not consciously notice. Silver bounce provides about 2 stops of fill at the same distance with more contrast and a cooler color temperature — it reads as intentional fill and works well for dramatic, high-contrast portraits where you want to see the fill as part of the image’s visual language rather than hide it. Gold bounce warms skin tones with a yellow-orange cast that complements fair to medium skin in warm natural light, but on overcast days it looks obviously gold and creates an unnatural color split between the key-lit side and the fill side. I use gold bounce about 5% of the time, almost exclusively during actual golden hour when the warm cast blends with the ambient light.
The black flag surface subtracts light rather than adding it. Position it on the shadow side of the subject to prevent ambient light or spill from your key light from filling in shadows that you want to keep deep. This is called negative fill, and it is the technique that creates the dramatic, contrasty look in high-end portrait work. A black flag opposite a single key light can drop the shadow side by an additional 2 to 3 stops compared to letting ambient fill do its thing. Most photographers never use negative fill because it is less intuitive than adding light, but subtracting light is equally powerful and costs nothing beyond the reflector you already own.
Grids and snoots restrict light to a narrow beam, creating a spotlight effect that can isolate a single detail in an otherwise dark frame. A grid is a honeycomb panel that attaches to the front of a reflector dish or softbox, limiting the light spread to a specific angle — commonly 10, 20, 30, or 40 degrees. A snoot is a conical tube that mounts directly to the flash head and creates an even tighter circle of light, often with a hard edge that falls off to complete darkness within a few centimeters of the circle perimeter. I use grids far more often than snoots because grids produce a gentler falloff at the edge of the beam while snoots create a hard-edged circle that often reads as theatrical or fashion-editorial rather than natural.
Godox’s round-head flashes and the S-R1 adapter that fits standard rectangular-head units like the TT600 both accept the same magnetic AK-R1 grid accessories — 20, 30, and 40-degree angles for about $8 each. A 20-degree grid on a bare reflector at 1.5 meters creates a light circle roughly 50cm in diameter — perfect for headshots where you want the face fully lit and the shoulders falling into shadow. The same grid at 3 meters creates a circle about 1 meter across, which covers a seated subject from head to waist. The math is simple: beam diameter equals distance times the tangent of the grid angle, so a 20-degree grid at 1 meter produces a 36cm circle. This predictability is useful when you are setting up a multi-light product shot and need to know exactly which light is hitting which part of the product.
An optical projection attachment (like the Godox SA-P, which mounts to a Bowens-fitting continuous LED rather than a hotshoe speedlight) takes this control further by adding a focusing lens that accepts gobos — metal shapes that project patterns like window blinds or leaf shadows onto the background. This is specialized territory that I almost never use for my own work, but it is worth knowing exists because the ability to project patterns for well under $100 used to require a projection-spot system costing many times as much — the optics are simpler on the budget version, but the creative effect on a print is closer than the price gap suggests. The democratization of lighting modifiers over the past five years has been extraordinary, and essential camera accessories now include modifiers that were studio-only gear a decade ago.
A beauty dish is a shallow parabolic reflector, typically 40cm to 70cm in diameter, that produces light that is simultaneously soft and contrasty — a combination that no other modifier achieves in quite the same way. The physics involves a central deflector plate that blocks direct light from the flash bulb, forcing all light to bounce off the parabolic dish surface before traveling forward. This eliminates the central hotspot that softboxes sometimes produce and creates a distinctive falloff pattern: bright and punchy in the center, dropping off quickly toward the edges, which naturally draws the viewer’s eye to the center of the frame where the face typically sits. This is the light you see in high-end beauty and fashion work where skin texture is visible but not harsh, and the contrast gives faces a three-dimensional sculpted look.
I bought a 55cm beauty dish two years ago expecting it to be my primary portrait modifier, and I use it for about 15% of my portrait sessions. The reason is that beauty dishes are unforgiving of less-than-perfect skin. The combination of contrast and controlled beam angle means every pore, every wrinkle, every texture irregularity shows up with clinical clarity. This is exactly what you want for beauty work where the makeup artist has spent 45 minutes creating a flawless surface, but for an environmental portrait of an 80-year-old fisherman in Bohuslan, a softbox with a grid is the more flattering choice. The beauty dish rewards preparation and punishes shortcuts, and I respect it enough to only reach for it when the image calls for its specific look rather than defaulting to it because it was expensive and looks professional on a light stand.
If you buy a beauty dish, buy the 55cm size and make sure it includes both a white interior coating and the silver deflector plate. The white interior produces a slightly softer look with more wrap; the silver interior is punchier with more contrast. Godox makes a 55cm beauty dish with both options for about $45, and it mounts to the same S-type bracket as your softbox. You will also want a grid for it — the 30-degree fabric grid that velcros to the lip of the dish — because an ungridded beauty dish spills almost as much light as an umbrella, and controlling that spill is half the point of using a dish in the first place. The grid adds about $15 and turns the dish from a specialty tool into a precision instrument.
If you are buying your first modifier today and own exactly one speedlight and one light stand, buy a 33-inch white shoot-through umbrella for $15 and a 5-in-1 80cm reflector for $25. This $40 combination gives you the ability to create soft key light (umbrella), fill shadows (white reflector), subtract light (black flag), and diffuse harsh sunlight (translucent panel). That is four distinct lighting techniques from two items that together weigh under 700 grams and fit in a small tripod bag. I used exactly this setup for my first year of off-camera flash and produced portraits I still include in my portfolio today. The limitation was never the gear — it was my understanding of how to position it.
Your second purchase should be a 60cm x 60cm softbox with a grid, roughly $65 including the S-type bracket. The softbox adds directional control that an umbrella cannot provide, and the grid adds spill control that makes shooting in small rooms with white walls possible without the entire room becoming a fill card. This is the upgrade path I recommend to anyone who asks, and it mirrors exactly what I did: umbrella and reflector first, softbox second, beauty dish a distant third when you have a specific reason to want its look. Do not buy a full set of modifiers on day one. The constraint of limited tools forces you to learn each one deeply, and depth of understanding with two modifiers produces better work than shallow familiarity with eight.
The photographer’s tendency to buy modifiers as retail therapy for creative blocks is real and I have done it. A new softbox feels like progress because unboxing things is easier than troubleshooting why your catchlights look flat at f/5.6. But the solution to poor light is almost never a different modifier — it is moving the modifier you already have 20cm closer or 15 degrees higher. Before you buy anything, shoot 500 frames with what you own and restrict yourself to changing position, distance, and power. If after 500 frames you can articulate exactly what your current modifier cannot do that a different one would enable, then buy it. If you cannot articulate that, you are shopping, not problem-solving.
| Modifier Type | Typical Size | Approx. Cost | Light Quality | Spill Control | Setup Speed | Best Use Case |
|---|---|---|---|---|---|---|
| Shoot-Through Umbrella | 33-45 inches (84-114cm) | $10-$25 | Soft, wide wrap, low contrast | Poor — 180-degree spill | Under 10 seconds | Indoor single portraits, learning off-camera flash, small rooms |
| Reflective Umbrella | 33-45 inches (84-114cm) | $15-$30 | Moderately soft, more contrast than shoot-through | Moderate — forward throw with less rear spill | Under 10 seconds | Outdoor portraits, when power efficiency matters |
| Square Softbox | 60cm-120cm (24-47 inches) | $40-$120 | Soft, directional, even across face of box | Good — controlled forward beam, grid optional | 1-2 minutes (EZ Lock); 3-5 minutes (rod-style) | Portraits with dark backgrounds, controlled studio work |
| Octagonal Softbox | 80cm-150cm (31-59 inches) | $55-$200 | Soft, round catchlights, gentle falloff | Good — grid optional | 1-2 minutes (EZ Lock) | Beauty and fashion, group portraits, full-body shots |
| Strip Box | 15x50cm to 30x140cm | $35-$100 | Long narrow highlight, rim and edge light | Excellent with grid — very narrow beam | 1-3 minutes | Rim light, hair light, edge separation from background |
| 5-in-1 Reflector | 80-110cm (31-43 inches) | $20-$40 | Bounce fill or subtractive, no self-illumination | N/A — passive tool | Under 20 seconds to deploy, needs stand or assistant | Fill light outdoors, negative fill, diffusing sunlight |
| Beauty Dish | 40-70cm (16-27 inches) | $40-$100 | Contrasty yet soft, signature center-weighted falloff | Moderate without grid, good with 30-degree grid | 1-2 minutes | Beauty and fashion, high-contrast editorial portraits |
| Grid (on reflector dish) | 10-40 degree angles | $8-$20 | Hard direct light with controlled beam diameter | Excellent — beam angle precise to grid spec | Under 5 seconds — magnetic attachment | Hair light, background spot, rim light, product detail |
| Snoot | Conical, 15-25cm length | $10-$40 | Very hard, tight circle with sharp edges | Excellent — pencil beam | Under 10 seconds | Theatrical spotlight, hair light, macro detail |
A 33-inch white shoot-through umbrella ($10 to $15) is the best first modifier. It sets up in under 10 seconds, weighs less than 300 grams, and produces soft flattering light that wraps around facial features. Pair it with an 80cm 5-in-1 reflector ($25) for fill light, negative fill, and sunlight diffusion. This $40 combination covers four distinct lighting techniques and is what I used for my entire first year of off-camera flash work.
Yes, but only at the same working distance. A 120cm softbox at 1 meter produces softer light than a 60cm softbox at 1 meter because the larger source wraps around the subject from more angles. However, a 60cm softbox at 0.5 meters can produce softer light than a 120cm softbox at 3 meters because apparent size depends on distance. The rule is simple: the closer and larger the modifier relative to your subject, the softer the light.
A shoot-through umbrella fires the flash through white translucent fabric toward the subject, producing soft light with wide 180-degree spill that bounces off nearby walls for natural fill. A reflective umbrella has a black outer shell and fires the flash into the interior reflective surface, which bounces forward with less spill and noticeably better power efficiency. Shoot-through is softer and better for small rooms; reflective is more directional and better for outdoor use where spill is wasted power.
A grid is not mandatory but it solves the most common softbox limitation: light spilling onto backgrounds and walls. A 30-degree fabric grid ($15) restricts the softbox beam to a controlled angle, letting you light a subject against a dark background even in a white-walled room. I use a grid on my 60cm softbox for about 40 percent of my portrait work. If you shoot in small spaces or want dark backgrounds without moving your subject meters away from the wall, a grid is the cheapest fix available.
Yes, and I do this for about 80 percent of my single-subject portrait work. A white reflector positioned opposite the key light at 60cm distance adds roughly 1 stop of fill shadow lift. The advantage over a second flash is zero setup time, zero additional power management, and fill that never overpowers the key because it is physically limited by the reflector surface area and distance. For dramatic portraits, swap to the silver side for 2 stops of fill or use the black flag side to subtract light entirely for deep shadows.
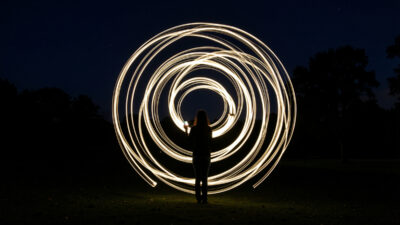
Light painting is a long-exposure technique where you work in a dark scene, open the…
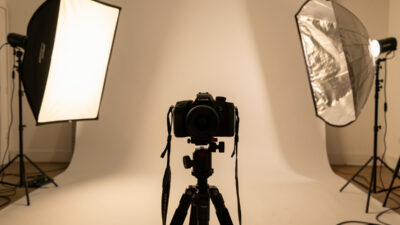
Light determines more about a photograph than any camera body or lens. Direction sculpts, quality…
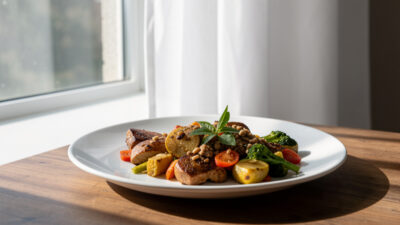
Window light is the best food light there is: place the dish beside a north-facing…
Leave a Reply