Best Speedlights for Mirrorless Cameras: Flash Buying Guide 2026
A speedlight is the most accessible artificial light source for photography. It costs between $100…

Flash is not the enemy of natural light — it is the tool you reach for when daylight runs out or refuses to fall where you need it. The fastest way to learn flash photography is to treat a single speedlight as a portable, shapeable sun: one light, one modifier, one decision about direction, and then build from there. Master those three controls and you cover roughly 90% of the situations a hobby shooter actually meets.
I came to flash sideways. I am a glass-first shooter — I care more about how a lens draws than about the latest sensor, and natural light is the subject I chase most months across the long blue hours of a Swedish summer. But the same camera that documents a welded sim rig, a hydroponic build, and a leather wallet eventually has to shoot something at 9pm in November when there is no light left to read. That is where flash earns its place: not as a crutch, but as light you can put exactly where the scene needs it. This guide is the map I wish I had when I stopped fighting flash and started using it.
Flash gives you a second light source you control completely — intensity, direction, color, and timing — on top of whatever ambient light already exists. A single off-camera speedlight at quarter power, bounced through a diffuser, can lift a backlit portrait out of silhouette in a fraction of a stop. That is the whole game: balancing the flash you add against the ambient you keep.
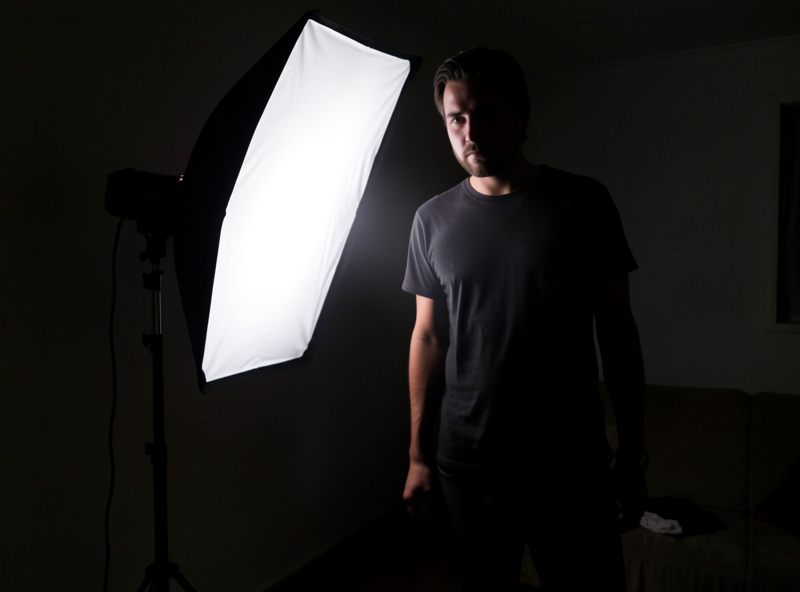
The trap most beginners fall into is thinking of flash as an on/off brightness switch screwed to the hot shoe. Pointed straight at a face from the camera position, a bare flash flattens everything — it kills the micro-contrast and shadow gradient that make a face read as three-dimensional. The skill is not having flash; it is shaping and placing it so the result looks like light that belonged in the scene. Once you separate the flash from the lens axis and soften it, the difference between a snapshot and a photograph is one light stand and a modifier.
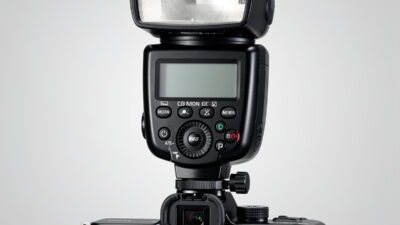
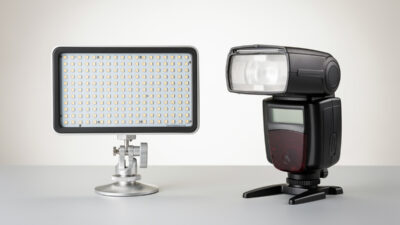
Almost every flash you will meet falls into one of two camps. Speedlights are the compact, battery-powered units that mount on a hot shoe or sit on a stand — the kind I run off-camera with a wireless trigger. Studio strobes (often called monolights) are larger, mains- or pack-powered heads built for the controlled output a studio or commercial set demands. I shoot the speedlight world daily; the high-end strobe systems sit on the commercial side of the fence, and I will flag where I am describing what studio shooters report rather than what I run myself.
For a hobby shooter or someone documenting projects, products, and portraits, a speedlight does almost everything you need at a fraction of the size, weight, and cost. The output ceiling is lower and recycle times are slower at full power, but for one- and two-light setups in a normal room, that ceiling is rarely the limit. Here is how the two families compare on the things that actually change your decision.
| Factor | Speedlight | Studio strobe (monolight) |
|---|---|---|
| Power source | AA batteries or Li-ion pack | Mains AC, or a separate battery pack |
| Output ceiling | Lower; fine for one or two lights in a room | Much higher; overpowers sun, big modifiers |
| Portability | Pocketable; travels anywhere | Bulky; needs stands and transport |
| Recycle at full power | Slower (2–5 sec on alkalines) | Fast, consistent |
| Modifier mounting | Needs a bracket/speedring adapter | Native Bowens or brand mount |
| High-speed sync | Common on modern units | Model-dependent |
| Best for | On-location, run-and-gun, hobby portraits | Studio, commercial, large modifiers |
My honest take: start with one good speedlight. You will learn more about light shaping from a single small flash and a reflector than from a three-head strobe kit you are afraid to take out of the box. If you outgrow it, the strobe upgrade will make sense for reasons you can articulate — bigger modifiers, faster recycling, beating the midday sun — rather than reasons a sales page invented for you. That is the same anti-GAS discipline I bring to glass: buy the tool the work actually demands. For a deeper comparison of the two families, see my strobe vs speedlight breakdown.
The single biggest jump in flash quality comes from getting the flash off the camera. On-camera flash — even bounced — throws light from roughly the lens axis, which produces flat, frontal illumination and that tell-tale hard shadow on the wall behind your subject. Move the same flash a meter to the side and up, and you get directional light with real shadow modeling: the difference between a passport photo and a portrait.
There is a measurable reason this happens. When the flash sits a few centimeters above the lens, the shadow it casts falls directly behind the subject, hidden from your viewpoint, so the scene looks shadowless and flat. The moment you move the source off-axis, those shadows swing into view and start describing the shape of a face, a product, a texture. Shadow is information — it tells the eye where the planes and curves are — and on-axis flash throws that information away. Off-camera flash is not about more light; it is about putting the shadows where they do some work.
That said, on-camera flash is not useless — bounced off a white ceiling or a side wall, it becomes a large, soft, overhead source that flatters indoor scenes and event work. The ceiling becomes your modifier. The skill there is reading the room: a low white ceiling bounces beautifully; a high or colored ceiling will either underexpose or cast color you have to correct. I cover the indoor bounce technique in detail in my on-camera flash guide for beginners, and the wireless off-camera leap in the off-camera flash setup guide.
Every flash exposure comes down to one question: how much light fires? TTL (through-the-lens metering) lets the camera and flash decide automatically, firing a pre-flash to measure the scene and setting power on the fly. Manual means you set the power yourself — 1/1 full, 1/2, 1/4, on down to 1/128 — and it stays put until you change it.
TTL is brilliant for unpredictable, fast-moving situations: a wedding reception, kids, an event where the distance to your subject keeps changing. The downside is consistency — TTL re-meters every frame, so two shots of the same subject can come out slightly different exposures. Manual is the opposite: once you dial it in, every frame matches, which is exactly what you want for portraits, product work, or anything on a tripod. I shoot manual flash for almost everything I set up deliberately, because consistency is what lets me chase the look across a whole sequence the same way I lock aperture for a series. TTL lives on my flash for the genuinely unpredictable moments. Learn manual first; it teaches you what the light is actually doing.
Your camera has a maximum shutter speed at which the whole sensor is exposed at once — the flash sync speed, usually 1/200 or 1/250 second. Try to use flash above that and you get a black band across the frame where the shutter curtain blocked part of the sensor. For a lot of indoor flash, sync speed is plenty.
The problem appears outdoors: you want a wide aperture for shallow depth of field in bright sun, which demands a fast shutter — faster than sync speed — to avoid overexposure. The answer is high-speed sync (HSS), which pulses the flash rapidly so it illuminates the sensor across the entire travel of the shutter, letting you sync at 1/1000, 1/4000, even higher. HSS costs you effective flash power, but it is what makes fill flash possible wide open in daylight. It is one of the most useful tricks in the kit and I unpack exactly how and when to use it in the high-speed sync explainer. There is also rear-curtain sync, which fires the flash at the end of the exposure rather than the start — the trick behind motion trails that follow rather than precede a moving subject.
Two pieces of physics explain almost everything flash does. The guide number is a flash’s rated power — a single figure that lets you compare units and, in manual mode, work out aperture for a given distance. You rarely calculate it by hand anymore, but knowing a higher guide number means more reach helps you read spec sheets honestly instead of trusting marketing wattage claims.
The one that genuinely changes how you work is the inverse-square law: light falls off with the square of the distance. Move your flash twice as far from the subject and it delivers a quarter of the light, not half. This sounds academic until you use it deliberately — place the flash close to the subject and the falloff is steep, so the background goes dark fast and the subject pops; pull the flash back and the light becomes more even across subject and background. That single lever, distance, is one of the most expressive controls you have, and it costs nothing to learn. I think about falloff the same way I think about depth of field: a physical property I can exploit for the look I want, not a limitation to fight.
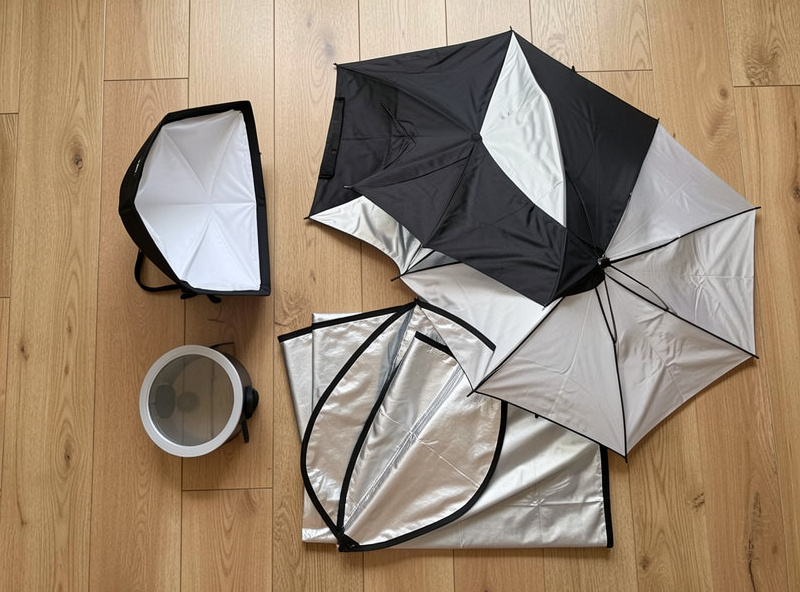
A bare flash is a hard, small light source — harsh shadows, specular highlights, unflattering on skin. Modifiers change the size and quality of that source. The single most important principle in lighting: the larger the light source relative to the subject, the softer the shadows. A softbox, an umbrella, even a sheet of diffusion turns a tiny flash tube into a broad, wrapping light.
I run a modest kit deliberately — a Godox V1 fired by an X2T trigger, a 60cm softbox on an S2 bracket, a Neewer 5-in-1 reflector/diffuser, and the bare flash for when I want hard, dramatic light. That covers far more situations than beginners expect, because shaping is about understanding the principle, not owning every modifier. A reflector is the most underrated tool here: it costs almost nothing and turns your single flash into a two-light setup by bouncing fill into the shadow side. I break down which modifier does what — and which ones you can skip — in the softbox and modifier guide, and the broader principles live in the existing light modifiers explainer.
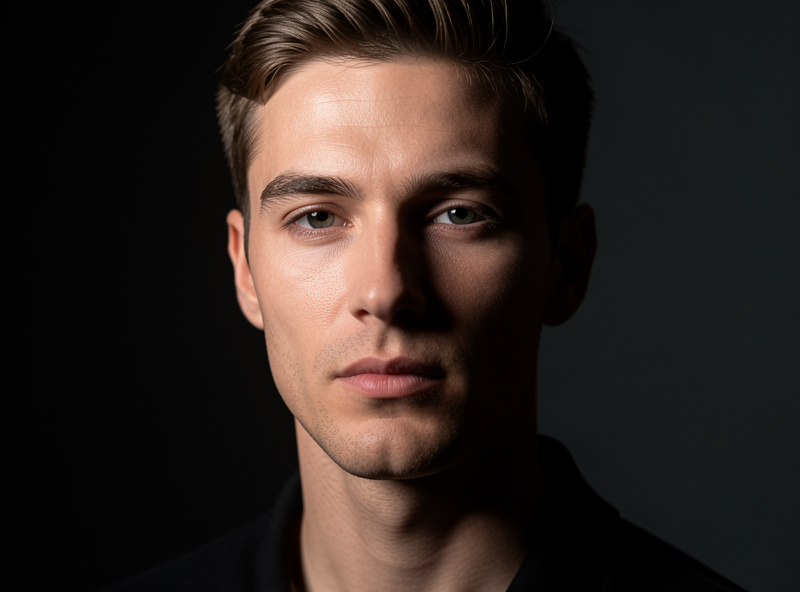
You do not need three lights to make a great portrait — one light and a reflector is a complete, professional-looking setup, and it is what I use most. But understanding the classic three-light arrangement (key, fill, and a rim or background light) gives you a vocabulary for any lighting situation you walk into, even when you are working with daylight and a single flash. The key light establishes the look; the fill controls how deep the shadows go; the third light separates the subject from the background.
The beauty of speedlights is that a three-light setup is genuinely affordable — three small flashes and a trigger cost less than one studio head. I walk through the full arrangement, including the light ratios that control mood, in the three-light portrait setup guide. Start with one, add a reflector, and only add lights when you can name what each one is doing.
Here is the concept that separates people who own a flash from people who can use one: a flash photograph is actually two exposures layered in one frame. Your shutter speed and ISO control how much ambient light you collect; your flash power and aperture control how much flash hits the subject. Aperture affects both, which is why it is the pivot of the whole balance. Once that clicks, you stop fighting your flash and start conducting it.
The practical workflow I use: set the exposure for the ambient first, ignoring the flash entirely. Decide how bright or dark you want the background — a stop under ambient for a moody look, dead-on for a natural fill look. Lock that with shutter and ISO. Then bring up the flash power until the subject sits where you want it relative to that background. Working in this order means the flash never blows out the scene or leaves the background a dead black hole, which is the single most common giveaway of beginner flash work. On a backlit golden-hour portrait, for instance, I expose for the warm sky, then add just enough flash — often a third to a half stop of fill — to keep the face from sinking into shadow without killing the glow behind it.
This is the same disciplined, deliberate approach I bring to exposing for the print in natural light: decide what the light should do, then make the gear deliver it, rather than letting auto-everything average the scene to mud. Shoot manual on the camera and manual on the flash for anything you set up, and the result is repeatable frame to frame.
A speedlight fires at roughly daylight color temperature, around 5500 Kelvin. That is fine outdoors or in a neutral room, but indoors under warm tungsten or LED household bulbs, an uncorrected flash drops a cold blue subject into a warm orange room — the two color temperatures fight, and skin tones go strange. The fix costs almost nothing: a CTO gel (color temperature orange) taped over the flash head warms its output to match the room, so you can set one white balance for the whole frame.
Gels do double duty. Beyond correction, a colored gel on a background light is how you add a deliberate splash of color behind a subject — a blue or magenta wash that separates them from a dark backdrop. I keep a cheap gel pack in the bag precisely because it is the difference between a flash that announces itself and one that disappears into the scene. Reading color the way I read it on a calibrated monitor in Lightroom Classic starts at capture: the closer your flash matches the ambient, the less correction you fight in post.
Most flash disappointments trace back to a handful of repeatable errors. Flash too close to the lens axis produces flat, frontal light and harsh background shadows — move it off-camera and up. Bare, unmodified flash gives hard, unflattering shadows on skin — bounce it or add a softbox. Forgetting the ambient leaves backgrounds black and subjects spotlit — expose for ambient first. Full power by default drains batteries, slows recycling, and is almost always more light than you need — most of my indoor work sits between 1/8 and 1/32 power. I learned that the expensive way at an indoor event running the V1 at full on alkalines: recycling crawled to four or five seconds, I missed half the candid moments waiting for the ready beep, and the batteries were flat before the cake. Now it lives at low power on a Li-ion pack and never misses a frame.
Two more catch people constantly: shooting above sync speed without HSS (the black bar), and mixed color temperatures from an uncorrected flash. Both are covered above, and both are trivial once you know to look for them. The thread running through every one of these fixes is the same principle that governs good photography of any kind — control the light deliberately rather than letting the gear decide for you. That is exactly the mindset that carries over from charting a lens wide open to placing a single flash at quarter power: know what you want the result to be, then make the tool deliver it.
If you are assembling a first flash kit, resist the urge to buy everything. The order that actually builds skill: one capable speedlight with TTL and HSS, a wireless trigger that matches your camera mount, a sturdy light stand, a bracket and a small softbox, and a 5-in-1 reflector. That kit handles portraits, product shots, and fill-flash in daylight — and it fits in a single bag.
As an Amazon Associate I earn from qualifying purchases.
A good starting point is a modern TTL/HSS speedlight for mirrorless cameras, paired with a wireless flash trigger for your mount. Add a speedlight softbox and bracket kit, a light stand, and a 5-in-1 collapsible reflector. For specific model recommendations, my existing best speedlights for mirrorless roundup goes deeper on which units are worth the money.
Flash is one tool in a lighting toolkit, not a replacement for learning light. Most months I shoot natural light because it is the cheapest professional-grade light there is — and knowing how to read and shape daylight makes you better with flash, not worse. Flash and continuous light each have their place, and the continuous vs flash comparison sorts out when to reach for which. This flash guide sits under the broader photography lighting guide, which is the place to start if you are building lighting knowledge from zero.
Not always, but flash extends what you can shoot. Natural light is my primary source most months, yet a single speedlight rescues backlit portraits, fills harsh midday shadows, and lets you shoot after dark. Flash complements daylight rather than replacing it.
Start with one good speedlight. It is compact, battery-powered, and teaches you light shaping faster than a strobe kit. Studio strobes make sense later if you need to overpower sun, use large modifiers, or want faster recycling for high-volume work.
TTL lets the camera set flash power automatically each frame, ideal for fast, unpredictable scenes. Manual means you set power yourself and it stays fixed, giving identical exposures across a sequence. Learn manual first because it teaches you what the light is actually doing.
You exceeded your camera flash sync speed, usually 1/200 or 1/250 second. Above that, the shutter curtain blocks part of the sensor during the flash. Either drop below sync speed or enable high-speed sync, which pulses the flash to cover the full shutter travel.
One light and a reflector is a complete portrait setup and what I use most often. The reflector acts as a free second light by bouncing fill into the shadows. Add more lights only when you can name what each one is doing in the frame.
The flash is firing straight from the camera position, on the lens axis, which flattens facial modeling. Get the flash off-camera and to the side, or bounce it off a ceiling, and soften it with a modifier. Direction and size are what make flash look natural.
A speedlight is the most accessible artificial light source for photography. It costs between $100…
Why Off-Camera Flash Changes Everything Taking your flash off the camera gives you control over…
What Continuous Lighting Is Continuous lighting is exactly what it sounds like: light sources that…
Leave a Reply