Buying Used Vintage Lenses: How to Spot Fungus, Haze, and Separation
The three defects that turn a cheap vintage lens into a paperweight are fungus, haze,…
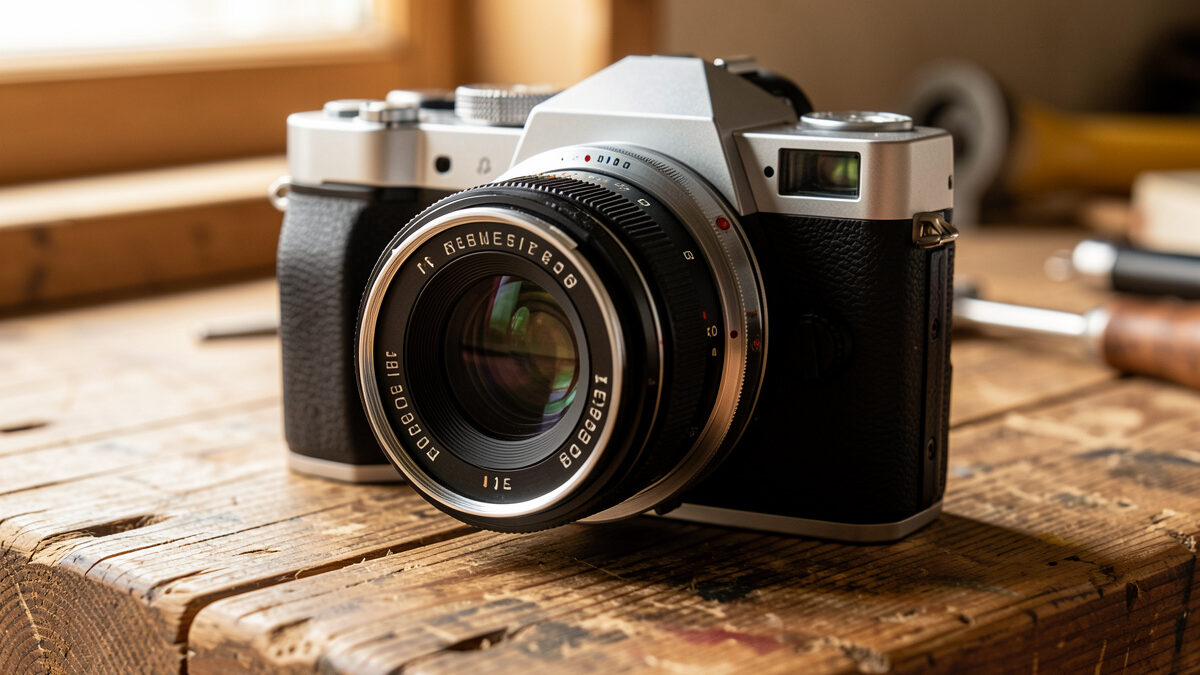
Adapting vintage lenses to mirrorless works because the short flange distance of a mirrorless body leaves room for a simple adapter to sit between old glass and a modern sensor, restoring infinity focus. On my X-T5 I have mounted M42 primes from the 1970s that cost less than a fast SD card, and they draw with a character no clinical modern lens will give you. The trade is manual everything — focus, aperture, and a bit of patience.
This guide is the map for the whole thing: what a mirrorless mount actually is, why old lenses fit, which adapter to buy, how to focus glass with no autofocus motor, and how to read the flaws — swirl, flare, field curvature — as tools instead of defects. I shoot two systems side by side, a 40MP Fujifilm X-T5 and a full-frame Sony a7 IV, and I chart every lens on a flat wall before I trust a word I write about it. Everything below is what my chart and my prints have told me, not spec-sheet theory.
The reason this whole hobby exists is a single number: flange focal distance, the gap from the lens mount to the sensor. Mirrorless bodies have no reflex mirror to swing, so that gap is short — roughly 18mm on both Fujifilm X and Sony E — while old SLR mounts sat around 44-46mm because they had to clear a mirror. An adapter is essentially a hollow spacer that makes up the difference, so a lens designed for a 45.46mm M42 flange focuses to infinity again when you add a tube of the right length in front of an 18mm mount.
That math is the entire trick. Because you are only adding an empty tube with no optics, image quality is untouched — the lens draws exactly as it did on a film SLR in 1974, projected onto a sensor that resolves far more detail than the film it was designed for. A DSLR, by contrast, has a long flange distance and no room for that spacer, which is why adapting legacy glass is a mirrorless privilege that simply cannot be done on a Canon or Nikon SLR without a corrective element that wrecks the optics. If you are still deciding between systems, my camera lens mount guide walks through every current mount and its flange distance.
The practical upshot: almost any SLR mount with a flange distance longer than your mirrorless body can be adapted with a plain mechanical ring. M42 (42mm screw), Nikon F, Canon FD, Olympus OM, Konica AR, Minolta MD, Pentax K — all of them clear the short mirrorless flange with room to spare. The only mounts that fight back are rangefinder mounts like Leica M, whose flange is already so short that adapting them to mirrorless is trivial but adapting anything to them is not.
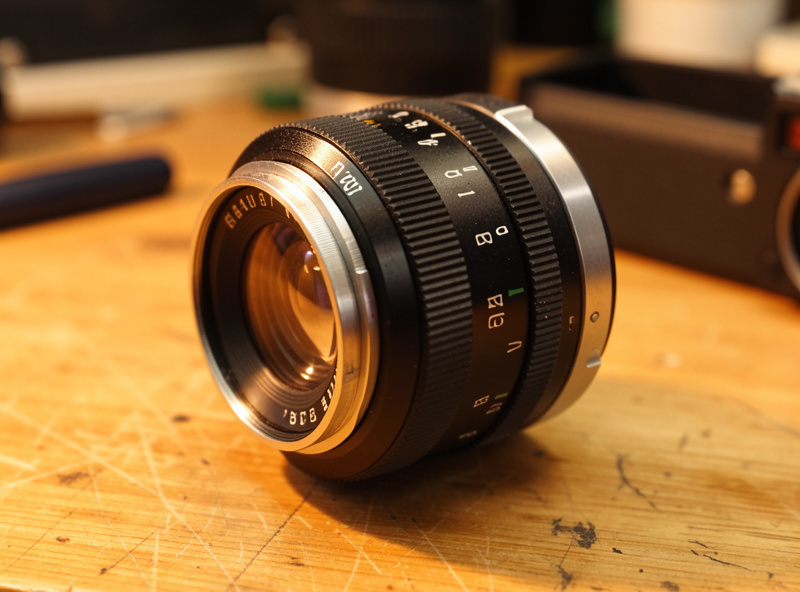
Adapting old glass means going fully manual, and it is worth being honest about that before you spend money. There is no autofocus, no electronic aperture, and on a simple adapter no EXIF data — your files will not record what lens or f-stop you used. You focus by hand and you set the aperture on the lens ring, watching your histogram rather than trusting a meter that no longer talks to the lens.
What sounds like a downside is the fastest way I know to actually learn photography. When the camera stops making decisions, you start seeing depth of field, the sharpness peak of an aperture, and the difference between wide-open glow and stopped-down bite. My whole argument in prime vs. zoom lenses — that constraint teaches faster — is doubly true here. A manual prime forces you to move your feet, choose an aperture on purpose, and nail focus yourself. Six months of that will do more for your eye than any body upgrade.
You also lose in-lens stabilization, which matters more than people admit at 40MP where handshake shows up as a soft file rather than a sharp one. If your body has in-body stabilization, you get most of it back — you just have to tell the camera the focal length manually, because the lens can no longer report it. On my X-T5 I set the IBIS focal length to match whatever lens is mounted, which keeps the stabilization from over- or under-correcting.
Before the first shot, three menu settings turn a mirrorless body into a manual-focus machine. First, enable “shoot without lens” (Sony) or the equivalent release-without-lens option, or the shutter simply will not fire when the camera sees no electronic contact. Second, assign focus peaking to a visible color — I use red on the X-T5 and white on the a7 IV — and set a magnification button under your thumb. Third, dial in the IBIS focal length manually so stabilization matches the mounted lens.
I also shoot these lenses in aperture-priority or full manual, metering off the sensor with the histogram live. Because the aperture is stopped down mechanically on the lens, the camera meters through the working aperture — what you see is what you get, exposure-wise. This is the one place where a fully manual lens is easier than a modern one: no aperture surprises between the viewfinder and the file. Set exposure to protect your highlights (ETTR when you can), and let the flat vintage contrast lift in post.
Adapters split into two families. A “dumb” adapter is a machined tube with a mount on each end and no electronics — it holds the lens at the correct distance and does nothing else. A “smart” adapter adds electronic contacts or optical elements to pass autofocus, aperture control, or EXIF between an electronic lens and a different-mount body. For genuine vintage glass — an M42 screw lens, an Olympus OM, a Nikon pre-AI — you want a dumb ring, because there is nothing electronic in the old lens to talk to.
The mistake beginners make is over-buying. A $20 machined-brass M42-to-Fuji-X ring holds infinity focus perfectly if the flange length is cut right; a $200 “smart” adapter buys you nothing on a fully mechanical lens. The one thing worth paying for in a dumb ring is machining tolerance — a poorly cut cheap ring can focus slightly past infinity or leave the lens with play, and on a 40MP sensor that slop shows. The exception to the whole dumb-ring rule is speed boosters — focal-reducer adapters with a glass element that squeezes a full-frame image circle onto APS-C, giving you back roughly a stop of light and a wider field. Those genuinely change rendering. I break the whole category down in dumb rings vs. smart adapters.
| Adapter type | What it does | Best for | Typical cost |
|---|---|---|---|
| Dumb ring (mechanical) | Holds lens at correct flange distance, no electronics | M42, OM, Nikon pre-AI, all manual glass | $15-$40 |
| Dumb ring with aperture control | Adds an iris ring for lenses with no manual aperture | Canon FD, “dandelion”-chipped lenses | $25-$60 |
| Smart (electronic) | Passes AF, aperture, EXIF between electronic mounts | Modern EF-on-E, not vintage glass | $80-$400 |
| Speed booster (focal reducer) | Glass element: +1 stop, wider FoV on APS-C | Full-frame legacy glass on APS-C bodies | $120-$650 |
The best-value legacy glass shares one trait: it was mass-produced, so the used market is deep and prices stay low. The M42 screw mount is the sweet spot — it was a near-universal standard from the 1950s to the 1970s, so Takumar, Helios, Pentacon, and Zeiss Jena lenses turn up everywhere for pocket money. My most-used adapted lens is a Helios 44-2 58mm f/2, a Soviet copy of a Zeiss Biotar that swirls its background into a spinning vortex wide open. It cost me roughly the price of a lunch.
Beyond M42, the Olympus OM primes are tiny and beautifully built, Canon FD glass is sharp and cheap because it fits no modern body natively, and the Konica AR line is underrated. What you are buying is rendering — micro-contrast, color, and how the lens draws out-of-focus areas — not resolution. For the full mount-by-mount breakdown of what mounts on what, see my M42 lenses on mirrorless buyer guide. And if you want the deep dive on why some backgrounds go creamy and others go nervous, busy bokeh vs. creamy bokeh covers the optics.

If someone handed me a mirrorless body and $200 and asked for a character kit, this is what I would hunt down. A Helios 44-2 58mm f/2 for the swirl. A Super-Takumar 55mm f/1.8 for its clinical center sharpness and warm color. An Olympus OM 50mm f/1.8 because it is tiny, sharp, and almost free. A Jupiter-9 85mm f/2 for portraits with soft, painterly falloff. And a Carl Zeiss Jena Flektogon 35mm f/2.4 for a wide with close-focus and gorgeous color.
Five lenses, five distinct looks, all of them fitting a single cheap M42 adapter, and the whole drawer costing less than one modern autofocus prime. Each teaches a different lesson — the Takumar teaches you what “sharp” really means, the Helios teaches you to compose for the swirl, the Jupiter teaches you subject separation. When you want to understand how these choices map to focal length, my types of camera lenses guide and my portrait lens recommendations both cross-reference the vintage options.
Mirrorless bodies turn manual focus from a chore into a strength, because they give you two tools film SLRs never had: focus peaking, which paints a colored fringe over whatever is in focus, and one-touch magnification that zooms the live view to 100% so you can nail the eyelash. On a 40MP sensor I rely on magnification for anything critical and peaking for run-and-gun, and I have back-button-focus muscle memory even with glass that has no AF.
The catch is that at 40MP the depth of focus is thin — a Helios wide open gives you millimeters of sharp plane, and peaking alone will lie to you. I punch in to 100%, rock the focus ring through the plane, and shoot on the far side of the peak. My full method — when to trust peaking, when to magnify, and the drills that build the muscle — is in how to focus manual lenses accurately. It is the single skill that separates keepers from a card full of near-misses. The same discipline applies when I shoot stars, which is why my manual focus for astrophotography notes overlap heavily with adapted-lens technique.
Short answer from my chart: the good ones are sharper in the center than people expect, and softer in the corners than a modern lens — and on a 40MP body both facts show clearly. A Super-Takumar 55mm f/1.8 stopped to f/5.6 resolves beautifully across most of the frame; the same lens wide open glows, and the extreme corners never fully catch up. That is not a flaw to fix, it is the look.
The mistake is judging vintage glass by a modern MTF standard. These lenses were computed for film that resolved a fraction of what a 40MP sensor does, so of course the corners lag — but center sharpness, color, and rendering hold up remarkably. I shot a full aperture sweep to prove it, and the results surprised even me; the whole test lives in are old lenses sharp enough for a 40MP sensor. The one-line verdict: buy vintage for how it draws, not for corner-to-corner resolution, and stop down when you need bite.
The risk with old glass is not the optics, it is the decades of storage. Three defects turn a bargain into a paperweight: fungus (a web-like growth that etches coatings permanently), haze (an oily internal fog that kills contrast), and separation (the balsam cement between elements crazing at the edges). A little dust is harmless; fungus in the center of an element is not. Learning to spot these from a listing photo and a shine-a-light test is the difference between a $30 gem and a $30 loss.
I shine a small flashlight straight through every lens I buy, tilt it against a dark background, and look for the tell-tale spider-web of fungus and the milky glow of haze. I check the aperture blades for oil and confirm they snap shut. The complete inspection routine — what to ask a seller, what is fixable, and what to walk away from — is laid out in buying used vintage lenses inspection.
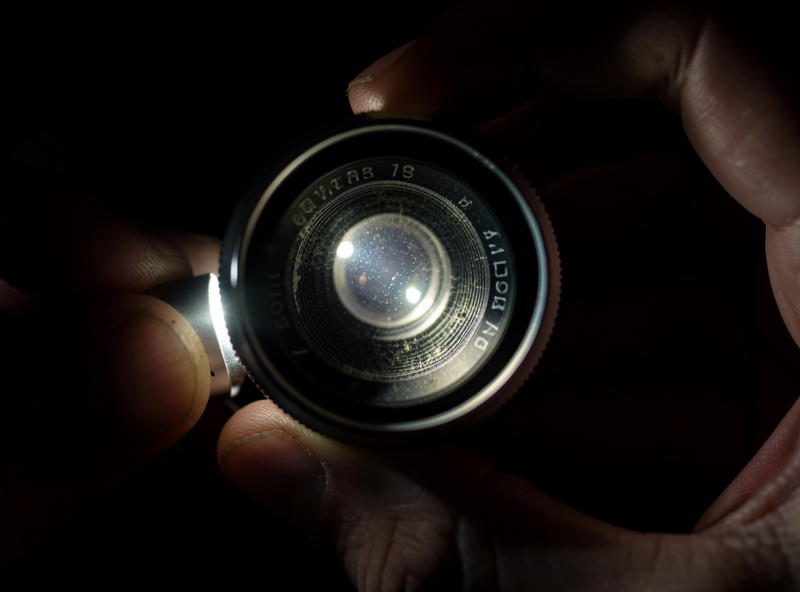
The reason I shoot vintage at all is character — the specific, repeatable ways old glass departs from optical perfection. The Helios swirl is the famous one, a rotating field of out-of-focus highlights that pulls the eye to the subject. But there is also the way uncoated or single-coated glass flares: veiling washes, rainbow ghosts, and low-contrast glow when you shoot into the light, none of which a modern multi-coated lens will give you.
These are not accidents to correct in Lightroom; they are the point. I use flare deliberately to lift shadows and add atmosphere, the same way I use the swirl to separate a subject. Two guides go deep here: why vintage glass flares the way it does explains the coatings behind it and how to control it, and the Helios 44-2 swirl shows exactly how to force that spinning bokeh on purpose. If you want the broader physics of odd-looking backgrounds first, my piece on onion-ring bokeh is a good primer.
Here is the math that keeps me buying old glass instead of new bodies. A drawer of five character primes — a Helios 58mm, a Takumar 55mm, an OM 50mm, a Jupiter 85mm, and a wide Flektogon — can be assembled for less than a single modern f/1.4 autofocus lens, and each one draws differently. That is five distinct looks for the price of one, and none of them depreciates the way a body does.
Most body upgrades are sideways moves; a new sensor rarely changes how your images look the way a new rendering does. I would rather spend $200 on three vintage primes that teach me to see than $2,000 on a body that autofocuses a hair faster. The same camera that charts these lenses documents everything else I build — the welded rig, the leather work, the sourdough crumb — and vintage glass is what makes those photos feel like something rather than a spec sheet. Start with the focal-length basics if they are still fuzzy, then pick a mount and buy your first adapter.
Because I run the same vintage lenses on both an APS-C X-T5 and a full-frame a7 IV, I see exactly what the sensor does to old glass, and it is not what most people assume. A 50mm vintage prime is a 50mm lens on both bodies — the focal length is a property of the glass and never changes. What changes is the crop: on the 1.5x APS-C sensor that 50mm frames like a 75mm, so a nifty-fifty becomes a short portrait lens, and a 35mm becomes a natural 50mm equivalent.
There is a hidden bonus to shooting vintage on crop. APS-C only uses the center of the image circle — the sharp part — and throws away the soft, vignetted, aberration-heavy corners that a full-frame sensor would record. So a mediocre full-frame legacy lens often looks noticeably better on APS-C, because the crop hides its worst behavior. The trade is that the swirl and the dreamy corner falloff you bought the lens for also get cropped away; the Helios vortex is far more dramatic on the a7 IV’s full frame than on the X-T5. This is precisely where a speed booster earns its keep — it puts the full-frame field of view (and the full swirl) back onto the crop sensor while adding a stop of light. Deciding which body to point at a given lens is half the fun of running two mounts.
No. A dumb adapter is just an empty spacer tube with no glass, so it does not touch image quality. The lens draws exactly as designed. Only focal-reducer speed boosters add an optical element, and that changes field of view and light, not sharpness in a bad way.
No. Genuine vintage lenses are fully manual, so you focus by hand and set the aperture on the lens ring. Mirrorless bodies make this easy with focus peaking and one-touch magnification, but there is no autofocus motor to drive.
M42 screw mount. It was a near-universal standard from the 1950s to 1970s, so lenses are cheap and everywhere, and a simple M42 adapter costs under 40 dollars. A Helios 44-2 or Super-Takumar 55mm is the classic first buy.
The good ones are sharp in the center and softer in the corners, and both show clearly at 40MP. Stopped down to f/5.6 many vintage primes resolve beautifully. Buy them for how they draw and their character, not for corner-to-corner resolution.
Shine a flashlight straight through the lens against a dark background and look for a spider-web pattern (fungus) or a milky glow (haze). Check the aperture blades for oil. A little dust is harmless; central fungus or heavy haze is not.
A speed booster is a focal-reducer adapter with a glass element that squeezes a full-frame image onto an APS-C sensor, giving back about a stop of light and a wider field of view. It is only worth it for adapting full-frame legacy glass to a crop body.
As an Amazon Associate I earn from qualifying purchases. If you want to start, a basic M42 to mirrorless lens adapter and a used Helios is the cheapest way in.
The three defects that turn a cheap vintage lens into a paperweight are fungus, haze,…
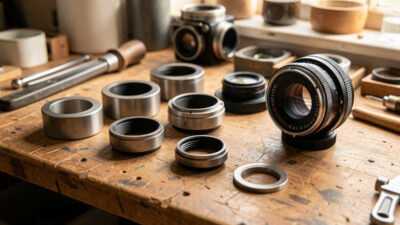
For genuine vintage lenses you want a dumb adapter — a machined metal ring with…
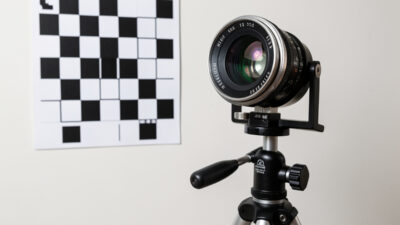
My chart says yes, with an asterisk: the good vintage primes are sharp in the…
Leave a Reply