Removing People From a Scene With a Long Exposure
To remove people from a scene with a long exposure, use a strong ND filter…
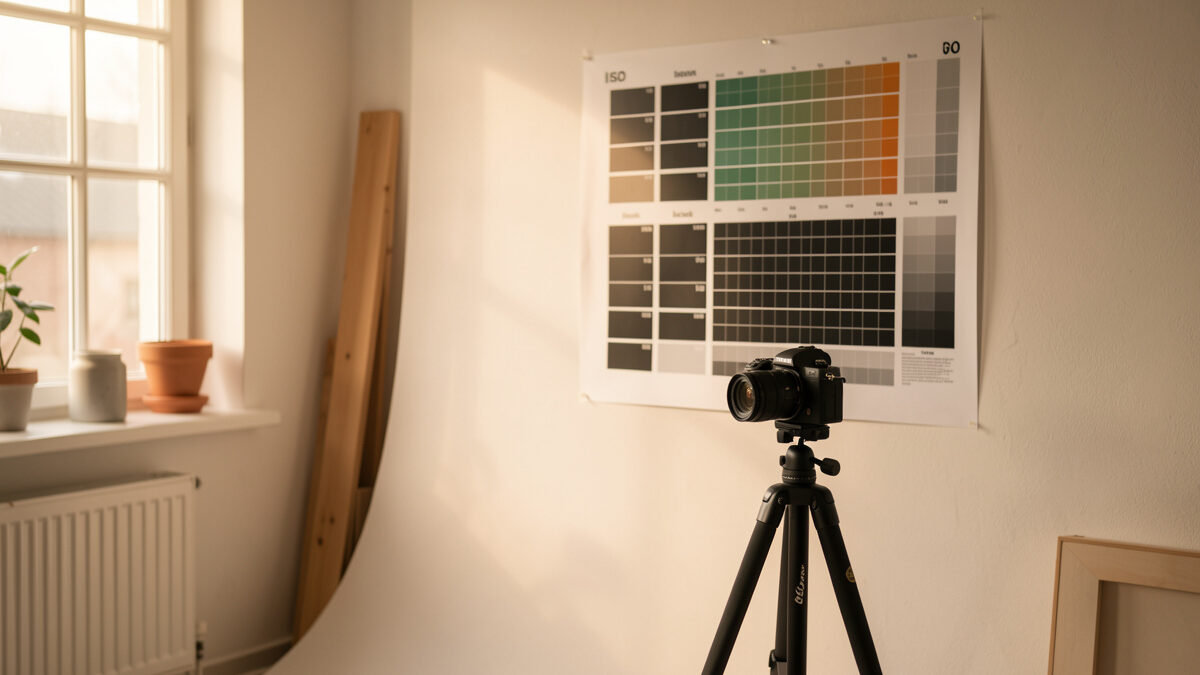
Sharp photos are not luck or the price of a pricier body. A tack-sharp frame is a five-link chain — shutter speed, stabilization, bracing, aperture, and focus point — and a soft shot means exactly one link broke. Fix that link and the blur stops for good.
I shoot two systems side by side on a test wall in southern Sweden — a 40-megapixel Fujifilm X-T5 and a full-frame Sony a7 IV — precisely because 40MP of APS-C resolution is a merciless judge. At that pixel pitch there is nowhere for camera shake or a missed focus point to hide; a frame that looks fine on a phone falls apart at 100% on a calibrated monitor. That resolving power taught me something most gear reviews skip: the lens is almost never the problem. Technique is.
This guide is the map for the whole cluster. Each lever below has its own deep-dive, and I’ll link you straight to the one that fixes your specific soft-photo symptom. Work through them in order and you build a repeatable sharpness discipline — the kind that survives handheld, after dark, wide open, and at 100% crop.
Almost every soft photo falls into one of three buckets: motion blur (the camera or subject moved during exposure), missed focus (the plane of sharpness landed somewhere other than your subject), or diffraction/optical softness (you stopped down too far, or the lens is past its peak). Nail the bucket first — because the fix for one is useless against the others.
The diagnosis is fast if you know what to look for. Motion blur smears in a direction — everything in the frame streaks the same way, including the in-focus plane. Missed focus is sharp somewhere, just not on your subject; the eyelashes are mush but the ear or the collar is crisp. Diffraction is uniformly, gently soft across the whole frame with no smear and no sharp plane anywhere. I misdiagnosed this for years — I blamed my XF 56mm f/1.2 for “soft” portraits when the real culprit was a 1/60s shutter that couldn’t freeze a subject who breathed. The lens was fine. My shutter discipline wasn’t.
If you only read one companion piece, make it the full symptom walkthrough: why your photos look soft — motion blur vs. missed focus vs. diffraction. It shows the exact 100% crops for each failure mode so you stop guessing.
The floor is the reciprocal rule: your shutter speed should be at least 1 over your full-frame-equivalent focal length. A 50mm lens wants 1/50s minimum; a 300mm reach wants 1/300s. But that rule was written for 12-megapixel full-frame film and DSLRs, and on a 40MP sensor it is optimistic by roughly a stop — the pixels resolve shake the old rule quietly tolerated.
On my X-T5 I treat the reciprocal as the absolute minimum and then double it for anything I actually care about. My 56mm (an 85mm-equivalent field of view) reads as “1/85s” by the rule; I shoot it at 1/160s or faster handheld, and 1/250s if the subject is a person who might shift weight. Crop factor matters too — APS-C multiplies the effective focal length, so a 55mm lens on the X-T5 frames like 82mm and needs the shutter to match the framing, not the barrel marking.
Subject motion is a separate budget entirely. A portrait sitter needs maybe 1/160s; a walking street subject 1/250s; a kid running 1/500s; a bird in flight 1/2000s. The camera-shake floor and the subject-freeze floor are two different numbers, and your shutter has to clear the higher of the two. I break the reciprocal rule down — including how stabilization changes it and where it stops helping — in the reciprocal rule and beyond, and the action end of the scale is covered in my sports photography settings guide.
In-body image stabilization (IBIS) buys you shutter-speed latitude for camera shake — and nothing else. It steadies the sensor against your hand tremor, so a static subject that needed 1/125s might hold at 1/15s. What it categorically cannot do is freeze a moving subject: a running dog at 1/15s is a smear no matter how good the IBIS rating is, because the stabilizer counters your motion, not the world’s.
The industry rates IBIS in stops of correction under a standardized CIPA test protocol (Camera & Imaging Products Association), and real-world results usually run a stop or two below the headline number because CIPA measures on a shake table, not with a caffeinated human. On my X-T5 the roughly seven-stop rating translates, honestly, to about four usable stops for me on a good day. That still means sharp handheld frames at shutter speeds that would have been unthinkable on my old DSLR — but it is a shake tool, not a magic sharpness button. The full breakdown of when it saves the shot and when it does nothing is in image stabilization explained: when IBIS helps and when it can’t.
Most handheld blur is a bracing problem, not a shutter-speed problem. Your body is the tripod, and most people build a wobbly one: elbows winged out, breath held mid-inhale, the shutter stabbed rather than squeezed. Tighten the platform and you gain a genuine stop or two of hand-holdability before IBIS even enters the equation.
My checklist is physical and boring, which is why it works: left palm under the lens (not gripping the side), both elbows pulled into the ribcage, a wide stance with weight forward, exhale halfway and pause, then roll the shutter rather than jab it. On my a7 IV I can hold a 35mm at 1/8s this way with a decent keeper rate; sloppy, I’d need 1/30s for the same result. There’s a sensory tell I trust — when my bracing is right I feel the shutter’s second curtain as a soft double-tap in my palm, not a lurch. When a wall, a doorframe, or a fence post is available, I use it; a beanbag or a folded jacket on a railing turns any flat surface into a monopod. The complete technique, including the kneeling and leaning positions I use after dark, is in handholding technique: how to steady the camera without a tripod, and when you do want three legs, my tripod buying guide covers the light-but-stable options. For handheld work after dark specifically, see my night photography settings for travel.
Almost every lens is softest wide open, sharpest two to three stops down, and softening again from diffraction past about f/11 on APS-C or f/16 on full-frame. The “sweet spot” for most of my glass lands between f/4 and f/5.6. Shoot wide open for subject separation, stop to the sweet spot for maximum resolution, and only go past f/11 when you truly need the depth of field and are willing to trade a little bite for it.

You don’t have to guess where your copy peaks — you measure it. I run a tripod-locked aperture sweep on a flat test target: focus once, lock it, then fire the same frame at every stop from wide open to f/16, and compare the corners at 100%. My XF 16-55mm f/2.8 peaks at f/5.6 in the corners; my XF 35mm f/1.4 is already excellent at f/2 and best around f/4. Diffraction is not a bug or a defect — it’s physics, the same wave behavior that limits every lens ever made, and the classic explainer at Cambridge in Colour is worth ten minutes if you want the why. The full chart-and-wall method is in finding your lens sharpness peak: the aperture sweep on my chart. If you’re chasing background blur instead of edge-to-edge bite, that’s a different trade covered in how to get more background blur.
At f/1.2 the plane of sharpness can be a few centimeters deep, and that’s where the old focus-and-recompose habit quietly kills portraits. Lock focus on the eye, swing the camera to recompose, and you’ve rotated the focal plane off the eye by exactly the amount you tilted — a miss that’s invisible on the back screen and obvious at 100%. On a fast prime, moving the focus point beats recomposing almost every time.
I learned this the expensive way on my 56mm f/1.2: a whole set of “sharp on the screen” headshots that were front-focused on the cheekbone once I pulled them into Lightroom, because I’d recomposed after locking. Now I move the AF point to the eye and let the camera hold it — eye-detect AF on both bodies has made recompose nearly obsolete for me. There are still cases where recompose is fine (deep depth of field, static geometry), and I lay out exactly when each wins in focus-and-recompose vs. moving the focus point. For the manual-focus discipline that carries over to any tricky-focus situation, my manual focus techniques for the night sky covers the magnify-and-confirm workflow I trust when autofocus can’t lock.
Capture sharpening recovers the small softening every demosaiced RAW file carries; output sharpening is a separate, final step tuned to the destination — and the amount that looks crisp on a 2048-pixel web export will look crunchy and haloed in a 300 DPI print, and vice versa. Sharpen for the medium, not for the screen you’re editing on.
My rule of thumb: a light capture-sharpen in the RAW develop stage, then a duplicate export with a heavier output-sharpen for print and a lighter one for web, judged at actual output size, never at 100% on the monitor. Over-sharpening is the single most common way people ruin an otherwise-sharp file — those white halos along high-contrast edges are the tell. The full recipe, with the radius and amount numbers I actually use for each, is in how much sharpening is too much? output sharpening for web and print.
Here’s the uncomfortable ranking after years of shooting two systems against a chart: technique first, lens second, body a distant third. A 40MP sensor doesn’t make you sharper — it makes your shake and focus errors more visible, which is the opposite of what the marketing implies. I’ve watched a $2,000 body deliver soft files in the hands of someone with a 1/30s shutter and winged elbows, and I’ve printed tack-sharp A2 enlargements from a 24MP full-frame body shot with discipline.
Lens choice matters more than pixel count — a great prime at its sweet spot out-resolves a mediocre zoom at any setting — which is the whole argument in my prime vs. zoom breakdown. And don’t forget the housekeeping: a dusty sensor throws soft blobs that mimic focus problems, which is why sensor cleaning is part of any real sharpness routine. But if you fix only one thing, fix the shutter-and-bracing chain. It’s free, and it moves the needle further than any purchase.
A lens is not equally sharp everywhere. Most designs are sharpest in the center and give up resolution toward the corners, and the gap can be dramatic wide open — my XF 16-55mm f/2.8 is bitingly sharp in the middle at f/2.8 but visibly softer in the extreme corners until I stop to f/5.6. If your subject sits center-frame this rarely matters; if you’re shooting a flat brick wall or a landscape where the edges carry detail, corner performance is the whole game.
Then there’s field curvature — the plane of sharpest focus isn’t always flat. On some lenses the corners focus on a slightly different plane than the center, so a flat test target that’s tack-sharp in the middle goes soft at the edges even at the “sweet spot” aperture, purely because the focal surface is dished. I chart this deliberately with a flat newspaper plane taped corner to corner on the wall; if the center and corners can’t both be sharp at any single focus distance, that’s field curvature, not a bad copy. It matters most for architecture and repro work and almost never for portraits, where you want a subject-plane focus anyway. Knowing which flaw you’re looking at stops you returning a perfectly good lens.
Sharpness discipline is easier when the camera is configured to help. Four settings do most of the work on both my bodies, and I set them once and forget them. First: back-button focus — I moved AF off the shutter button and onto the AF-On button (the AE-L/AF-L button on the X-T5) so focusing and firing are separate actions. That single change ended a whole class of “camera refocused as I pressed the shutter” misses. It feels alien for a day and indispensable after a week.
Second: a minimum-shutter floor in auto-ISO. Both bodies let me set the slowest shutter the camera is allowed to pick before it raises ISO, and I set it to my doubled-reciprocal number per lens. That way in aperture-priority the camera never quietly drops to 1/30s and hands me a soft frame — it bumps ISO instead, and a slightly noisier sharp frame beats a clean blurry one every single time. Third: EVF focus magnification bound to a button, so I can punch in to 100% and confirm critical focus before I commit, which is how I shoot manual-focus work and macro. Fourth: continuous drive for anything moving, because the middle frame of a three-shot burst is almost always sharper than a single deliberate press — the shutter actuation itself adds a hair of shake to frame one.
None of this is exotic. It’s the boring plumbing that turns good technique into consistent results, and it’s the same on my a7 IV as on the X-T5 despite the different menu systems. If you set nothing else, set back-button focus and the minimum-shutter floor. For action work specifically, the drive-mode and focus-tracking side is expanded in my wildlife photography camera settings.
Shooting a 40MP APS-C body and a 33MP full-frame body side by side is the single most useful thing I’ve done for understanding sharpness, because it separates sensor effects from lens behavior — something a one-system reviewer structurally cannot do. When a frame looks soft, running the same subject on both bodies tells me instantly whether it’s the glass, the technique, or the pixel pitch talking.
The lessons were humbling. High resolution is not “more sharpness” — it’s a higher standard your technique has to meet. The X-T5’s 40 megapixels demand a faster shutter and cleaner bracing than the a7 IV to look equally crisp at 100%, because each pixel is smaller and resolves finer motion. That’s why I say a body upgrade is usually sideways: buy more resolution and you inherit a stricter homework assignment, not a free sharpness win. The corollary is liberating — if your technique is dialed, a modest 24MP full-frame sensor will out-print a 40MP file shot sloppily, every time. The gear is not the bottleneck. You are, and that’s good news, because habits are free to fix.
You can audit every link in the chain in about ninety minutes with gear you already own, and the results will change how you shoot more than any purchase. I run a version of this whenever I add a lens, and a shorter version whenever a shoot comes back softer than expected. It needs a flat wall, a newspaper or a printed test chart taped to it, a tripod, and good even light — north-facing window light in the afternoon is my default because it’s soft and doesn’t shift.
Start with the lens itself. Mount on the tripod, level the camera so the sensor plane is parallel to the wall, focus once on the center of the chart in single-point AF, then fire the same frame at every full stop from wide open to f/16 without refocusing. Use the two-second self-timer or a remote so your finger never touches the camera during exposure, and turn stabilization off — on a tripod, IBIS can actually introduce a tiny wobble as it hunts for motion that isn’t there. Pull all the frames into Lightroom, view at 100%, and step through them. The aperture where the corners snap into focus and the center is still crisp is your sweet spot. Write it on a piece of tape on the lens hood. My XF 35mm f/1.4 says “f/4” on its hood to this day.
Then test yourself. Take the camera off the tripod, pick a static subject with fine texture — a brick wall, a bookshelf spine — and shoot ten handheld frames at your doubled-reciprocal shutter, then ten more a full stop slower, then ten more two stops slower. Count the keepers at 100% in each batch. The shutter speed where your keeper rate falls off a cliff is your personal handheld limit, and it’s almost always slower than you fear or faster than you hope. Mine, braced properly with a 35mm, holds about 70% keepers at 1/15s and collapses to maybe 20% at 1/8s. Now you’re not guessing — you know your own hands as a number, and that number is the difference between hoping a frame is sharp and knowing it will be.
This is the table I mentally run when a frame comes back soft. Match your symptom to the row, run the test, apply the fix — and follow the link to the full method.
| Symptom at 100% | Most likely cause | Fast test | The fix |
|---|---|---|---|
| Whole frame streaks one direction | Camera shake / too-slow shutter | Does the in-focus plane smear too? | Raise shutter above the doubled reciprocal; brace better |
| Sharp behind or in front of subject | Missed focus / recompose error | Is the ear/collar sharp but not the eye? | Move the AF point; use eye-detect; stop down a touch |
| Uniformly soft, no smear, no sharp plane | Diffraction or wide-open softness | Was it shot past f/11, or wide open? | Return to the f/4–f/5.6 sweet spot |
| Only the subject is blurred, background crisp | Subject motion, shutter too slow for action | Is the static background sharp? | Match shutter to subject speed (1/500s+) |
| Soft blobs in the same spot every frame | Sensor dust, not focus | Do the blobs move with the frame? | Clean the sensor |
| Crisp file looks mushy online | Wrong or missing output sharpening | Does it look fine at export size? | Apply medium-specific output sharpening |
None of this is theory I read — it’s the muscle-memory checklist I run before frames that matter, refined on a test wall and proven on prints. Shutter above the doubled reciprocal and clear of subject motion. IBIS on for handheld, off on the tripod. Elbows in, exhale, squeeze. Aperture at the sweet spot unless I’m buying separation or depth on purpose. Focus point on the eye, not a recompose. And a medium-specific sharpen at the very end. Miss one and the frame goes soft; run all six and “how do I get sharp photos” stops being a question.
What I’d do starting today: pick the one link in your chain that breaks most often — for most people it’s the shutter-and-bracing pair — and drill it for a week until it’s automatic. Then move to the next. Sharpness isn’t a gear upgrade you buy once; it’s a habit you build one lever at a time, and every spoke in this cluster is one lever.
A good camera does not fix blur; a high-resolution sensor actually reveals shake and missed focus more clearly. Nearly all blur comes from three causes: too-slow a shutter for camera or subject motion, focus landing off the subject, or diffraction from stopping down too far. Diagnose which of the three it is before changing gear.
Shutter speed. Set it to at least double the reciprocal of your full-frame-equivalent focal length for camera shake, then raise it further to freeze subject motion. On high-resolution sensors the old 1-over-focal-length rule is about a stop too optimistic.
Only for camera shake with a static subject. IBIS steadies the sensor against your hand tremor, buying roughly three to five usable stops of slower shutter. It cannot freeze a moving subject, because it counters your motion, not the subject’s.
Most lenses are sharpest two to three stops down from wide open, typically between f/4 and f/5.6, and start softening from diffraction past about f/11 on APS-C or f/16 on full frame. The exact peak varies per copy, which is why an aperture sweep on a test target is worth doing.
No. Output sharpening is tuned to the destination. A web export at around 2048 pixels needs a lighter touch than a 300 DPI print, and applying print-level sharpening to a web image produces visible halos. Judge sharpening at actual output size, never at 100 percent on your editing monitor.

To remove people from a scene with a long exposure, use a strong ND filter…

In-camera focus bracketing is the feature, built into bodies like my Fujifilm X-T5 and Sony…

Daytime long exposure photography means stacking a strong neutral-density filter over your lens so the…
Leave a Reply